
How to remove and replace a broken tile
Broken, cracked or chipped tiles can occur at any time. While broken tiles can be caused by accidents, they can also occur as a result of poor preparation before laying, insufficient tile adhesive underneath or behind the tile, or ground movement. Where insufficient space for grouting has been left between tiles, you may also experience tiles popping under stress.
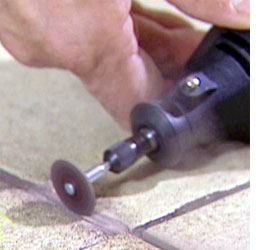
Step 1
Start off by removing the grout that surrounds the tile.
For this you can use a plastic scraper (best for wall tiles) or with a Dremel MultiTool and cutting disk.
This prevents any shock waves as you hammer from damaging the surrounding tiles.
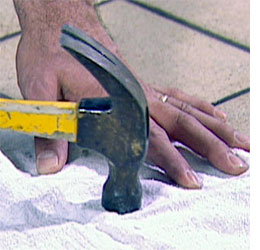
Step 2
After removing the grout surrounding the tile, lay a cloth over the tile and use a hammer to break the tile beneath into more manageable pieces.
Don a pair of gloves before removing the tile pieces - they're very sharp!
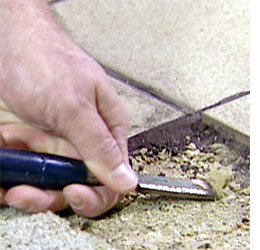
Step 3
Use a hammer and chisel to remove any adhesive left behind. Switch on the vacuum cleaner to remove all traces of debris and dust.
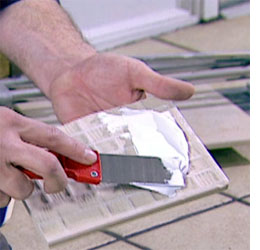
Step 4
"Butter" the back of the tile with tile adhesive using a putty knife. Use a notched trowel to smooth the adhesive evenly across the back of the tile. It's important to spread evenly over the entire back of the tile.
Place the tile and tap it down firmly with a hammer handle to make sure it's well bedded. Let the adhesive cure thoroughly according to the manufacturers instructions.
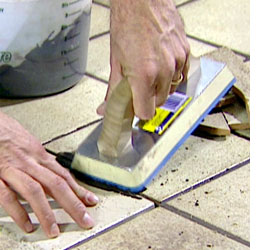
Step 5
Use a grout float to press the grout around the edges of the tile. Use a damp sponge or towel to wipe the excess from the top of the tile.
Buff the tiles around your repair to remove the haze left when the grout has started to dry.
diynetwork.com