
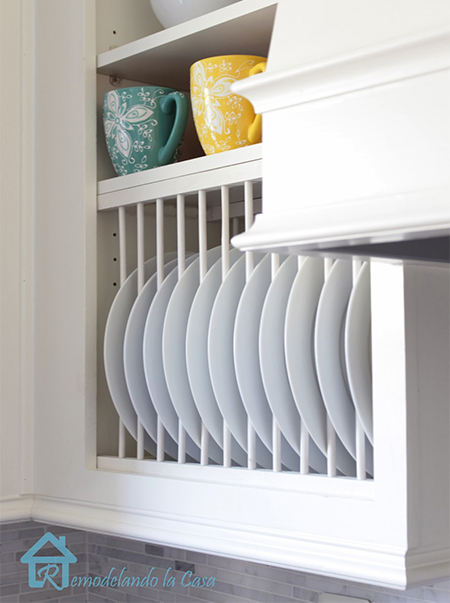
How to Make a Built-In Plate Rack
Making a built-in plate rack for your kitchen allows easy storage and access to delicate plates or crockery.
16/09/2021
remodelandolacasa.com
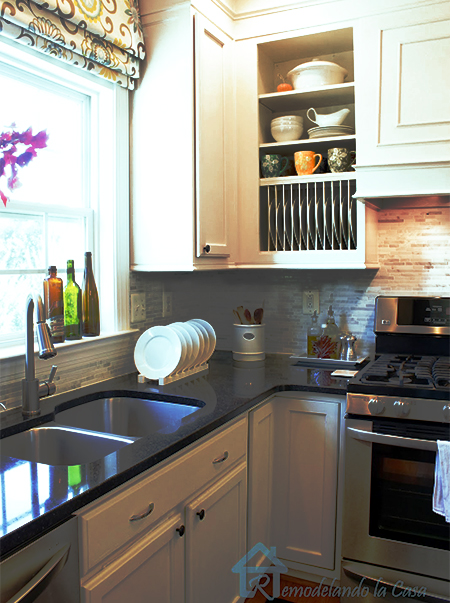
Many people consider plate racks to be obsolete, but a plate rack is an integral element in many homes and particularly those with cottage or country-style kitchens, kitchens that are rustic and homey, as well as kitchens that are Shaker style or similar. A plate rack adds something different to a kitchen and provides an easy and convenient way to store decorative crockery or delicate plates. And believe it or not, but plate racks are back in style and can easily be fitted into an existing wall cupboard.
The simple design of a plate rack makes it an easy DIY project that you can complete in a couple of hours and the materials used are inexpensive
YOU WILL NEED:
32 x 32mm PAR pine for the frame
11 of 6 x 910mm pine dowels cut to 315mm length = 22 dowels
Waterproof wood glue
120- and 180/240-grit sandpaper
Paint or sealer to finish
TOOLS:
Drill/Driver + assorted bits
Jigsaw, hacksaw or mitre saw
Tape measure and pencil
Safety gear
HERE'S HOW:
Step 1
Before you begin, take accurate measurements of the cupboard where you want to fit the plate rack. Measure the width, height and depth of the cupboard so that you can work out what materials you need to build the plate rack. Builders have everything you need at an affordable price.
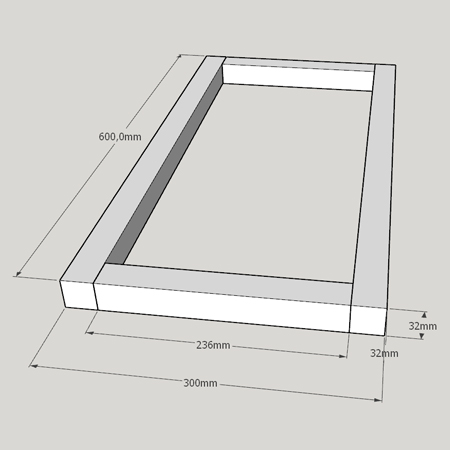
Step 2
To join the frame sections together - both bottom and top frame, you can do a simple butt joint with screws through the front and back of the battens, or you can use a pocket-hole jig and wood glue to make the frame.
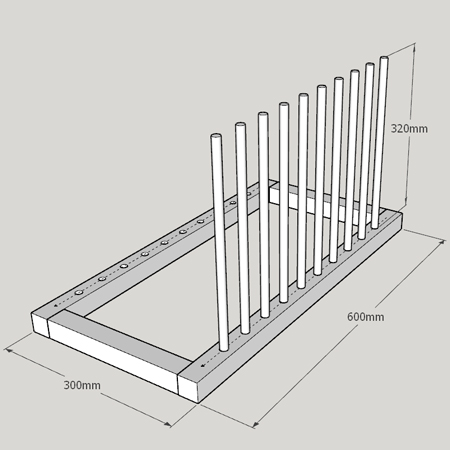
You can modify the dimension below to work out component sizes according to the measurements of your kitchen cabinet.
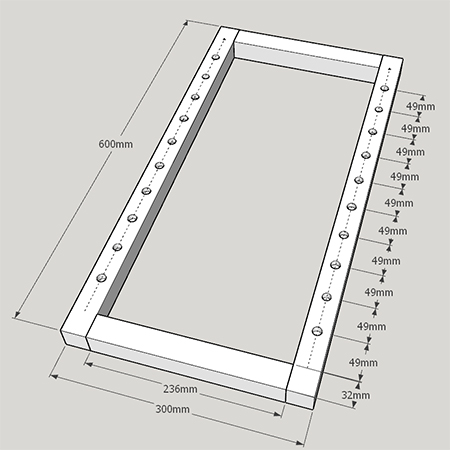
Step 3
Measure and mark as per the diagram below. If you are using less or more dowels depending on the size of the plate rack, calculate the required spacing between the dowels.
Step 4
Use a 6mm wood bit to drill holes to a depth of 15mm. To make this easy, simply wrap masking tape around the end of the drill bit at the 15mm mark.
Step 5
Before inserting the dowels, sand all the rough edges with 120- and then 180/240-grit sandpaper.
Step 6
Apply a bead of wood glue into the drilled holes and press the pine dowels firmly in position. Try to ensure that the dowels stay as straight as possible until the top frame is added.
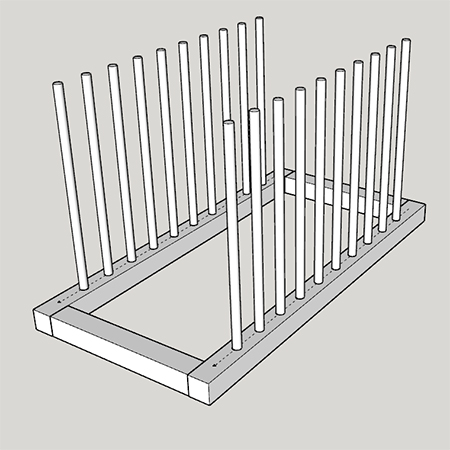
Step 7
Add the second row of dowels, as shown below.
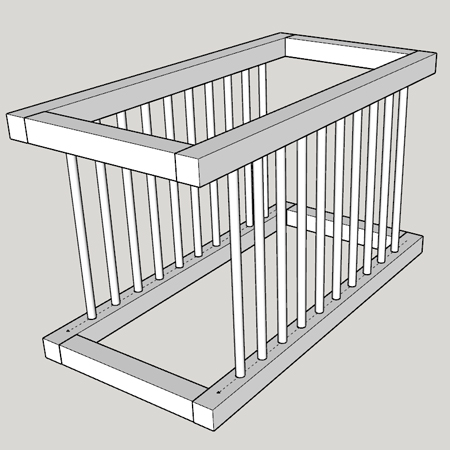
Step 8
Now it's time to finish off the plate rack assembly by adding the top rack. It helps to have an extra pair of hands close by to assist with this step, as you need to line up the holes in the top frame with the dowels. You also need to place a bead of wood glue on the end of each dowel so that it glues firmly into the frame.
FINISHING:
With the plate rack assembled, you can now paint or stain in your choice of colour. The best way to paint is using a paint sprayer or spray paint as this easily coats the dowels. Put down a drop cloth or newspaper before spraying in a well-ventilated space.