
How to Create Faux Marble Countertops
Not everyone can afford to have marble countertops fitted in their kitchen, but they can create the look of marble on a more affordable countertop.
28/08/2022
cuitandokter.com
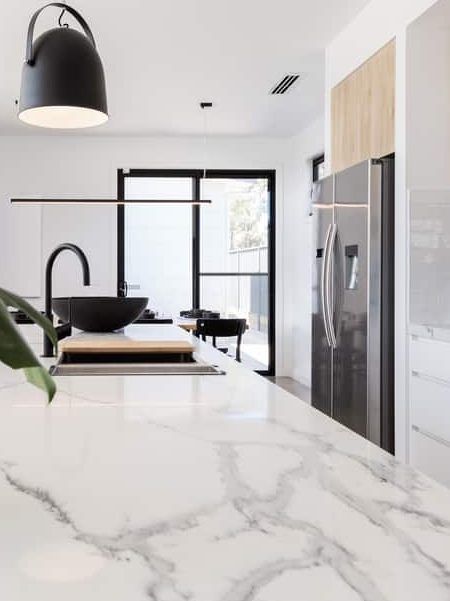
There has been quite a lot of buzz on the Web regarding the Gianni faux marble countertop kit. This kit contains everything you need to create a faux marble countertop in your own kitchen. Sadly, this kit is not available in South Africa, and even if it was it would be very expensive and not something the average homeowner would spend money on. However, there are still plenty of affordable ways to give laminate countertops that faux marble effect using products that are available at your nearest Builders store. Let us take a look at what you will need and how to create a faux marble countertop.
The great thing about creating a DIY faux marble countertop is that it is easy to do - even if you have no previous painting experience. Before you tackle the actual countertop, it is best to do a few test runs on scrap wood until you master the simple technique.
house beautiful
YOU WILL NEED:
Oil-based primer, white
Oil-based paint, white, light, medium, and dark grey
Painter's tape
120-grit sandpaper
Paint thinners
Rags, slightly damp
Oil-based polyurethane or epoxy resin
Plastic drop cloths
TOOLS:
Paint roller, lambswool preferably
Paintbrushes, natural bristle, assorted sizes
Artist's paintbrushes, assorted sizes
Sea sponge
OPTIONAL: Feathers
Face mask
Thick rubber gloves
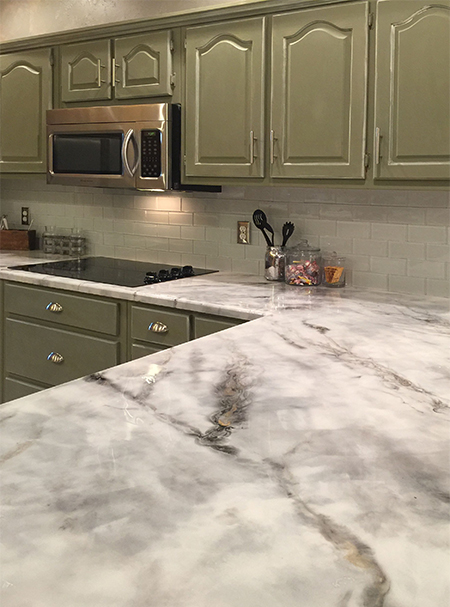
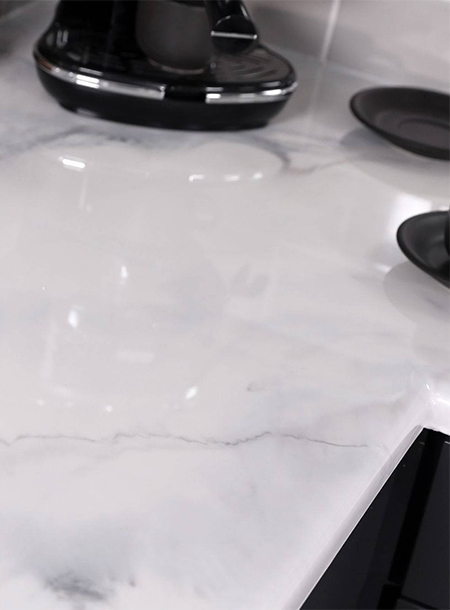
Follow these tips to replicate the faux marble countertop shown in the image below. Note that the pattern will differ than that shown.
this old house
HERE'S HOW:
- This technique requires the countertop to be as smooth as possible, so clean well beforehand and then sand the entire surface with 120-grit sandpaper. Wipe clear to remove all traces of dust. If any repairs need to be done - chips, gouges, or scratches - fill these in with epoxy putty or filler before sanding.
- Mask off the surrounding areas with painter's tape and plastic drop cloth. This includes floors, front of cupboards, backsplash, and any fitted appliances.
- Use the roller to apply primer to all the surfaces being painted. There should not be any bubbles but if these do appear, continue roller over the area to remove these. Don't overlook the edges as you want the finished countertop to look as natural as possible. Allow the painted surfaces to dry overnight.
- Once the primed surface is thoroughly dry, go over this using 120-grit sandpaper in circular motions. Wipe clean with a damp rag once finished. Leave to dry.
- Use a paintbrush to apply white oil-based paint over the primed surface and immediately smooth this over with the paint roller, doing the same around any edges. Allow to dry for the specified time, usually overnight.
- Now you can begin adding the three grey shades onto the white surface. Work in small sections and start with a large artist's paintbrush (round one) and dab small patches of the grey shades onto the surface. Repeat this with all three shades. Start to blend the colours together but not mixing them. You can blot the paint with the sea sponge and then drag a thin artist's paintbrush from the edges of the paint outwards to create the vein effect that is so prominent in marble.
- You don't have to worry about the paint drying too fast as oil-based paint takes a long time to dry. This gives you scope for creating the perfect marble design using the three shades of grey. You can also use a bit of white for lightening but leave some darker areas for contrast.
- If you have a feather, use this to create a contrast using the darker grey colour by dipping the feather lightly into the paint and dragging this gently over the surface. If the paint is hard to work with or too thick, use thinners to dilute.
- Allow the painted surface to dry overnight.
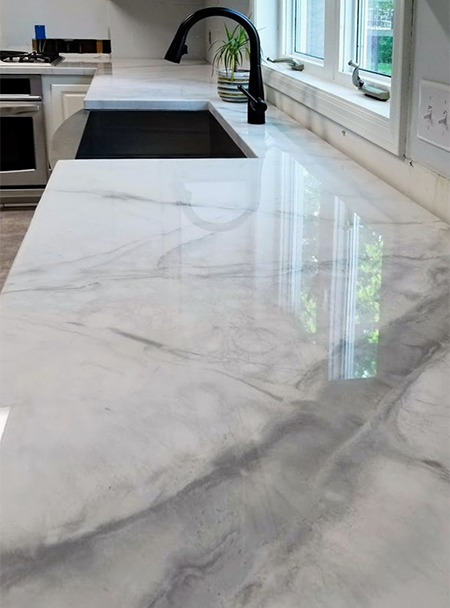
glasscastresin.com
The veins in marble run diagonally with blurred or softened edges so be sure to smudge or blur any solid edges with the sea sponge for best effect.
FINISHING:
For the finishing, you have two options. You can apply an oil-based polyurethane sealer, or you can use epoxy resin, it all depends on what you can afford. Epoxy resin will provide a tough and durable finish that is longer-lasting than polyurethane, so consider how long you need the countertop to last. Allow the specified drying time before using the countertop.
For inspiration or video tutorials, pop onto the web and search for 'DIY Faux Marble Countertops'.
homestratosphere.com