
Make A Mobile Baking Trolley For The Kitchen
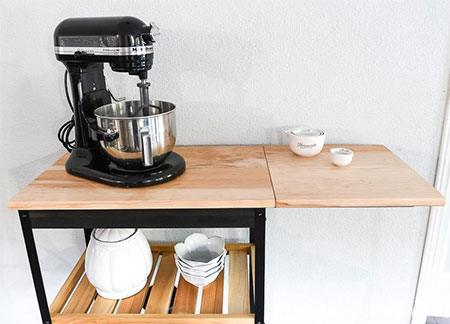
Not all kitchens have plenty of countertop space for baking but this mobile baking trolley has a drop-leaf and storage for all your baking essentials.
07/05/2021
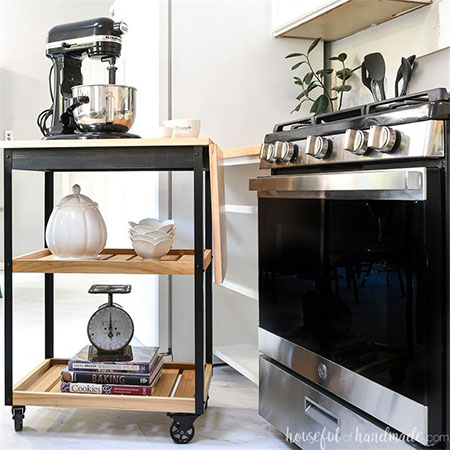
Brought to you by Kreg and Houseful of Handmade, this baking trolley is perfect for a small kitchen that doesn't have a lot of countertop space for when you feel like baking up a storm. The baking trolley has a drop-leaf that can be set up to provide more space for you to work and also has a couple of storage shelves for your baking essentials.

The baking trolley is made using Kedla or Salbev aluminium equal angle corners that you will find at Builders and that come in 2.5-metre lengths at a cost of around R115 per length, and the rest is made using PAR pine that can also be found at Builders.
Grab your power tools and let's get started.
YOU WILL NEED:
4 of 25.4 x 25.4 x 787mm - Aluminum angle corners
6 of 44 x 44 x 572mm PAR pine - Top supports
1 of 19 x 44 x 190mm PAR pine - Leaf support handle
2 of 19 x 64 x 343mm PAR pine - Top frame side
2 of 19 x 64 x 610mm PAR pine - Top frame front/back
4 of 19 x 44 x 343mm PAR pine - Self sides
4 of 19 x 44 x 610mm PAR pine - Shelf front/back
14 of 19 x 64* x 343mm PAR pine - Shelf slats
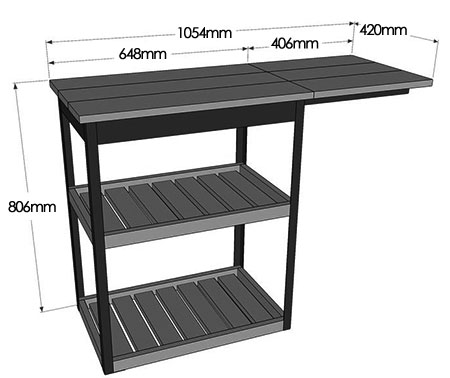
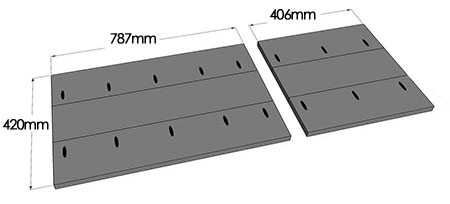
3 of 19 x 140 x 648mm PAR pine - Table top
3 of 19 x 140 x 406mm PAR pine - Leaf top
2 of 12 x 70mm - Dowels
4 of castor wheels (75 or 100mm height) plus screws
2 of butt hinges and 16mm screws
6 of steel angle brackets and 16mm screws
32mm pocket-hole screws
Wood glue
TOOLS:
Drill/Driver plus assorted bits
Spade, MAD or Forstner bit, 40mm
Kreg pocket-hole jig
Router and cutting bit
Jigsaw plus clean-cut and metal cutting blades
Hammer and panel pins
Tape measure and pencil
Safety gear
*See comments in Step 11
HERE'S HOW:
Step 1
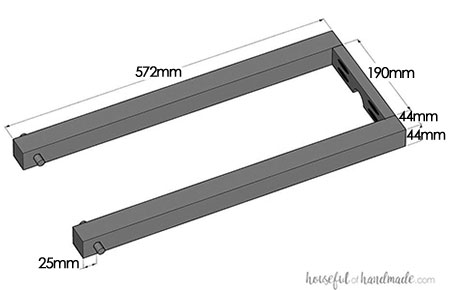
Drill a half-circle at the centre on the edge of the Top Support Handle. This will make it easier to pull out the Drop Leaf Support.
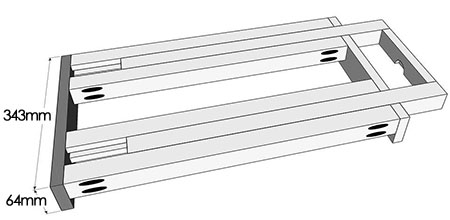
Step 2
Assemble the support for the drop leaf as shown below. Drill 12mm holes through the Top Supports and insert a length of dowel trimmed to protrude 16mm on both sides in both Top Supports. Drill [2] pocket-holes at both ends of the Top Support Handle to join it to the Top Supports. Use wood glue and screws to assemble.
Step 3
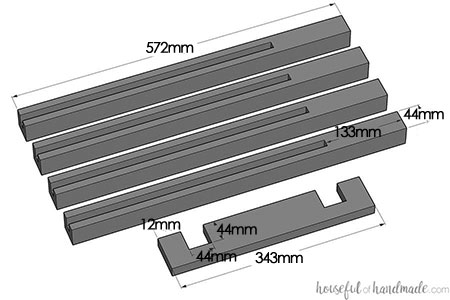
Use a router to cut grooves in the remaining Top Supports. The groove should stop 133mm from the edge, as can be seen in the diagram below. The groove needs to be 19mm deep and 12mm wide. Don't try to cut this out in one go, rather set the depth on the router for repeated cuts to reduce wear on your router bit.
Step 4
Take [1] Top Frame Side Board and cut out 44 x 44mm as per the diagram below. Test fit the assembly completed in Steps 1 and 2 above to ensure a good fit.
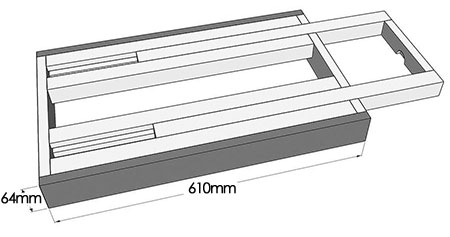
Step 5
Now you can begin to assemble the top frame. Set your pocket-hole jig for the material thickness (19mm) and drill [2] pocket-holes at the ends of the Top Supports - on the opposite side of the groove cut out. Note: You need to set the jig to 19mm thickness to prevent drilling through the grooves.
Step 6
Use wood glue and screws to secure the Top Supports to the Side Frame, making sure all edges are flush.
GOOD TO KNOW:
Any finishing such as staining, applying a sealer, varnish or paint can be done before moving on to the next step.
Step 7
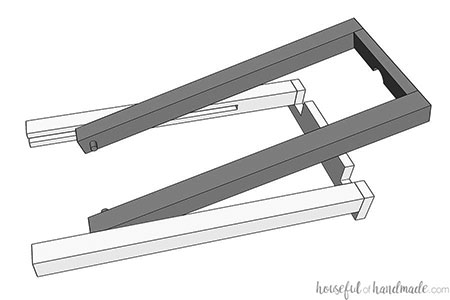
Take the Drop Leaf Support and fit the dowels inside the grooves.
Step 8
Assemble the remaining Top Supports as can be seen in the diagram below. The side with no grooves is attached to the support with notches by sliding the dowels into the grooves to hold the support boards together and allow the Drop Leaf Support to side in and out smoothly. Assemble all the sections using wood glue and screws.
Step 9
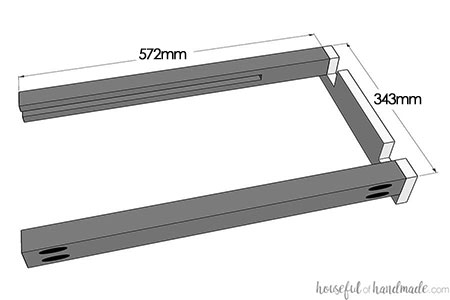
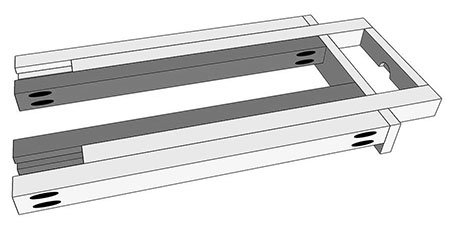
Assemble the Top Frame by attaching the Frame Side to the end of the Top Supports, making sure everything is flush before securing with wood glue and screws. Test that the Drop Leaf Support slides freely or adjust accordingly.
Step 10
Finish the Top Frame assembly by adding the Top Frame Front/Back pieces to the outer sides of the Top Supports using wood glue and nails.
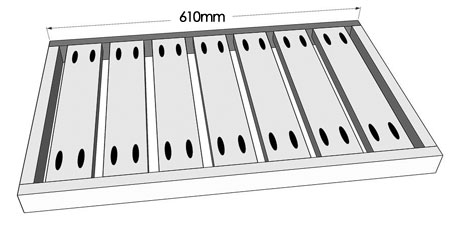
GOOD TO KNOW:
For the original project, 63mm wide PAR pine is used for the slats. Since our standard size is 67/69mm, you can adjust the gaps between the slats and leave a slat out for better spacing. Alternatively, trim the 67/69mm slats to size and follow the original plan as shown in the diagram below.
Step 11
Assemble the Shelves as shown below, using wood glue and screws. See comment above for spacing between the Slats.
Step 12
To continue with the assembly of the trolley, cut the aluminium angles to length. If you wish the paint the angles, use an etching primer spray before spraying the colour of your choice. Also, spray the screws used to fasten the angles to the top and shelves.
Step 13
Mark the location for drilling [2] holes in angles to secure these to the Top and Shelves. You need to stagger the screws slightly so that they do not collide with each other.
Step 14
Connect the pieces for the Table Top and Drop Leaf Top using wood glue and screws. If you want to avoid having any visible screws on these sections, you can always substitute with laminated pine shelving or other material.
Step 15
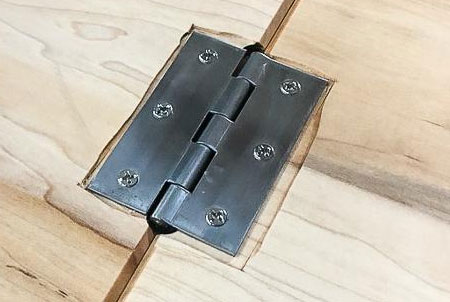
In order to be able to fold down the Drop Leaf Top when not in use, route or chisel out a rebate for mounting the hinges so that they are flush with the surface of the material.
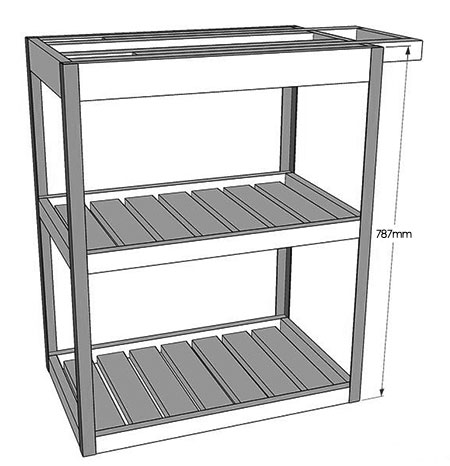
Step 16
Finish the trolley assembly by attaching the top onto the frame. The Table Top has an overhang all the way around, so place accordingly before securing the tops to the frame with steel angle brackets and 16mm screws on the underside.
FINISHING
Add the castor wheels to the base of the unit and do any touch-up required on the finish.