
Renovating a hardwood floor
Renovating hardwood floors might not seem easy, but it's not as difficult and as you might imagine. With proper planning, the right supplies and tools, and a weekend, and the results are rewarding and long lasting.
canadaam.ctvnews.ca
YOU WILL NEED:
Mineral Turpentine and steel wool for oiled or waxed floors
Industrial floor sander, or Orbital hand sander
Sanding pads in grits from 80- to 240-grit
Synthetic brushes
Woodoc Floor Sealer
Dust mask
HERE'S HOW:
Preparation
When renovating wood floors preparation is important. The existing finish/coating should be completely removed. The first step is to remove any old polish and grime from the surface to prevent clogging of the sandpaper when sanding. Use mineral turpentine and Woodoc steel wool to scrub off the dirt.
GOOD TO KNOW: A pot scourer can be used, with care, where the grime is thick or stubborn to remove.
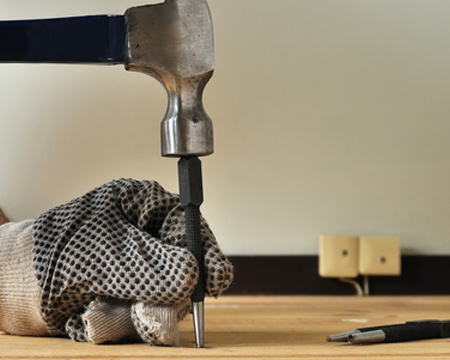
If necessary, a wax stripper could also be used. If the floor was previously carpeted, there could be deposits of old glue. Sanding will usually remove these deposits, but it is best to remove heavy deposits with a Bitume and Glue remover and plastic scraper.
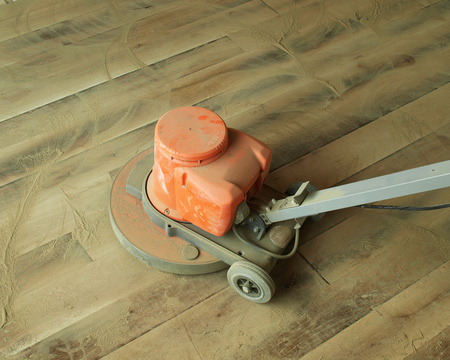
Remove the old finish
The ideal method is to use a floor sanding machine. These can be hired by the day and are relatively easy to use. The two main points to remember are:
- The sander should be absolutely flat at all times. Only the weight of the sander should exert any pressure on the surface.
- Sand away the minimum of the surface, just enough to remove any ridges as well as the old surface coating.
If in doubt as to your skills for this type of project - call in a specialist.
GOOD TO KNOW: If the room is small and the surface is in a good condition, sanding can be done by hand using an Orbital Sander.
After sanding the floor clean all the resultant dust off the floor. Vacuum cleaning is best. Before proceeding, inspect the floor thoroughly and hand sand where necessary to remove any remaining rough spots. Make sure that there are no oily marks and that the floor is completely dry.
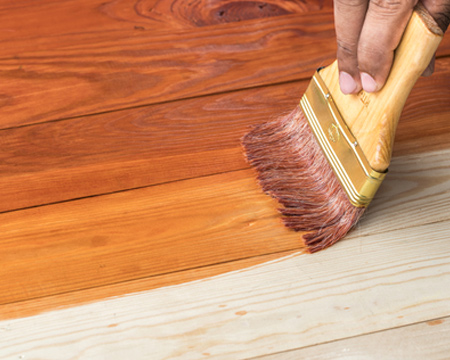
Seal the wood
When starting this step of the project, do not paint yourself into a corner. Ensure that you finish at an open door, especially if two people are working together.
All Woodoc products have detailed instructions on the tin and it is important to follow these instructions for proper application and a professional finish.
Work methodically so that you can reach back and apply more sealer to dull areas where the sealer is penetrating more than elsewhere. This is particularly important with the first coat as it is essential that the surface stays evenly, glossy wet for ten minutes after application to ensure proper penetration.
GOOD TO KNOW: The room should be well ventilated and it is important to let each coat dry hard before applying the next coat.
Sand lightly with fine Woodoc steel wool between coats. Then allow 24 to 36 hours after the final coat had dried before returning carpets and furniture to the room.
Correctly applied Woodoc 25 Satin Floor Sealer will not only last long, but will give you the best looking finish. Nothing beats the glow and warmth of a well cared for wooden floor.