
Vinyl tiles for flooring
I receive a lot of enquiries from homeowners wanting to update or install new flooring on a very tight budget. While carpet can be affordable if you select from a budget range, this isn't practical in kitchens and bathrooms. For these areas, and for a nursery or children's bedroom, I have found that vinyl tiles offer the most practical and affordable flooring option for anyone on a small budget.
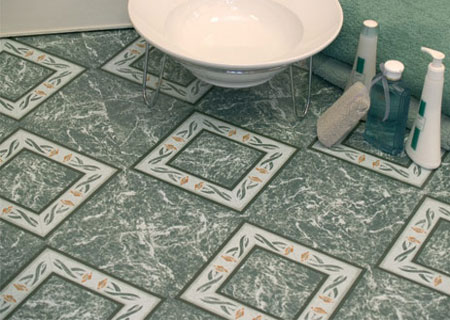
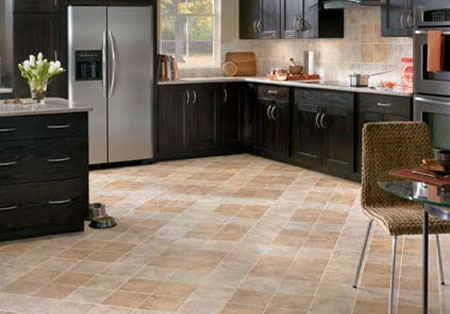
There are quite a few suppliers that offer a more extensive range of vinyl floor tiles than was offered in the past, which means you have more to choose from. In fact, there is no reason why you cannot install vinyl floor tiles and grout between the tiles to resemble a ceramic or natural stone tiled floor.
multi-flor.co.za
• Vinyl tiles are not a new flooring option, having been around since I was younger, but they are now even more durable, easy to install as a DIY option, and available in a much wider selection of styles.
• Vinyl tiles can be laid directly onto a smooth concrete floor, providing it is in good condition. If you need to cover up a dated tiled floor you can apply a 5mm-thick cement screed and apply vinyl tiles directly onto this.
• If you want to replace carpet with vinyl tiles, remove the carpet and clean up the floor to a smooth surface before applying vinyl tiles.
multi-flor.co.za
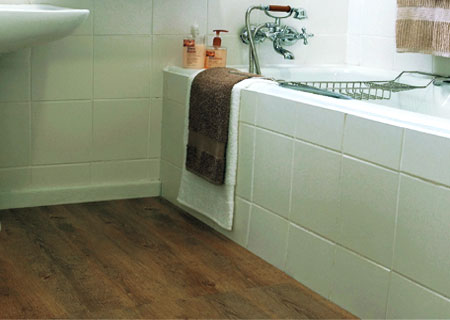
Not only affordable, vinyl tiles are durable and attractive. Vinyl tiles are ideal for bathrooms and residential kitchens and are easy to clean when installed in a nursery or child's bedroom. A quick clean with a sweeping brush, or wipe with a lightly damp mop, and the tiles are clean.
The only disadvantage to vinyl floor tiles is that they can be scratched or torn, although newer vinyl tiles are definitely more durable now than what was available previously. As with laminate floors, fit rubber caps to chair legs and lift rather than slide any furniture. If a tile does get scratched or damaged - no worries - simply remove and replace!
multi-flor.co.za
To install vinyl tiles you use a contact adhesive to adhere tiles to the floor, which makes installation easy and simple. Some tiles, such as those by Multi-Flor, have a self-adhesive backing which is pulled off so that you can stick the tiles wherever you want. However, do ensure that floors are completely dust free before sticking tiles down.
Vinyl is easy to cut with a pair or sharp scissors or craft knife, making installation around pipes, toilets and pedestals a breeze.
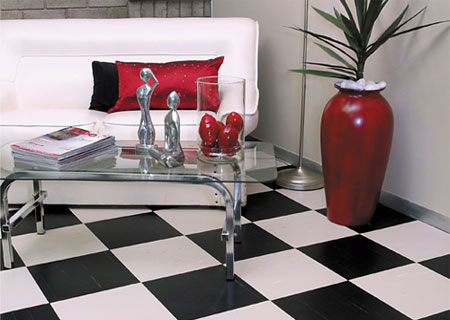
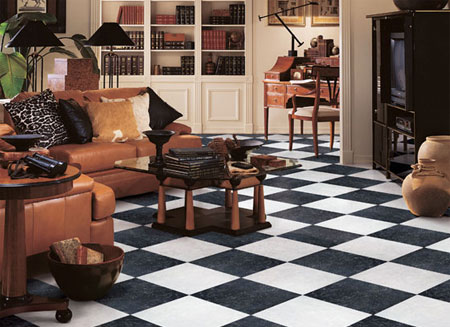
Because vinyl floor tiles are affordable, available in a selection of styles, and easy to install, you can design a floor that matches the style of your home. Mix up colours and styles for contemporary flooring, or add interest by mixing and matching styles in different shades.
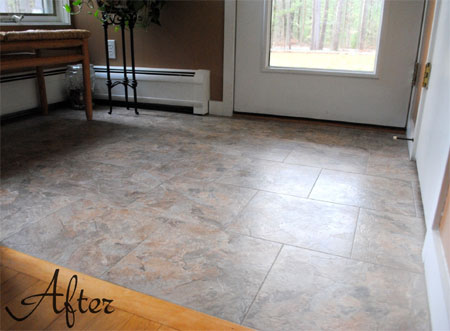
Jenna of SAS Interiors laid vinyl floor tiles directly on top of her existing ceramic tiled floor, and grouted the vinyl floor tiles for a more realistic tiled look. Here is how she did it.
In the past, when reading instructions on how-to-lay-tile, the rule of thumb was to start in the centre of the room – well I disagree. I think it really depends on the space and your desired layout. Yes, it may be good to start in the centre of a room if the space is square or rectangular, but many spaces aren’t. I think it’s best to lay out the tile how you feel it will be best suited for the space. For this foyer, I decided to start in the corner, where the tile and wood meet, so you would see a full tile (not cut) at the transition.
I first began by doing a dry lay of how the floor would look with a choice of straight or brick pattern.
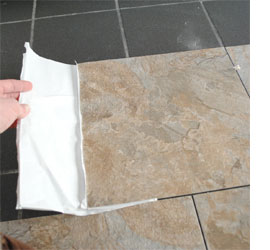
The floor was thoroughly cleaned before starting. Start by peeling off part of the backing from the tile and placing the vinyl tile on the floor in the designated spot. Once the edge is in place and stuck down on the surface, peel off the remainder of the paper backing. Use tile spaces when laying the next vinyl floor tile.
Unlike ceramic tile, it’s important that the peel-and-stick vinyl adheres to the surface below, so either walk on it a lot or use a rubber roller.
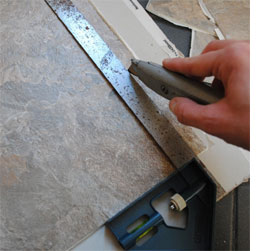
There is going to come a point where you’ll need to make some cuts to fit the vinyl flooring. Unlike the dreaded cuts with ceramic tile, cutting groutable vinyl tiles is fairly easy. Using a pencil and ruler, determine where your cut is going to be and draw a line. Score the vinyl tile 2-3 times with a sharp construction blade or sheetrock knife. You don't need to penetrate right through the tile. After scoring the vinyl tile, it should snap with ease and your straight cut piece will be read to lay.
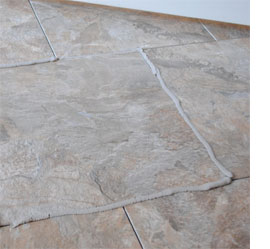
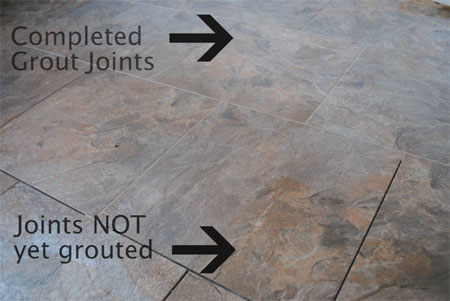
Once the floor is complete, you are ready to grout immediately with an acrylic sealer.
Jenna used a grouting compound in a tub, but using a cartridge and cartridge gun means that you can fill in the gaps without too much mess. But any excess needs to be wiped away immediately with a slightly damp cloth.
No Experience Required?
Yes, I have tiled before, but I do not feel that this project was difficult at all. I think a person with little experience can complete this project with ease. Measuring and cutting is really the most difficult part of the project, so take your time and measure correctly.
sasinteriors.net