
Affordable makeover with vinyl tiles
You may not think that vinyl tiles are glam, but when properly laid they can give any bathroom a makeover on a tight budget. Plus, vinyl tiles are tough and durable, and perfect for a small bathroom.
If you are looking for an easy and cost-effective way to change and update a bathroom, vinyl tiles provide an instant update that can easily be achieved in a weekend and create a bathroom that you love. You will find a selection of vinyl tiles at your local Builders Warehouse, or do an online search to find your nearest stockist.
The secret behind making vinyl tiles look good is to lay them as you would ceramic tiles... with a grout line between the tiles. In this way you fool the eye into thinking that you are not using inexpensive vinyl tiles.
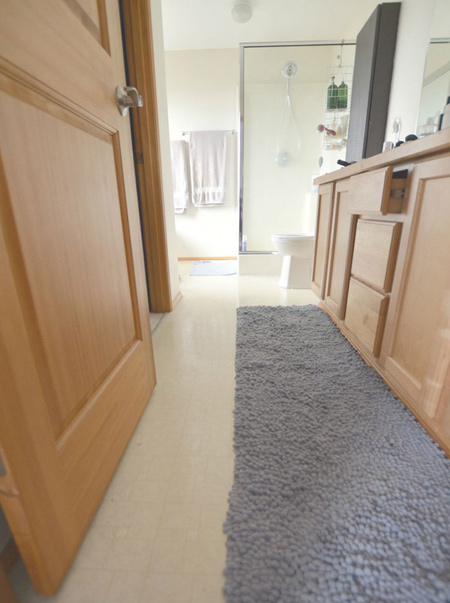
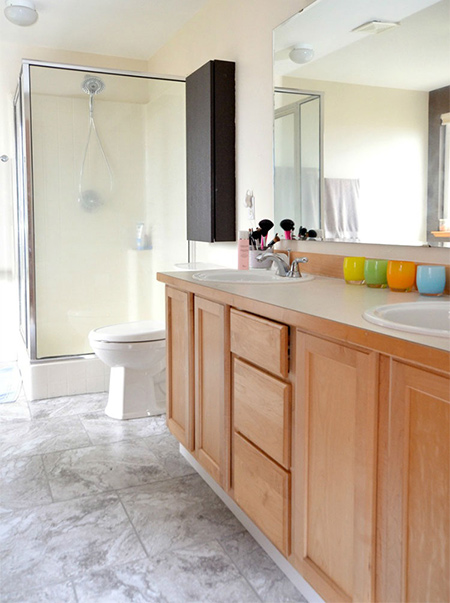
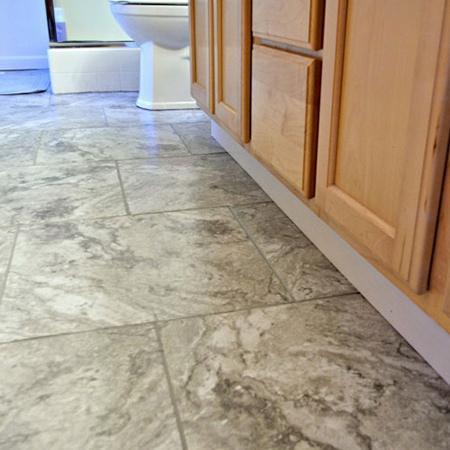
In this bathroom makeover, Kendra Darr of simply darrling, uses affordable vinyl tiles to replace peeling vinyl flooring and give her bathroom a wonderful new look.
YOU WILL NEED:
Vinyl tiles
Contact adhesive
Flexible grout
Putty knife
Tile spacers
Utility or sturdy craft knife and self-healing mat
Carpenter's square
Tiling sponge
Bucket of clean water
Tape measure and pencil
OPTIONAL: Bitumen and Glue Remover
HERE'S HOW:
Prepare the floor
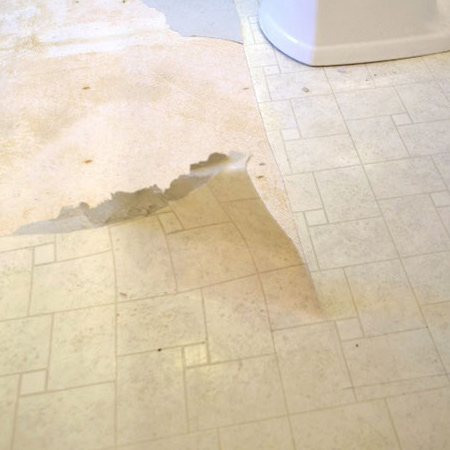
While you can lay vinyl tiles over existing vinyl floors in good condition, it is recommended that you start with a clean slate to prevent future problems. Remove old flooring by peeling away the old vinyl, using a paint scraper to remove any stubborn glue that stays behind. You can also buy Bitumen and Glue Remover at your local Builders to make this job easier.
It may also be necessary to remove skirtings around the perimeter of the room. Put these aside in a safe place if you plan to put them back once you are done. You will find instructions here for removing and replacing skirting boards.
GOOD TO KNOW: Floors should be absolutely clean and free from dust when installing vinyl tiles.
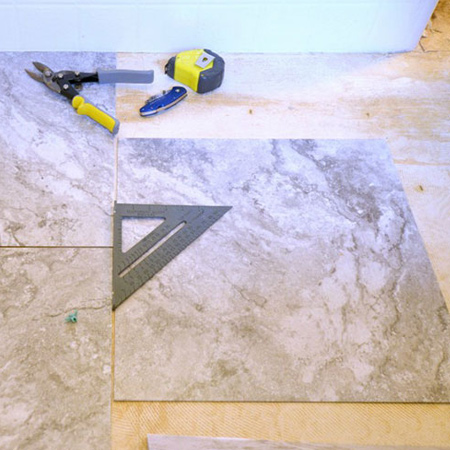
Determine the layout
Dry fit the tiles into the space to decide on the best layout for the tiles. This method allows you to choose a pattern, usually a staggered arrangement, that is easy to work with. Vinyl tile is reasonably easy to cut with a sharp blade and utility knife, and using a self-healing mat will extend the sharpness of the blade.
Secure the tiles
Once you have settled on a pattern you can start adhering the tiles to the floors. Start in a far corner to allow for easy movement in the room and remember to allow a grout line around the tiles using tile spaces. If using self-adhesive vinyl tiles, simply peel off the paper backing and press firmly into place. If you need to apply your own glue, use contact adhesive and follow the directions on the can.
Press tiles firmly onto the floor to create a solid bond and ensure that all sides are stuck down. If your floors are clean beforehand you should have any problems with gritty bits that impede the bonding process.
Grouting
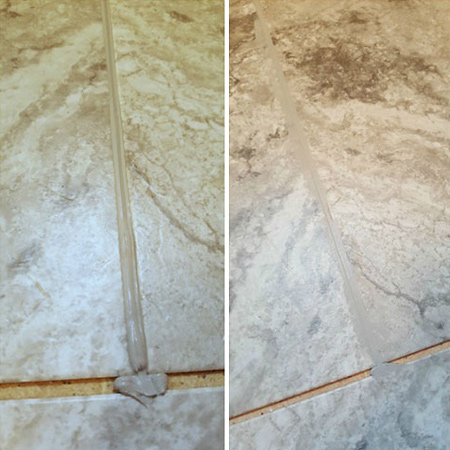
Choose a grout colour that complements the vinyl tiles you are using. You need to use a flexible grout for this project and will find this product at your local Builders Warehouse. If you are not sure of the correct product to use, ask for assistance. There are several products on the market.
Apply grout as you would when using ceramic tiles with a putty knife. Work quickly as the grout dries fast. Because the tiles are thin you will find that quite a bit of grout will overflow onto the tile, so try not to apply too much grout in one go. You only want enough grout to fill the gap to the same level as the tile.
Let the grout dry for an hour or so before wiping with a damp sponge to remove any excess grout and leave a smooth grout line. Leave to dry overnight before walking on the tiles and replacing skirtings.
GOOD TO KNOW: Keep a tiling sponge and clean bucket of water on hand to quickly clean up any mess.
homedepot.com