Fit a solar tube skylight
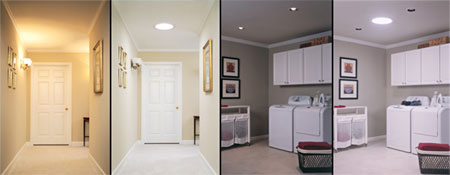
Solar Tubes or Tubelites are an excellent way to get natural light into parts of your home that don’t have any windows, or rooms that are situated on the south-east side of a home. These skylights are one of the most popular home improvement projects being done right now.
From the easy DIY installation to the long list of benefits, solar tubes can add a unique aspect of eco-friendly décor to your home and is so versatile that it can be installed in almost any situation. Solar skylights are one green design element that architects are increasingly turning to as an easy and effective way to earn green certification credits for projects.
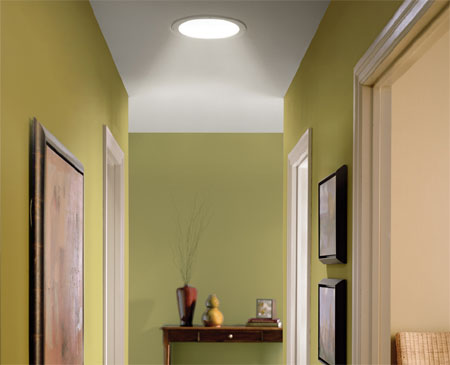
Solar skylights collect light, while reflective circular tubing helps guide the sunlight down through the ceiling space to a ceiling-mounted diffuser that distributes the light evenly throughout the room.
If you are a do-it-yourselfer, you can easily install a solar tube yourself, otherwise it is an easy installation for a handyman or a qualified roofing contractor. Many suppliers offer kits that come complete with all the parts you will need including, the dome, flashing, tubing, hardware, hole cutting guide, and easy-to-read instructions.
YOU WILL NEED:
Tubelite solar tube kit - see rainbowskylight.co.za
Stepladder
Rubber-soled shoes
Drill/driver and assorted drill and screw bits
Jigsaw with jigsaw blade for steel - or tin snips (for corrugated iron roof)
Keyhole saw
Roof flashing - if not supplied with kit
Safety glasses
Exterior silicone sealer
HERE'S HOW:
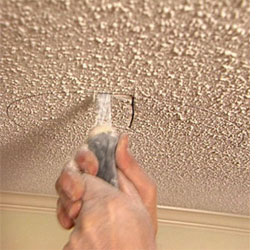
1. Cut the ceiling hole
Mark the centre position of the skylight on the ceiling. Use a length of timber with a nail positioned in the centre hole to mark the circumference of the ceiling ring according to the size given in the instructions. Cut the circle with a keyhole saw or jigsaw.

2. Mount onto tiled roof
The Tubelite kit comes complete with step-by-step instructions for DIY installation. The Tubelite fits underneath the roof tiles at the top, and over the top of roof tiles at the bottom, for a leak-free installation.
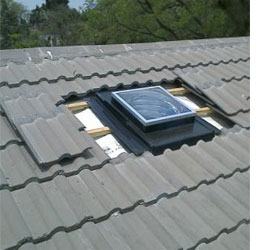
Where mounting onto a tiled roof, remove complete tiles to the approximate area for the Tubelite and integral fibreglass flashing tray. Once the Tubelite is in position, replace the roof tiles and ensure that they are well fitted onto the roof to prevent leaks.
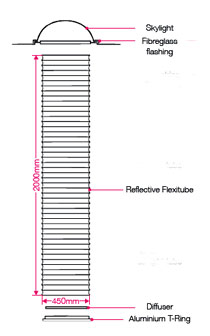
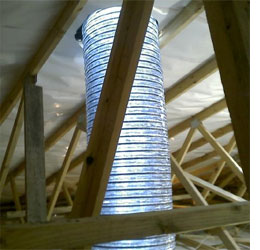
The Tubelite is manufactured of silver-coated fibreglass fabric that is reinforced with metal wire coiled around it. The unique design and silver coating allow a strong light transmission, even in a long and bent application. With a length of 2 metres, you can install the Tubelite in awkward positions, plus extra tube is available on request.
Install the roof dome
Bend out the dome aluminium base, feeding the tubing through the hole in the roof to position the dome. Use a hammer handle to shape the base to match the roof profile and seal with silicone around the base.
Fit the ceiling ring
Pull the tubing through the ceiling hole and cut away surplus, securing with evenly spaced spring clips and fastening the ring to the ceiling with the supplied screws.
Install the diffuser
Slide the tubing over the spring clips to secure then fit the diffuser to the ceiling ring.