
How To Remove And Replace A Single Porcelain Floor Tile
The following steps explain how to remove and replace a single porcelain floor tile.
10/07/2020
The flooring is a significant part of any structure that has a high impact on its aesthetic. The colour, style, and material used on the floor have a significant effect on the look and feel of any space. Since the floor takes up an ample space, changing its material, texture, and colour can make any room look smaller, more extensive, refreshing, or warmer.
A sturdy floor is also more suited for the safety of people. And since the everyday activity of people can be reflected on the floor, it is essential to have the right floor material.
Types of Flooring
The types of available flooring are numerous. With each type having its own advantages over the others. For instance, timber flooring is durable yet prone to scratches and movement. It is unsuitable for areas that habitually become wet. Laminate and Vinyl floorings are good alternatives to timber with various designs that can imitate other materials.
Tiles, on the other hand, are the most durable and suited for wet areas. Other flooring types are carpet, rubber, mastic asphalt, and polymeric flooring.
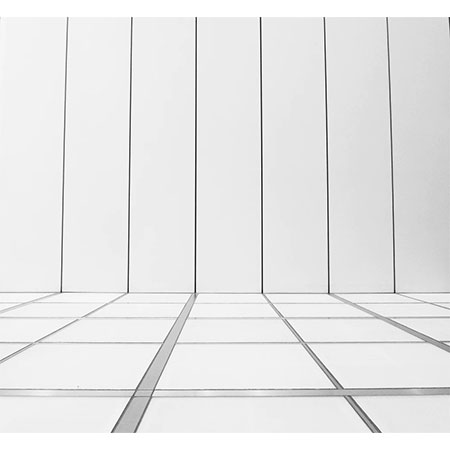
Floor Tiles
From the floor materials mentioned earlier, floor tiles are the most preferred for spaces with the most foot traffic and areas prone to humidity or water. The two most common floor tiles are ceramic and porcelain. Although these two might look similar, they differ in their properties. Ceramic tiles are recommended for interior floors, while porcelain is preferred for both outdoor and indoor areas. The preference is due to porcelain's property of being denser, less porous and its resiliency to wear.
Ceramic and Porcelain Tiles
Porcelain tiles look very similar to its ceramic counterpart. It is not easily distinguishable, and reading labels might not be truly helpful as there are no regulations on product labelling based on characteristics. What is important to note though, is that porcelain tiles have higher durability resulting in a higher cost. It is also heavier, making it more challenging to cut.
Nevertheless, porcelain tiles remain a perfect choice for kitchen, bathroom and in commercial applications where heavy foot traffic is expected. In market research, it was estimated that the ceramic and porcelain tile market would increase by 5% until 2027. However, it was also noted that installation mistakes could lead to higher repair costs for porcelain tiles.
Replacing Porcelain Tiles
Although the porcelain material is sturdy, there would be instances when replacing a single tile is necessary. When replacing porcelain tiles, some techniques used with ceramics are applicable while some may be completely different. So it is essential to know the type of tile material you have.
The following are the steps in replacing a single porcelain floor tile.
1. Remove the Grout
The first step is to remove the grout surrounding the tile to be replaced. This step is vital to lessen the chance of damaging the surrounding tiles. Removing the grout will expose if the damaged tile is touching or is putting pressure on other tiles.
Removing the grout can be accomplished either by hand or using a power tool such as a vibrating multi-tool with a rounded carbide bit blade with a width smaller than 1/16 inches. If you intend to do it manually, you can choose a flathead screwdriver to remove the grout carefully. In doing this process, remember to use safety glasses and have adequate lighting.
2. Dislodge the Damaged Tile
Use a dull masonry chisel to tap the corner of the tile to be replaced. Choose an initial area where the edge is not in contact with the surrounding tiles. Slowly crack small pieces and continue to do so until the tile is completely removed.
3. Remove the Adhesive
To remove the organic adhesive or thin-set mortar used to stick the tile, use the vibrating multi-tool with a flatter carbide tip. If you are doing the process by hand, use a firm one and 1/2-inch putty knife. Test that you have removed an adequate amount of material by trying to fit the replacement tile in the space. There should be 1/8 inch of space where the adhesive material will occupy.
4. Aligning and Attaching the New Tile
Ensure that no dust or loose material is present before you attach the new tile. Also measure the area, making sure that equal space is distributed around it. You can then apply an adequate amount of thin-set to attach the tile to the floor or wall. Most experts advise the use of cement-based thin-set as it does not dry too much and prevents the occurrence of cracks. In applying the thin-set, ensure that the entire tile is in contact with it with no gaps. To finish its installation, gently tap it, ensuring that the new tile is aligned with the adjacent ones.
5. Grouting
Before putting the grout, let the newly installed tile to set and cure for 48 hours. After the regulated time, apply the grout and ensure that its colour matches the existing grout colour. The grout's consistency should also be similar to cake batter before applying it using a grout float or trowel. Ensure that the joints are filled with grout while also removing any excess.
Finishing Touches
Most porcelain tiles do not require a tile sealant. However, a light application of a glazed porcelain tile sealer will protect from deterioration, oxidation and prevents the tile from absorbing stains. To protect tiles from grout stains, sealants can also be applied to unglazed tiles and dense porcelains before the grouting process.
The main types of tile sealants are categorised as penetrating or surface sealants. Penetrating sealants are absorbed by the tile and the grout which form a layer of protection. On the other hand, surface sealants provide a layer coat above the tile to create a stain-resistant and non-porous seal. While most penetrating sealants do not change the appearance of tiles, surface sealants enhance the natural colour of the tile and provide a little lustre.
Replacing a porcelain tile is easy as long as you have the proper tools and the patience for it. The steps provided are the basic guidelines in replacing tiles but may be modified depending on the materials to be used and the circumstance. However, if the tile to be replaced requires a little more skill, such as cutting the tile into a particular shape or when installing in challenging spaces, it is best to employ the help of experts.