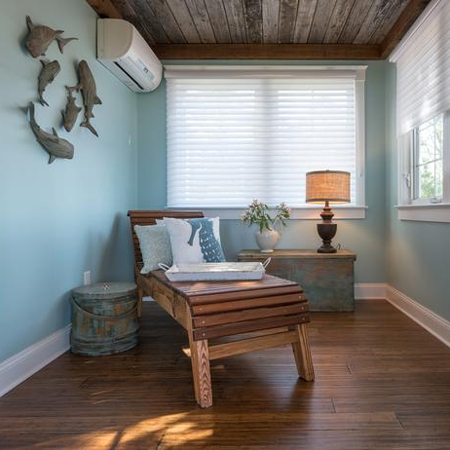
Reclaimed wood ceiling
If you have a little DIY know-how, you can be creative with reclaimed timber and completely alter the look of a room in just one day. Many tend to overlook a ceiling, but here's how you can transform a ceiling using reclaimed timber.
diynetwork.com
HERE'S HOW:
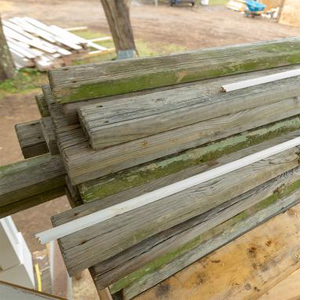
Select your timber
Any timber should be free of insect infestation and stable enough to be installed on the ceiling. Treat any timber with Woodoc Wood Reviver. This product removes mould, tannin, mildew, grime, water and rust stains, and brightens up wood by removing chalky oxidised surface build-up. Discard any pieces that show signs of woodworm or that have black rot.
Timber pallets are thin strips of timber that are easy to work with and not too heavy for ceiling installation, but preferably use timber that has been outdoors for some time and has gassed off any toxic chemicals used the treat the wood.
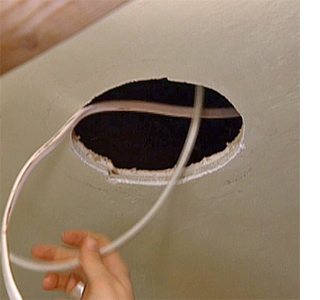
Allow of fittings
Remove existing ceiling fixtures or have an electrician do it for you. If any fittings need to be permanently removed or move, discuss with your electrician beforehand.
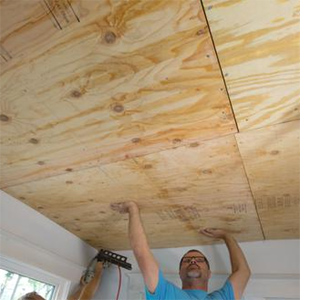
Prepare the ceiling
Use an electronic detector to locate the ceiling beams. You will use these to fit 9mm plywood panels over the existing ceiling. If necessary, scrape off a popcorn or heavy ceiling texture to create a flat surface. Screw the plywood panels into the ceiling beams.
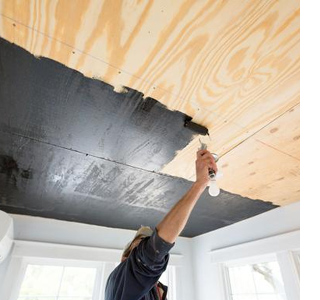
Paint plywood panels
To prevent small gaps from looking unsightly, paint the plywood with flat black or dark brown paint to create a seamless finish.
Put down dropcloths and mask off fittings before painting begins.
Mark the ceiling
Once the paint is dry, place a chalk line centre reference lines on the ceiling and work from that line out. This will ensure equal and even reveals at each wall. In this case, the material length dictated that the room be split into thirds.
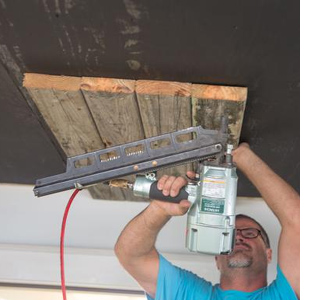
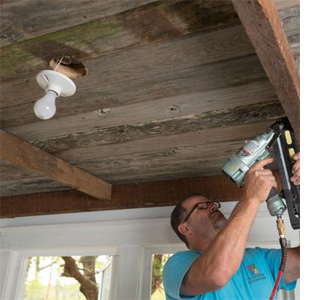
Install ceiling timber
Before installation, cut all the timber to equal lengths. Install one row at a time, apply Pattex No More Nails adhesive to each piece before nailing to the plywood ceiling. A pneumatic nailer makes the job easier and faster, but you can also use a hammer and wire nails.
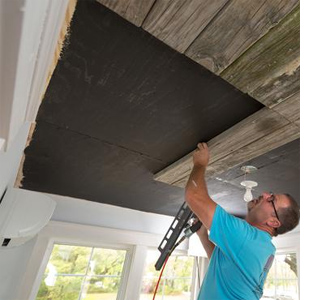
Place and adjust
Depending upon the size of the ceiling, it may be necessary to cut the last piece to fit the space against the wall. Remember to leave a 5mm gap between the timber and the wall to allow for expansion and contraction.
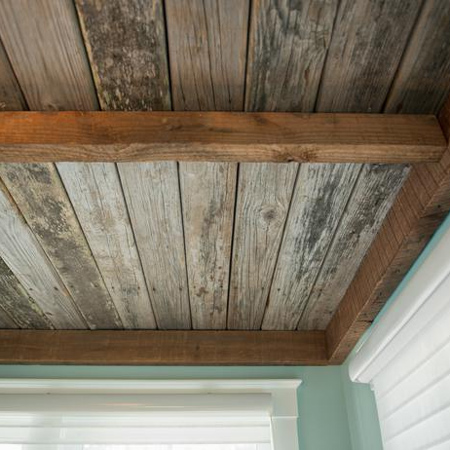
Edge the ceiling
To cover the expansion gap, a reclaimed timber frame was fitted to cover the seams. To prep material, first cut the frame pieces to size. Apply a bead of No More Nails adhesive to the top of each band and secure with wire nails.
Optional beams
For a more rustic look, install crossbeams onto the finished reclaimed timber ceiling using No More Nails adhesive and wire nails.
Ask an electrician to reinstall ceiling fixtures.