
How to Replace Damaged or Broken Gutters and Downspouts
Depending upon the age of your house, there will come a time when you may need to replace broken or damaged gutters and downspouts, so here's how...
26/01/2020
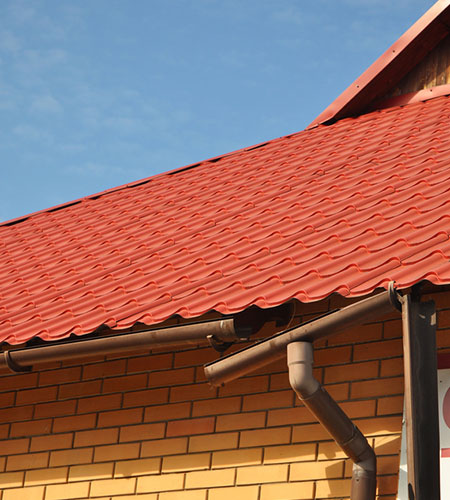
There may come a time when you need to replace a section of guttering due to bad weather or install new gutters and downspouts due to their age and corrosion or damage. The gutters around a home are designed to protect the walls of a home from damage by rain, so you will want to replace damaged gutters as soon as possible.
Regular home maintenance is essential for preventing blockages and attending to small areas of rust, but gutters aren't always easy to reach. Many minor problems like small holes are easily repaired with a patch, but when corrosion is extensive, or guttering is pulling away from the wall, it’s better to install a whole new system.
If you are replacing all the gutters on your property, you will need to calculate how much guttering you need. To do this, draw up a sketch of the property and measure around all the walls to calculate the total measurement. You will also need to factor in the required number of downpipes. You can determine the latter by the existing layout, but if you have experienced any problems with your gutters, now is the time to add extra downspouts.
GOOD TO KNOW: When calculating the amount of guttering required, allow extra for joints and corners, where mitres need to be cut.
HERE'S HOW:
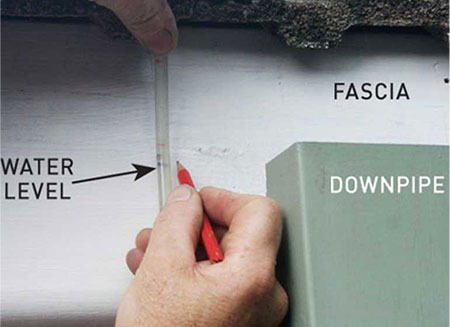
1. Start off by measuring and marking for the height of the gutter. The back of the guttering should be about 2cm below the fascia top. If your house does not have a fascia surround you will be attaching the new gutters to the eaves. Mark every 3 metres for downpipes, or at the end of a shorter length most probably at a corner junction.
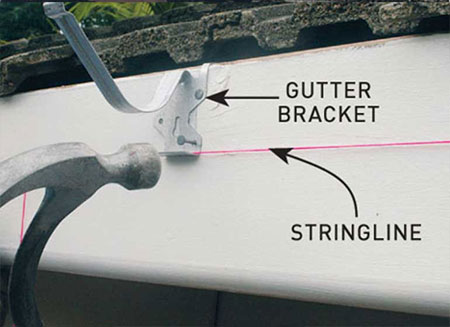
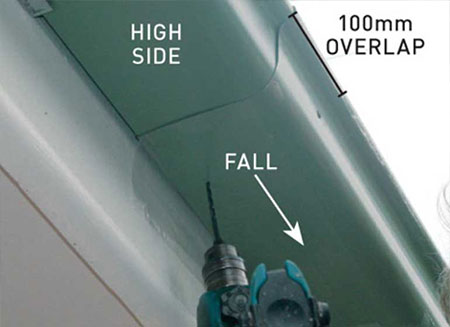
2. Secure the galvanised gutter brackets by setting up a string line along the fascia board or eaves. The gutter brackets should be spaced no further than 120cm apart and the fall at 1:500 pitch.
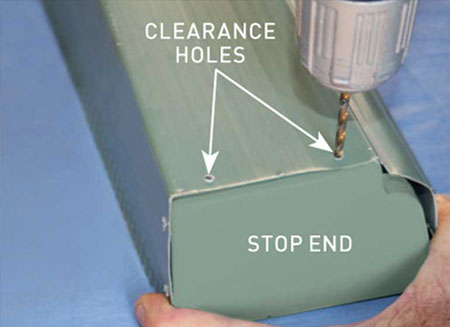
3. At the end of each run, secure the stop ends by pre-drilling the necessary holes to secure with 2mm rivets. Once the ends are fitted apply a bead of waterproof silicone along the overlap.
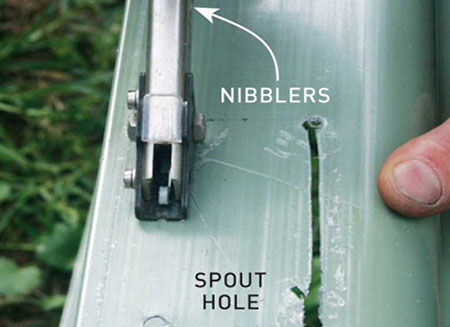
4. Use a nibbler or tin snips to cut out openings for the downspouts, making sure to leave room for the flanges around the outside. In order to get the nibbler or tin snips into position, drill starter holes.
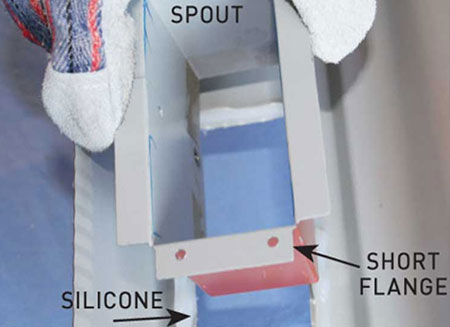
5. With the cutouts made you can install the flanges for the downspouts. Drill clearance holes in the short flanges and apply silicone around the hole on the inside of the gutter. Press securely in place before securing with rivets from underneath.
6. To assemble the gutters the corners need to be cut with mitres at the ends. The best way to do this is to allow for internal or external mitres. Use a junior hacksaw or Dremel Multitool and cutting disk to cut and then smooth the edge with a file.
7. Secure with corner brackets and apply silicone.

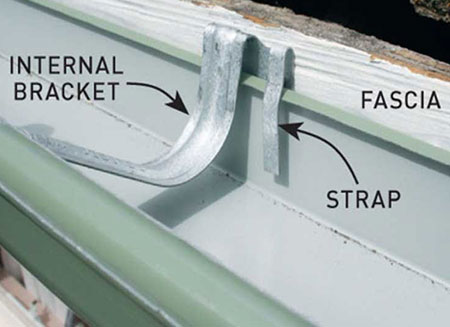
8. The gutters are now ready to hang on the brackets. Use needlenose pliers to position and place the bracket strap into the gutter. For added stability, use twist nails to secure the gutters midway along the length.
9. Where gutter lengths overlap, place the high side of the gutter joint into the low side with a 10cm overlap. Force open the outside rim on the gutter with pliers and secure the overlap with rivets. Seal with silicone between the layers.
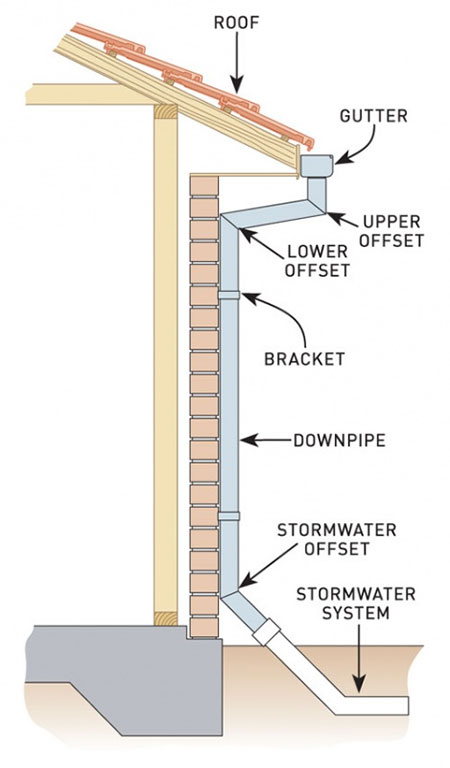
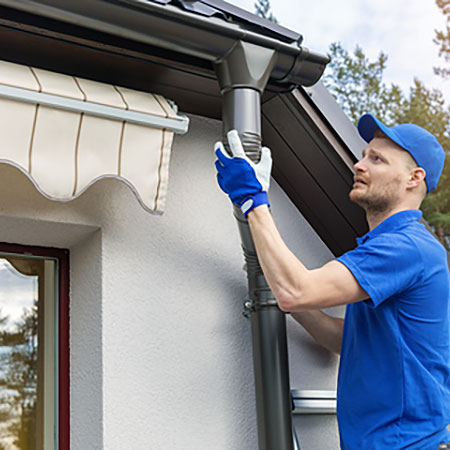
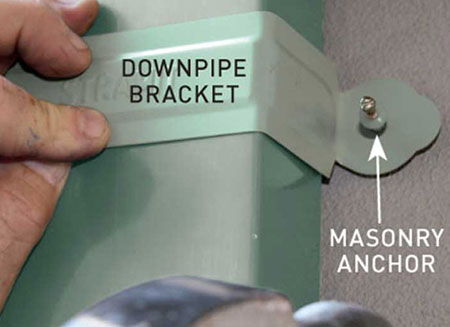
10. To finish off the project, the downspouts need to be cut to length before mounting. Mount the downspouts onto the gutter and secure with rivets. The downspouts are secured to the wall with galvanised gutter brackets.
handyman australia