
How To Install An Air Conditioning Unit
Easy fit air conditioning units are pre-gassed and are a convenient option for those who don’t have the means or budget to hire a professional.
01/10/2019
Easy fit air conditioning units are pre-gassed so they can be installed by anyone, making them a convenient option for those who don’t have the means or budget to hire a professional. From bedrooms to home gyms and offices, there are various areas of the home or commercial spaces where air conditioning can be beneficial. This guide will take you through step by step how to install an air conditioning unit.
Locate Where the Unit will be Installed
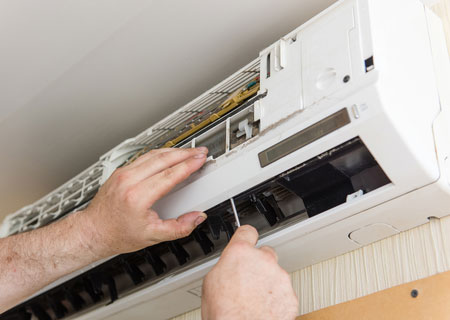
If you’re installing an indoor air conditioning unit, where you choose to position it is important for effective installation. There should be no pipes surrounding the unit and plenty of air circulation, plus the unit shouldn’t be too close to any doorways. In order for proper installation, the front vents of the unit shouldn’t be obscured by furniture either. For outdoor settings, the unit should be shaded from the worst part of the sun and also made to be weatherproof. The large fan should be facing away from the house and there should also be plenty of space surrounding it, as with indoor installations, lots of AC units use 16x25x1 filters, so make sure you have a window around that size to use. If the copper tubing is coiled at the back of the unit, it needs to have plenty of air flow around it and not obscure any flow of air to the front.
Avoid Pipe Benders
When you’re carrying out the installation process, it’s important to avoid using a pipe bender on the copper piping as units use 0.5-inch pipe so the bending apparatus would simply crush it. The insulation should be cut instead and pulled apart to expose the pipe, which should be bent very slowly and with great care. There needs to be a wide radius for most air conditioning units, so this should be relatively easy if you work outwards from the centre. Ensure that there aren’t any thumb indentations larger than a millimetre deep and then secure the insulation back in place, sealing with waterproof tape.
Install the Water Drain Pipe
For indoor units, the water drain pipe can be positioned at either end of the drip tray, providing the rubber bung is securely fitted at the other end. When you’re installing the water run off, angle the pipe downwards through the wall and make sure it runs a fair distance from the house as it can put out up to four pints of water each day during the warmer weeks of the summer season.
Connect the Pipes
When you are connecting the pipes to the unit, place a small drop of oil on all of the facings before you begin connecting them. Next, attach the pipes to the brass cones and tighten them – be careful not to overtighten them. Cover the copper pipes with foam insulation, ensuring that all of the connecting parts are covered. You should also check that there is no refrigerant is leaking from any of these connections before you start running the unit and follow the manufacturer’s instructions with regards to the timings when expelling air from the unit.