
Install home insulation
We've had a couple of very chilly days over the past two or three weeks. You can spend a lot of money on heating and cooling a home yet home insulation offers an affordable and more energy efficient way to keep a home cool or warm.

Investing in insulation can save you money, paying you back over time through reduced monthly energy expenses, as well as providing greater year-round comfort and a quieter indoor environment.
How ceiling insulation works
Ceiling insulation is designed to reduce the transfer of heat through the ceiling. Heat naturally flows from warm to cool areas, particularly through ceilings. During the winter months, the heat inside a home is lost through the ceiling, walls and windows and we resort to energy to heat a home. With the installation of ceiling insulation an effective level of insulation reduce our demand for energy and lowers our monthly energy costs.
How to install ceiling insulation
There is a right and a wrong way to install ceiling installation. If the material is too compressed it provides less resistance to heat flow. Properly installed ceiling insulation should be laid in its natural, fluffed form without the possibility of air cavities.
As a do-it-yourself project, adding ceiling insulation is fairly easy to do and your local Builders Warehouse offers standard ceiling insulation material. as well as any tools needed to install it.
YOU WILL NEED:
Ceiling insulation - enough to cover the entire floor space*
Safety clothing - dust mask, safety glasses, long-sleeved T-shirt and pants
Utility knife
Tape measure
Knee board - large enough to span two tie beams or joists**
Portable light
Stepladder
Safety first:
Glass fibres do not present a health risk. They may however cause a mechanical itch to the skin (similar to that caused by grass). It is advisable to wear gloves when installing fibre glass insulation. In the case of itching, wash affected area with warm, soapy water.
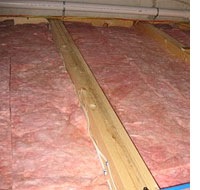
Be careful where you walk. Only walk on larger tie beams or joists and use a knee board that spans beams for sitting.
HERE'S HOW:
*The easiest way to determine how much ceiling installation is required is to measure the perimeter of the house. For example: If the house is 9 metres long and 10 metres wide = 90 square metres of ceiling insulation.
**A tie beam or joist is a horizontal span of timber that runs from wall to wall to support a ceiling or roof. An off cut of timber that spans two joists can be used as a knee board.

Working with one roll at a time, and starting at a far corner of the ceiling space, you need to cut the ceiling insulation so that it fits between the tie beams or joists. Measure the distance between beams using a tape measure. While still in the bag, cut insulation roll to the required size. The roll should be cut 50 mm more than the distance between the beams
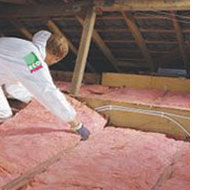
Remove the insulation from the bag and roll out between the tie beams ensuring that it fits tightly between the beams.
Do not press the material as you lay, simply place on top of the ceiling and allow it to retain its original form. This is important as pressing down will reduce the resistance. For the same reason, it is also important to ensure that there are no gaps between cut strips.
Cut the insulation out around trap doors and fix the cut section to the trap door using good quality contact adhesive. Leave a 50mm gap around motors, or electrical fixtures.
It is advisable to lay the insulation underneath any wiring and to cut around any down lights to allow heat to escape.
How easy was that!
via global systems