Install A Fireplace
Winter is spreading her icy tendrils across the land, so what better time to install a fireplace. We show you how to install a Megamaster Verano Fireplace.
09/05/2018
Pop into your local Builders Warehouse and you will find a wide selection of fireplaces. For this project we'll show you how to install a Megamaster Verano Fireplace. And while this is usually a job for a professional, if you have the skills and the time - why not do-it-yourself, but do have it checked by a local building control officer to make sure it complies with building standards.
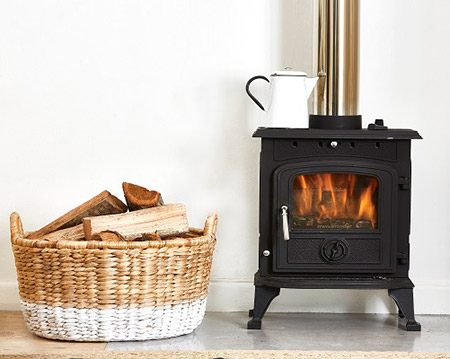
There's nothing quite like a cosy fire to warm up a home on cold winter evenings. Cast iron fireplaces are becoming very popular due to their affordability, and they will add a touch of charm and heat to any home.
The advantage of a freestanding fireplace is that you don't need to build a brick hearth and chimney - simply install and you're ready to heat up the night!
YOU WILL NEED:
Megamaster cast iron fireplace and flue kit
(2) Galvanised insulated flue (125 mm, 1,2 m)
Galvanised end cap flue (125 mm, 1,2 m)
Galvanised flue (125 mm, 1,2 m)
Flexikote silicone
Weatherproofing gauze
TOOLS:
Angle grinder and disc
Jigsaw
Screwdriver
Pop riveter and rivets
Pencil
Buy all the tools, materials and supplies for this project at your local Builders Warehouse.
HERE'S HOW:
Note that for some of the steps below you will need a person to assist you.
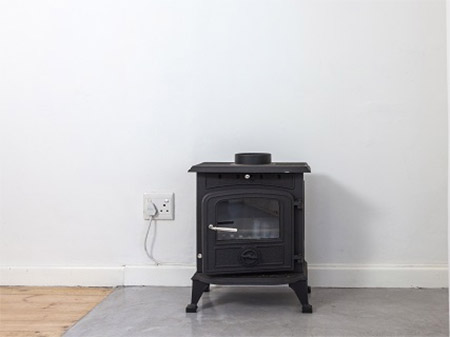
1. Determine where you want to install the fireplace. It should be a clear spot in your lounge or living room with plenty of space around it. Place the fireplace in position, leaving 100mm between the fireplace and the wall.
2. Use a plumb line and plumb bob to make a mark on the ceiling where the flue hole (chimney) needs to be drilled.
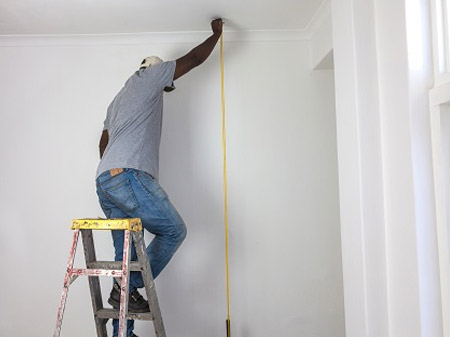
3. Make a small hole with a screwdriver and then go up into your roof space to ensure that there aren’t any beams or joists in the way. If there are, you will need to relocate the fireplace. If not, then you’re good to go. Also determine the position of the tiles that will need to be removed.
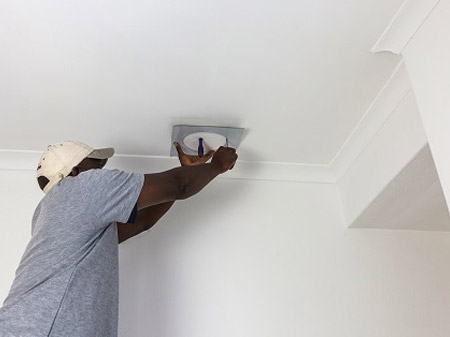
4. Using the template provided with the installation kit, use a pencil to draw a circle on the ceiling and then cut out the hole using a jigsaw.
GOOD TO KNOW: Put down a drop cloth to catch any mess when cutting and remember to use goggles!
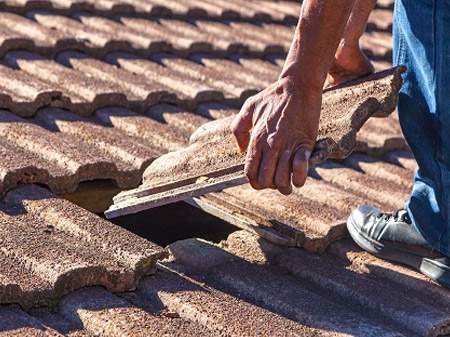
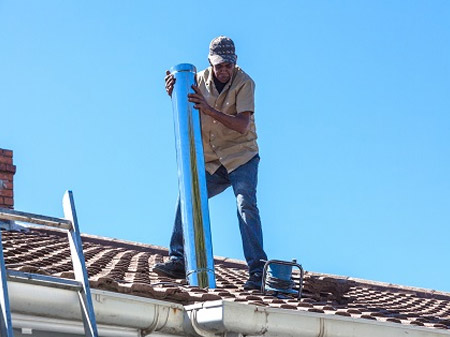
5. Remove the appropriate roof tiles to make a clear pathway for the chimney/flue.
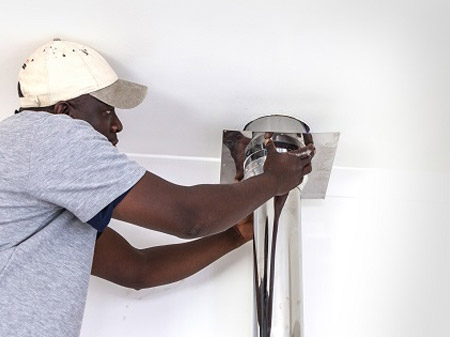
6. Using the installation kit, join the flue pipes; the single flue will lead directly out of the fireplace, while the double flue will go up through your ceiling and out of the roof. Once assembled, slip the ceiling plate over the flue.
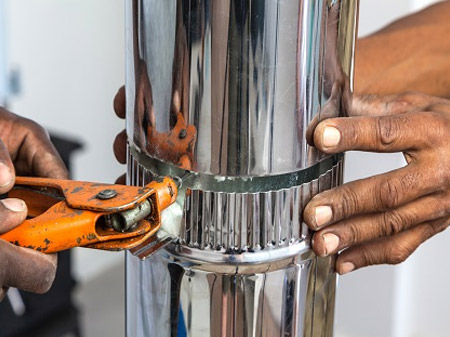
GOOD TO KNOW: The flues will have to be joined together. Drill holes and add a simple pop rivet.
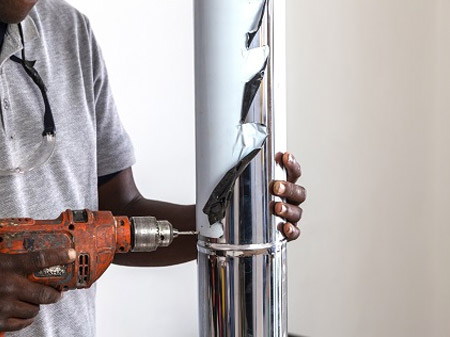
7. The double flue requires slight more complicated assembly; it has a layer of insulation to prevent overheating in the roof space. Join the pipes, drill the holes on the interior and pop-rivet them together. Now close the access panel and secure the outer layer as well.
At this stage, you will have the fireplace, a joined single flue, a joined double flue, a hole in your ceiling and a corresponding hole in your roof.
8. Go onto the roof and drop the double flue down through the hole in the roof and then connect the double flue to the single flue.
9. Slide the ceiling plate up along the single flue, onto the double, and secure it to the ceiling. The plate has holes, so you only need to screw it into place using a standard flathead screwdriver.
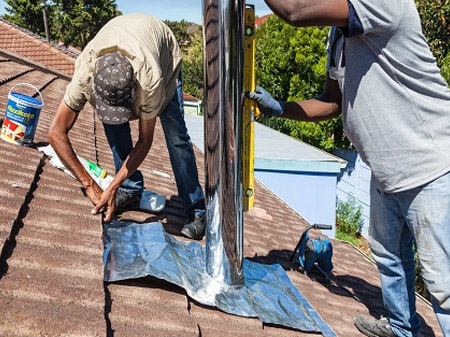
10. To cut the roof tiles to fit back in place, use an angle grinder to cut a hole in them. You will also need to cut the flashing to fit.

11. Install the cut roof tiles and flashing, close, seal and weatherproof the roof. Use generous amounts of exterior-grade silicone to seal the flashing and the flue. Seal the flashing and the silicone with waterproofing (Flexikote) and membrane.
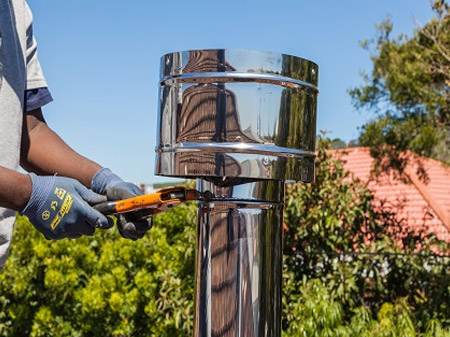
12. Now you can secure the cap on the top of the flue assembly, again using drilled holes and pop rivets - and you’re done.
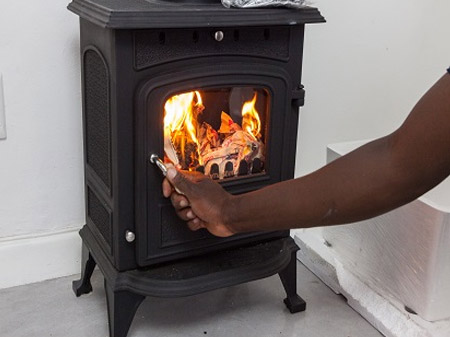
This is the most rewarding part of the project... start a small wood fire to test that the flue is pulling smoke nicely, then wait 24 hours before you use the fireplace properly.