How to Lay Concrete Rock Driveway
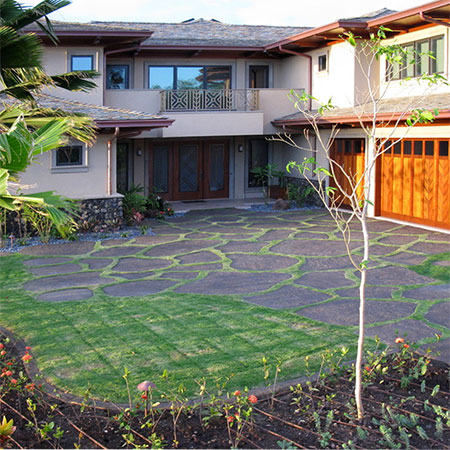
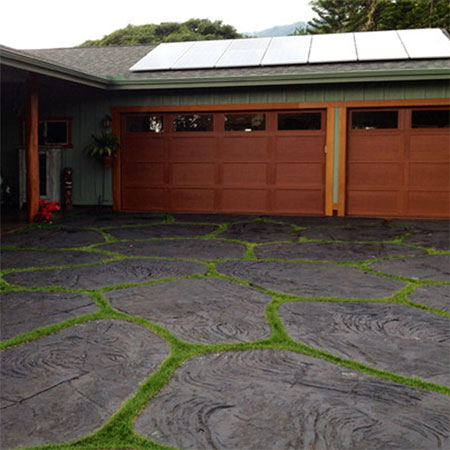
This stunning concrete rock driveway is installed using moulds that are filled with cement mix and then tinted and sealed.
29/08/2020
If your driveway is situated in an area where water tends to collect, or where there is runoff from a main road or other areas, this concrete rock driveway might be just the solution you need.
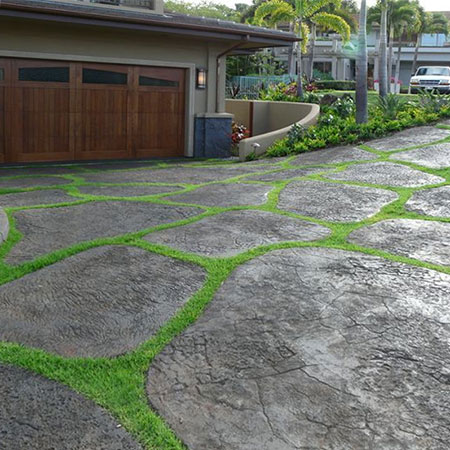
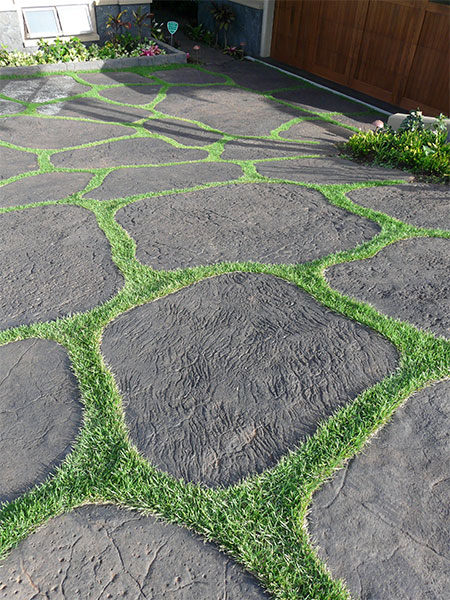
First off, using moulds to lay a concrete driveway does away with any joints that allow for expansion and contraction. The gaps left between the individual concrete rocks can be filled with gravel or low-growing grass and this allows for movement as well as allowing water to permeate through the gaps. This will result in less cracks caused due to insufficient or lack of expansion joints.
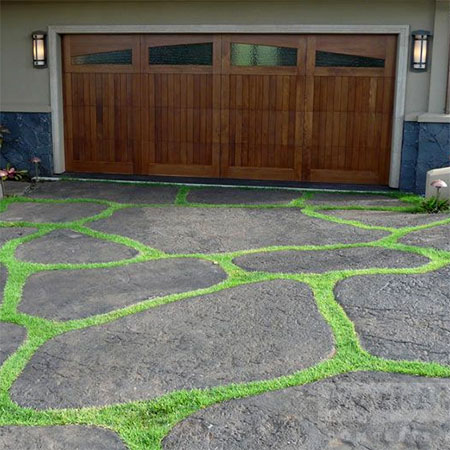
I love the overall effect that is achieved by using large moulds for the concrete 'rocks' and filling gaps with grasses. Concrete has a tendency to have an industrial look but this is softened by the addition of the grass.
The project shown here was done by Rock Moulds and using their concrete moulds. If you are an international visitor, you can click on the previous link to visit their website should you wish to purchase the concrete rock moulds. For everyone else, you won't be able to purchase the moulds used in this project, but you will be able to make your own using aluminium strips that are pop-riveted together.
YOU WILL NEED:
Moulds or aluminium forms
Cement (cement, sand and aggregate)
Concrete stamp - or do this by hand
Concrete colour
Concrete sealer
HERE'S HOW:
1. Clean up and prepare the site for the installation and determine the layout for the concrete rocks. Prepare a gravel base and compact firmly. You will find more details on this in the original post. You can use road marking paint to outline where individual moulds for the concrete rocks will be positioned.
GOOD TO KNOW: Vary the shapes so that these all fit together to form the finished design. It's good to have a few smaller concrete rocks in the design.
TOP TIP: Run planks down the outer edge of where the installation will take place in order to establish a grade. This is particularly important in preventing further water pooling later on and to ensure water runoff is away from any structure.
2. Make up the individual forms if you haven't purchased these. If you are joining forms together to make for easier installation, attach thin strips between the moulds for stability and to hold the shape of the forms once the cement is poured in.
3. Mix and pour the cement into the forms or moulds and then use a plank to screed each mould.
GOOD TO KNOW: If you are adding colour to the cement mix, do this when mixing the cement, sand and aggregate.
When pouring cement mix into the individual moulds, keep stock of where you are working. You may need to leave a few moulds empty and go back to these later on.
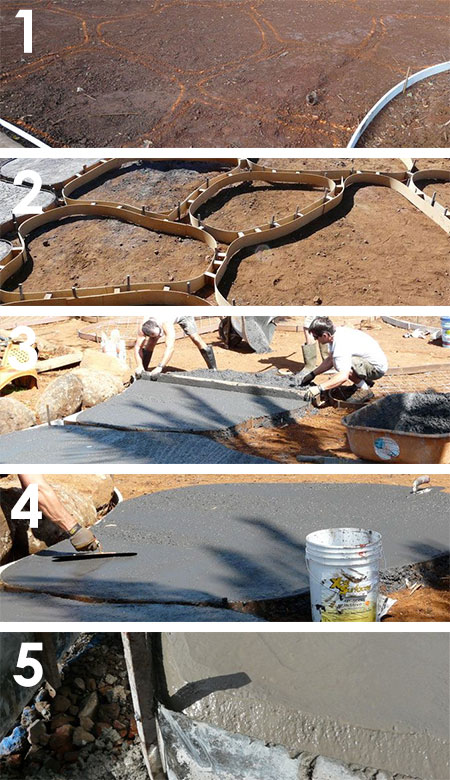
4. Float the top to ensure knock-down of the aggregate - forcing the aggregate down so that it does not sit on the surface.
5. There is no edging around the outside edge of the concrete rocks, rather a trowel cuts down the edges at a 45-degree angle for a finish that reflects the style of the paving. his will give a more organic edge to your pavers as natural stone would look, and allow to stamp this area.
STAMPING
Test the surface of each rock to ensure it is ready for stamping. If your push you thumb into the mix and if the surface holds and does not break you can begin stamping.
FINISHING
Leave all the moulds to cure for at least 24 hours, after which you can carefully remove all the forms and proceed with the next stage of pouring.
Apply concrete stain or sealer to finish off. It is recommended that you refresh the sealer every few years.