
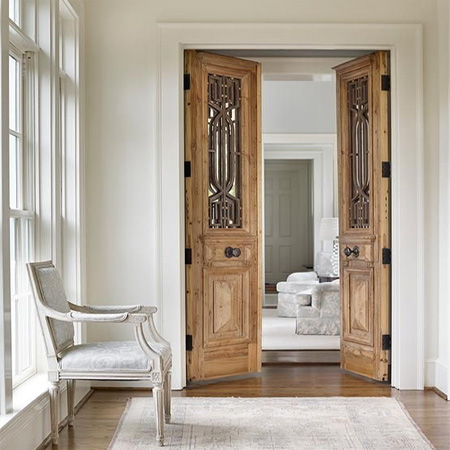
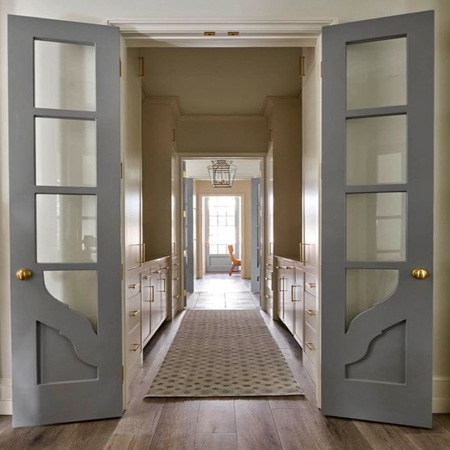
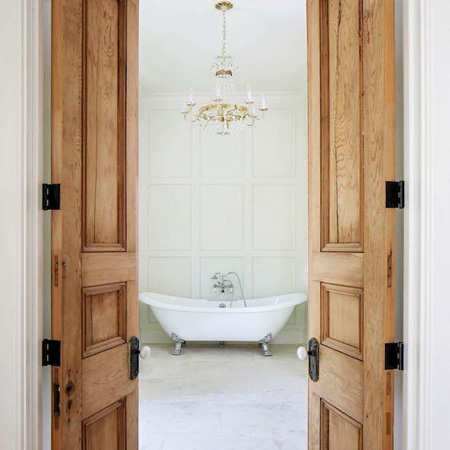
Space saving doors
Doors can take up a lot of floor space, but by dividing the door into two halves you are able to cut the standard 820mm arc down to 410mm - saving you floor space.
23/10/2017

Fitting a conventional door to an opening takes up an 820mm arc of floor space. By dividing the door in half, each section only takes up 420mm on either side - a drastic saving of floor space, especially in a small room like a bathroom, laundry or hallway.

To hang a split door you can cut any standard hollow core door or timber door in half. When using a hollow-core door you add timber strips to reinforce the frame. All doors have a rebate along the meeting edge to allow an overlap when the doors are closed.
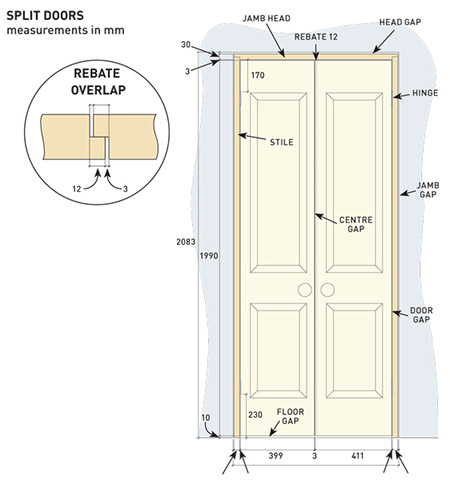
1. Measure the internal width of the rebated jamb in the door frame, then subtract 3mm from each side, as well as 3mm from the middle. Measure the door height and subtract 3mm from the top and 10mm from the bottom to allow for floor clearance.
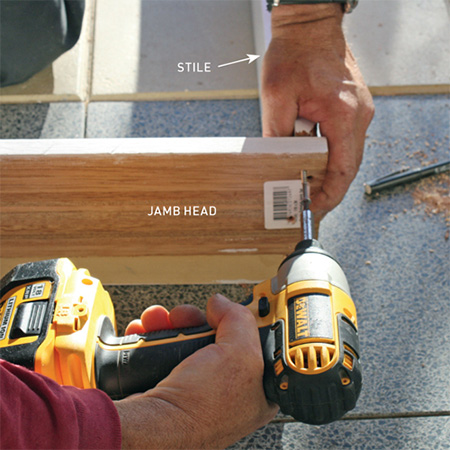
2. Butt the stiles up against the rebated head piece. Use wood glue and drill [4] 2.5mm countersunk pilot holes and secure with screws. Check that the corners are square.
GOOD TO KNOW: The doors in this project were fitted to a door opening that was not fitted with a frame. You can modify this project to fit split doors into a steel or timber frame.
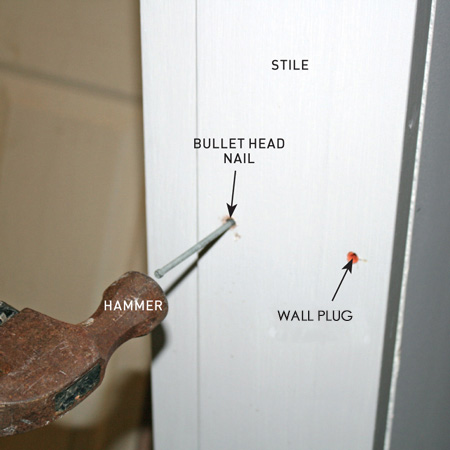
3. Drill three rows of 5mm dia holes into the brick mortar joints - or steel frame if there is one already installed - on both sides at top, centre and bottom. Push in 5mm wall plugs and secure the jamb in place with galvanised nails. Check that the stiles are plumb all round.

4. To cut the door in half, measure to draw a vertical line down the centre of the door (front and back). Mark a second cut line 6mm to the left of the centre line on both sides.
GOOD TO KNOW: After cutting these will form the 12mm rebate to allow the doors to overlap when closed.
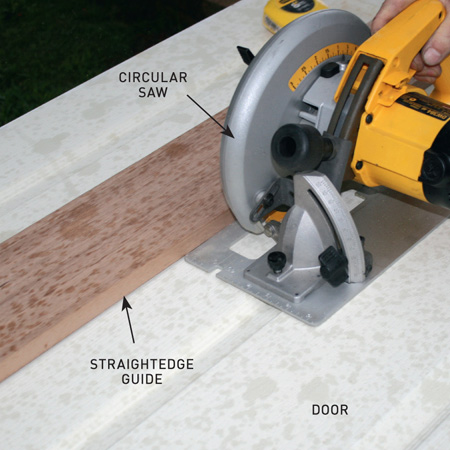
5. Place your door on a couple of benches or sawhorses to trim. Set the blade cutting depth to 10mm. Use a straightedge clamped in position as a guide for cutting along the 6mm line. Turn over the door and repeat on the reverse side.
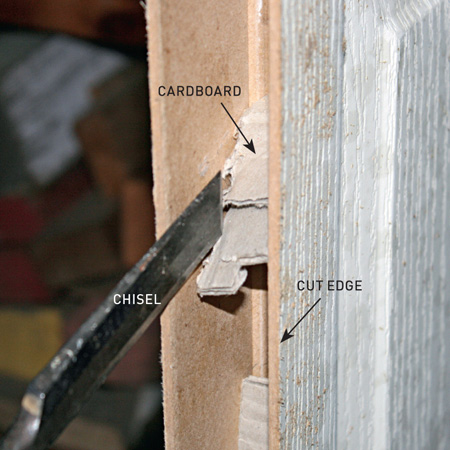
6. Use a chisel to remove the cardboard ribs between the door faces. You need just enough space to fit the timber inserts.
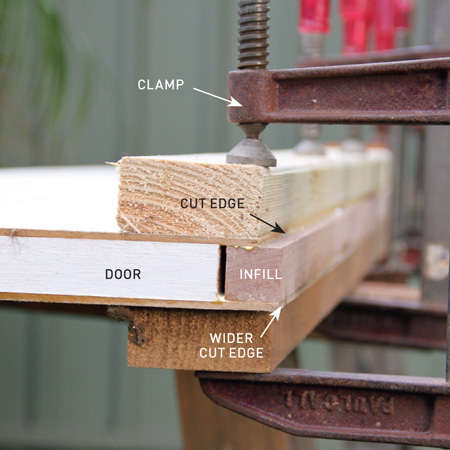
7. Cut lengths of 32 x 32mm pine PAR to fit into the gap along the centre cut line. Place a bead of wood glue along both sides and push into position. Make sure the edges are flush and then clamp for an hour or two.
GOOD TO KNOW: If required, you can hammer in a few panel pins along the length to ensure the inserts are firmly fitted.
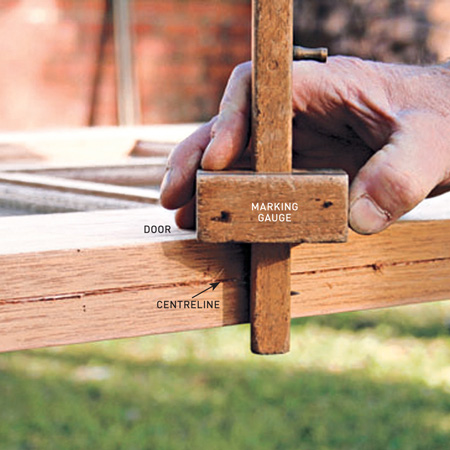
8. With a marking gauge, draw a centre line on the inside edges of both doors. On the outside face of the left hand door and inside face of the right hand door, mark lines 12mm from the meeting edges - from the top to the base.
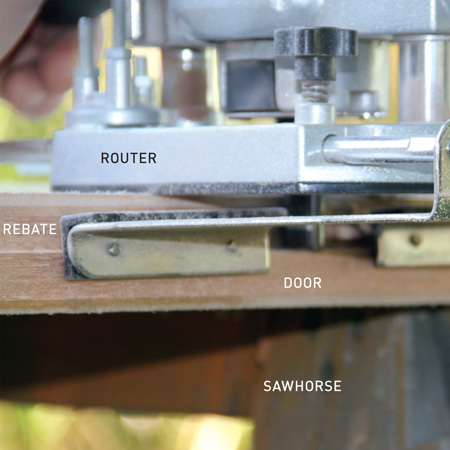
9. With your router set up with a fence and straight cutting bit, make three passes along the edges, removing about 5mm each pass. Sand all sharp edges smooth.
GOOD TO KNOW: The left door will open first, with the 12mm rebate cut from the front face.
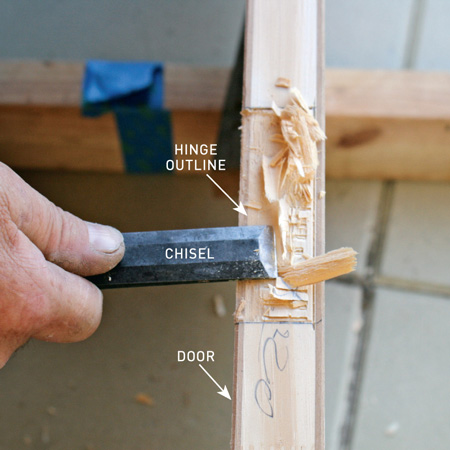
10. For mounting the hinges, mark the hinge outlines on each door and then chisel out. Test-fit each hinge in its housing and then wedge the door in the jamb to mark the hinge positions. These also need to be chiselled out.
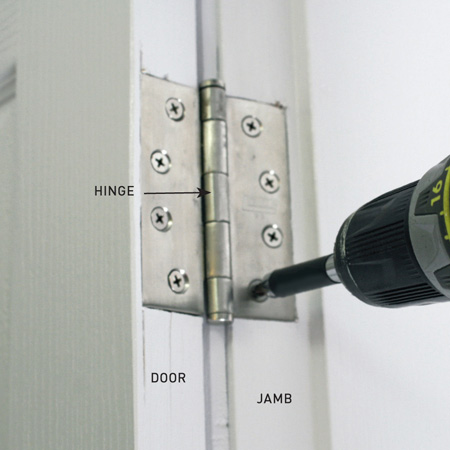
11. Drill pilot holes into the frame and secure with screws in the top and base hinges. Check the doors close smoothly before driving in the other screws. Attach your choice of knobs or handles.
handyman.net.au