
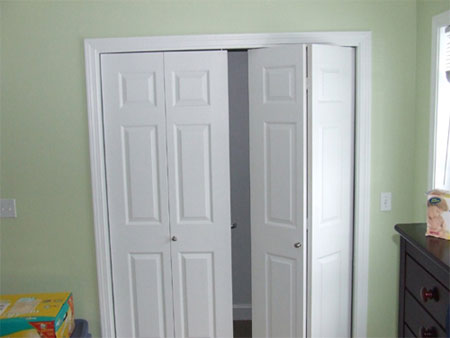
Install bi-fold doors
I have recently done quite a few features on closet door options, both from a design perspective and from a DIY closet door option. Bi-fold closet doors are another space-saving door option that is decorative and do-able.

The level of effort in installing bi-fold doors really depends on the condition and type of door jambs you already have. In new construction this is pretty straight forward. You just trim out the door opening as if it were going to be a cased opening.
If you’re not familiar with the term “cased opening” then let me quickly explain. A cased opening is a door or window opening that gets a very simple trim detail. You use flat material for the jambs (top and sides) and then use your normal casing around the outside of that. The real difference between a cased door opening and a regular door are the stops on the jamb of a normal door.
HERE'S HOW:
1. Install top track
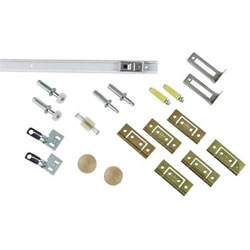
The first step is to install the top track along the top jamb of the door. To determine the location of the track , measure a nearby regular door. Measure the distance from the front edge of the jamb to the centre line of the door panel, then set your track to the same measurement. That way the doors will close and look like the regular doors in the rest of the house. The track comes with some small wood screws that easily attach the track to the jamb.

2. Install lower door pivot
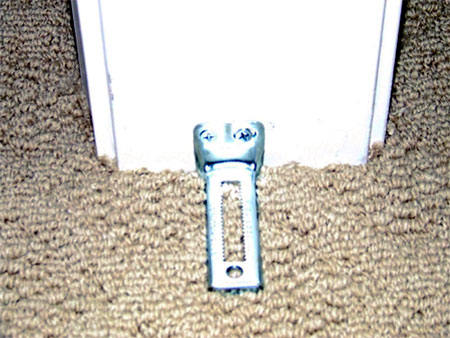
The next step is to install the lower pivot bracket. The bracket holds the lower pivot pin in the door. If you have carpeted floors, I recommend that you only put screws in the upper leg of the bracket into the jambs. If you try to put a screw in the lower arm through carpet you’ll most likely end up pulling the carpet yarn and ruining your carpet.
3. Install pivot and roller pins
The next step is to install the three different pivot and roller pins. The door closest to the jamb gets two pins, one top and one bottom. The top pin is spring loaded and allows you to take the door in and out of the brackets. The lower pin controls the height of the door off the floor. The other door only gets one pin on the top. That pin is a little plastic roller wheel that allows the door to follow the upper jamb track.
Each of the pins can easily be installed in the door using a hammer. (Typically most bi-fold doors come pre-drilled for the pins, if they do not follow the directions with the bi-fold door hardware on the proper size and location of the holes.)

4. Hang the doors
The last and probably hardest step is installing the doors. The easiest way to do this is to stand outside the closet and tip the upper portion of the doors away from you. Line up the upper pivot pin and the upper roller into the pivot hole and track. Once they are lined up you can slowly push the bottom of the door towards “vertical” until it is near the lower pivot bracket.
Now the hard part: The easiest way to get the lower pivot pin onto the bracket is to place a wood chisel under the door and pry it up. (The upper pins are spring loaded so that you can lift the door up.) Once you pry up the door slowly move the door back until the pivot pin is directly above the slot in the lower pivot bracket.
The last step is to align the doors and install the hardware. The upper pivot point can be adjusted left and right by loosening a screw in the bracket. The lower pivot pin can be moved left and right by simply lifting up on the door with the chisel. Install the door pulls and you’re all done.
homeconstructionimprovement.com