
Make A Table For The Garden Or Patio
Use meranti, saligna or PAR pine to make this table for your garden or patio.
18/07/2021
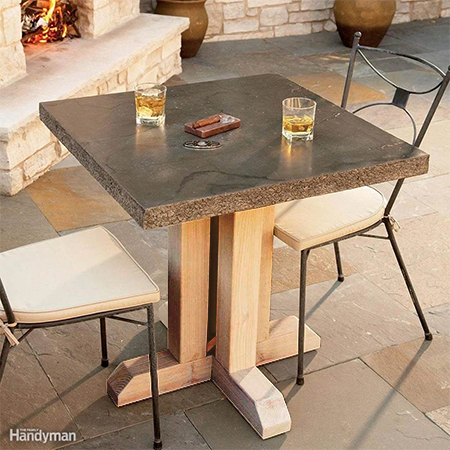
Adding an outdoor area to the garden lets you enjoy dining outdoors, whether it's a large patio table set or a more intimate table and chairs. This concrete tabletop can easily be made using readily available cement products that you can purchase at any Builders or hardware store plus it is extremely easy to make.
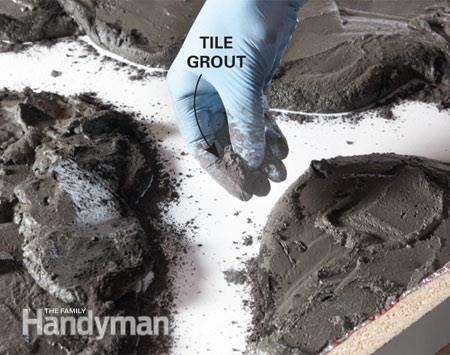
If you look closely at the tabletop you will be able to see that the concrete top resembles marble or granite and this was achieved by using grout powder to mimic dark veins that run through the concrete.
Make the table base from PAR pine that you will find at Builders Warehouse countrywide, or substitute with PAR meranti or saligna. The latter two woods are better suited to an outdoor environment but if pine is protected properly it should also be fairly weather-resistant.
YOU WILL NEED:
Concrete mix (cement and sand)
Spray lubricant (spray n cook or cook n bake)
Scrap plywood or melamine for the form
Wire grill
Buckets for mixing and pouring
straight edge
Angle grinder
Piece of plastic large enough to cover size of tabletop
Tape measure and pencil
Rubber gloves
HERE'S HOW:
The Concrete Tabletop
It is important to note that the concrete top for the table is cast upside down. This will ensure that the top of the table is perfectly smooth
Make up the form (frame) for the table to the size that you want or follow the instructions for a tabletop as shown in the top image.
GOOD TO KNOW: Once mixed the cement hardens fast. In warm weather, it will become stiff and difficult to work with in just 15 minutes, so make sure you have everything ready for the next step. Read each step carefully before actually starting on the project.
Step 1
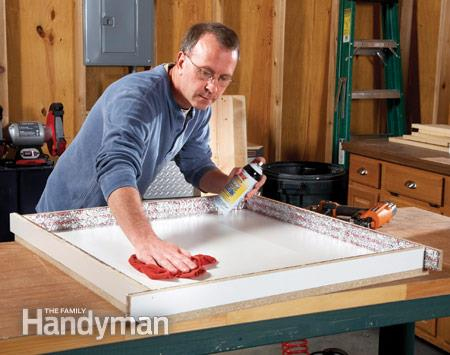
Cut the form base to 800 x 800mm. Cut the [4] form side to 80 x 815mm. Assemble the base by attaching the sides to the base with screws. Overlapping the ends of the sides make it easier to remove the form once the concrete has cured. Set the completed form on a level work surface and put down drop cloths to protect floors.
GOOD TO KNOW: Before spraying the form with spray lubricant, use a pencil to draw a random pattern on the form base. Nothing fancy, just an outline of how you want to veins to look once the tabletop is finished.
With the form assembled, spray the inside liberally with spray lubricant. This will coat the concrete and make it easier to remove the form.
Step 2
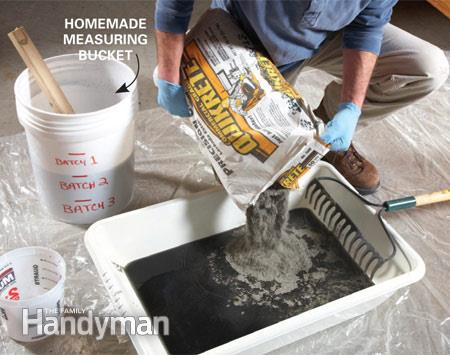
Mix up the cement batches in small quantities to prevent drying as you work. Have a measuring cup on hand to measure the quantities precisely in order to perfectly replicate each batch of cement. If you want to add a colouring pigment to the cement mix, do this at this stage of the process. Only make and pour enough cement for the mounds. Leave plenty behind to add more in Step 6.
Step 3
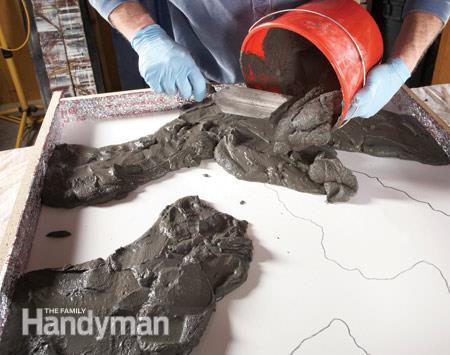
Pour the cement into the base to form mounds around the drawing that follows the vein patterns you want.
Step 4
In the gaps between mounds, sprinkle rows of coloured grout to resemble veins. The grout will create dark or light veins depending on the grout colour used. Alternatively, you can use cement pigments to colour the cement.
GOOD TO KNOW: It is a great idea to practice the vein process on a small project so that you know how much grout to sprinkle in to get the effect you want. Perhaps make a small side or coffee table with a concrete top.
Step 5
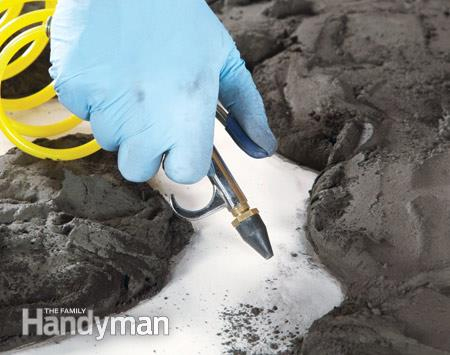
Use a blower or air compressor to spray the grout against the cement piles. Don't set the compressor too high, you don't want to blow the grout away.
Step 6
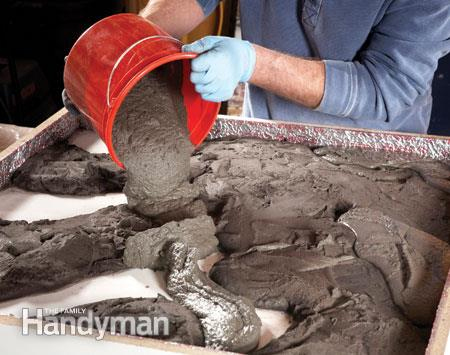
Mix and pour the remaining cement mix over the bare areas and grout. Give the form a few taps and jiggles to remove any trapped air bubbles.
Step 7
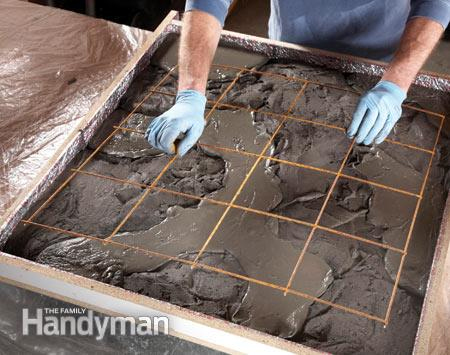
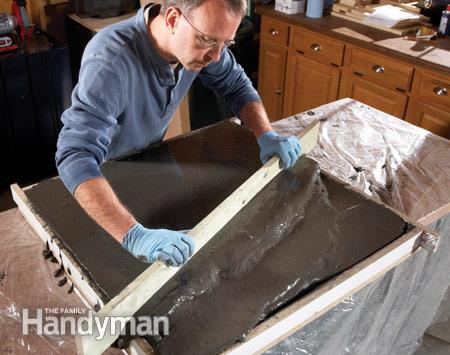
Use an angle grinder to trim the wire mesh to fit inside the form and fill up with cement mix.
Step 8
Use a straightedge to scrape off excess mix for a neat finish and then screed the surface with a zigzag motion using the straightedge. Immediately cover with a piece of plastic. If the cement mix dries to quickly it will shrink and crack.
Step 9
Allow the concrete to cure for at least 7 to 10 days. If the weather is hot, lightly spray with water every 2 to 3 days to slow down the process. The longer it takes to cure the more durable to tabletop will be. Remove the form by tapping with a hammer to loosen and remove. You might need a helper to turn the top right side up.
FINISHING:
Step 9
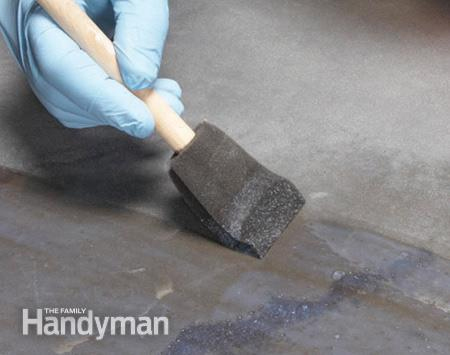
The top of the concrete should be smooth but if not, sand with medium-grit sandpaper.
Finishing off the top with a sealer will add depth and deepen the colour and you can even use a tinted sealer to add more colour. You need to wait a while before applying the sealer - approximately 28 days from casting.
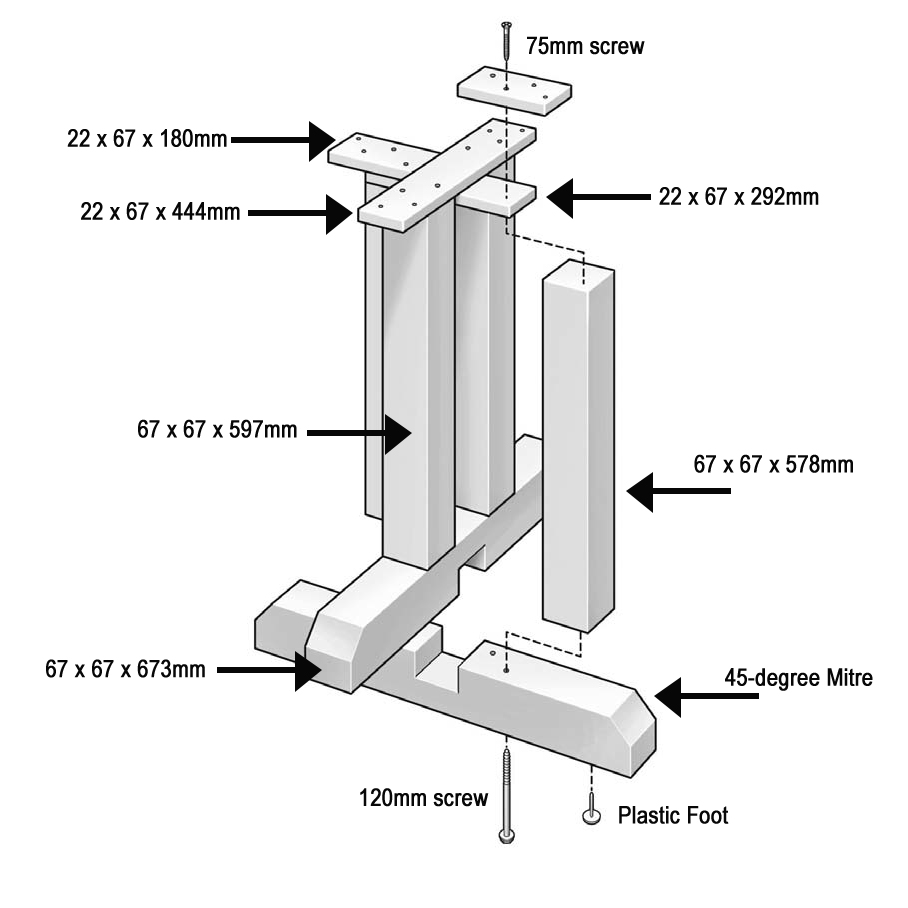
The Table Base
Use the diagram below to make the base for the tabletop. We recommend using meranti or saligna for the base as these do fairly well outdoors, but you can substitute with PAR pine if the wood is treated regularly with an exterior sealer.
The table base is joined using half-lap joints and you can do these on a circular saw or mitre saw by setting the cutting depth. Do a series of cuts to get the correct width and remove this with a sharp wood chisel.
Secure the base to the tabletop with [8] concrete screws.
CLICK ON IMAGE FOR ENLARGED VERSION
Now your durable wood and concrete table is ready for use. It is a good idea to lift the base off the floor to prevent wood rot and you can do this by adding plastic feet to the base of the table.