
Make a Mini Picnic Table and Stools
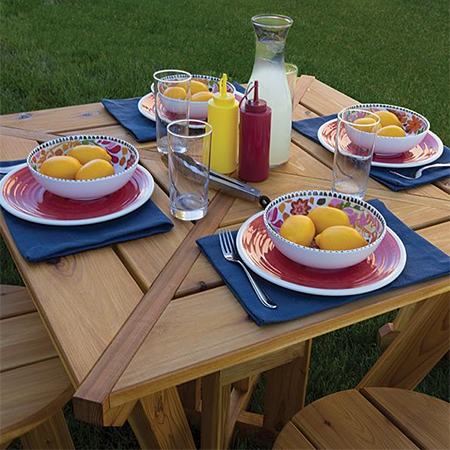
This mini picnic set is just right for kids and if you make it now it will be ready for use in the garden when summer arrives.
06/07/2021

This DIY mini picnic table and stools are just right for kids and if you make it now it will be ready for use in the garden when summer arrives. Having all the components cut to size at your local Builders Warehouse will make it easier to assemble the set quickly and accurately.
After making the picnic set, sand everything nice and smooth before applying your choice of clear or tinted exterior sealer. Be sure to follow the manufacturer's recommendations for proper application and follow this up regularly to ensure a long lifespan if kept outdoors.
You can make the mini picnic set using pine, meranti or saligna or other hardwood.
YOU WILL NEED:
1 of 38 x 89 x 1016mm - Table Runner
4 of 38 x 89 x 560mm - Table Upright
4 of 38 x 89 x 641mm - Table Angled Upright
1 of 38 x 89 x 1295mm - Table Rail
2 of 38 x 89 x 490mm - Table Half Runner
2 of 38 x 89 x 630mm - Table Half Rail
4 of 38 x 89 x 203mm - Table Brace
4 of 25 x 140 x 280mm - Table Inner Slat
4 of 25 x 140 x 572mm - Table Middle Slat
4 of 25 x 140 x 864mm - Table Outer Slat
4 of Stool Runner , 38 x 89 x 457mm -
16 of 38 x 3 1/2" x 273mm - Stool Upright
4 of 38 x 89 x 406mm - Stool Rail
8 of 38 x 89 x 210mm - Stool Half Runner
8 of 38 x 89 x 184mm - Stool Half Rail
16 of 38 x 89 x 254mm - Stool Brace
12 of 25 x 140 x 457mm - Stool Slat
38mm pocket-hole screws
50mm pocket-hole screws
64mm pocket-hole screws
TOOLS:
Drill/Driver plus assorted bits
Jigsaw plus clean-cut blade
Mitre Saw
Orbital Sander plus assorted sanding pads
Carpenter's square or corner square
Tape measure and pencil
Safety gear
HERE'S HOW:
GOOD TO KNOW: As you cut the component pieces, mark them to ensure that you attach the correct pieces when assembling.
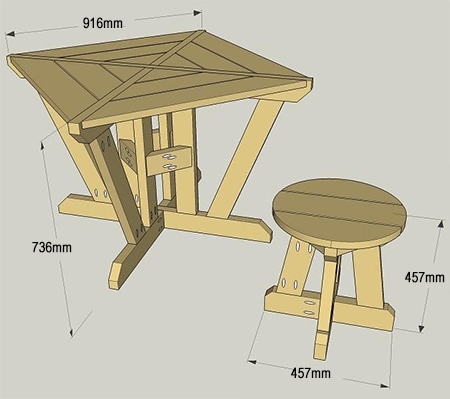
Step 1
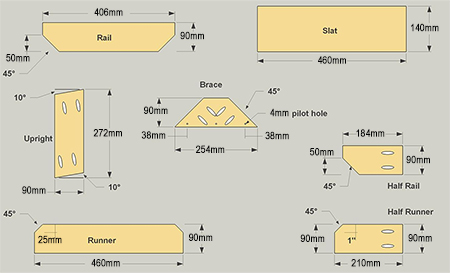
For quick and easy assembly have all the pieces cut to size with appropriate angles cut as shown in the diagram below. Once all the pieces have been cut to size, use the diagram below to drill pocket-holes. Set the pocket-hole jig for the thickness of the material you are using.

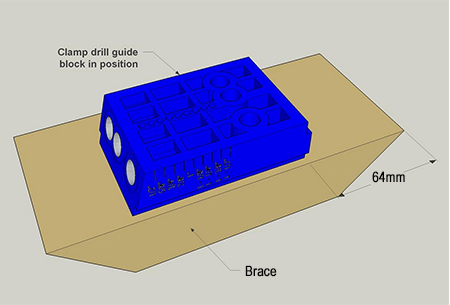
Step 2
Take out the drill guide from your pocket-hole jig and clamp this onto a Brace, allowing a 64mm gap at the end. Drill [2] pocket-holes and then remove and repeat for the other end. Repeat this process for all the Braces.
Step 3
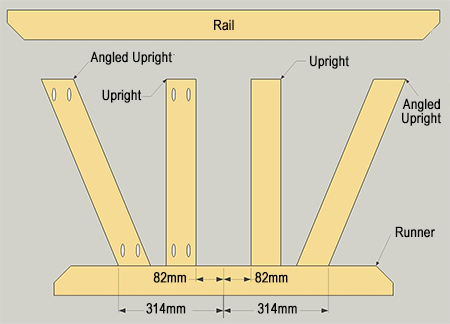
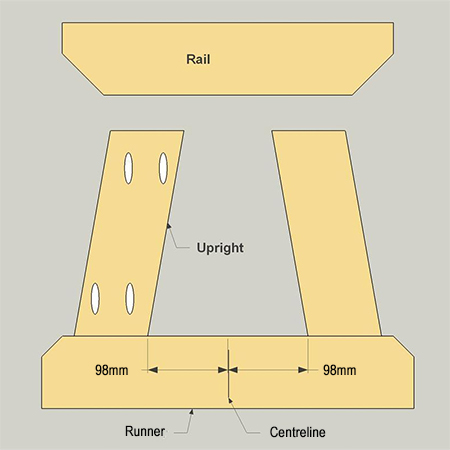
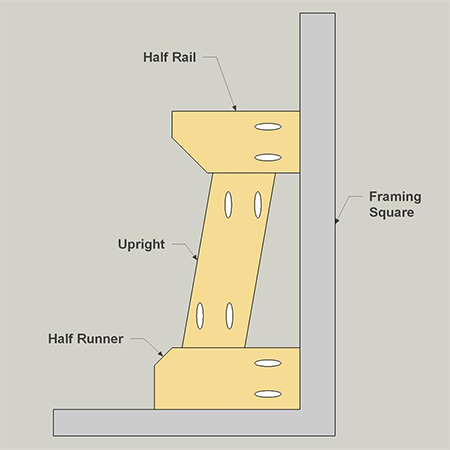
Measure and mark the centre line on the top of the Runner and then measure from this mark for the location for the inside edges of the Uprights. Also, mark the outside edges of the Angled Uprights. Centre the Rail over the Uprights and secure with 64mm screws.
Step 4
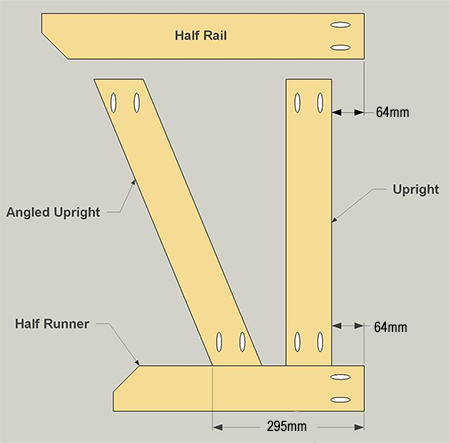
To build the Half Frames, measure and mark as shown in the diagram below. Place the Half Rails with the inside ends protruding 64mm over the inside edges of the Uprights. Secure with 64mm screws.
Step 5
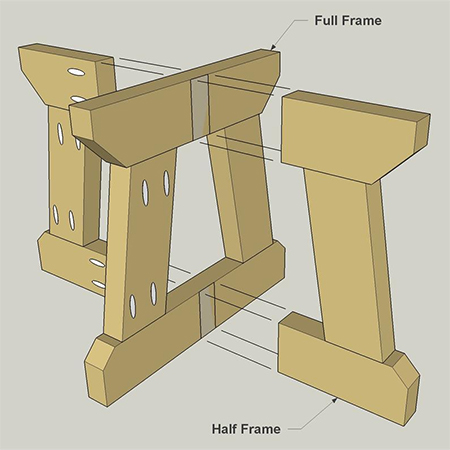
Position [1] Half Frame on the Full Frame. Double-check that the edges are flush before securing with 64mm screws and then repeating for the other side.

Step 6
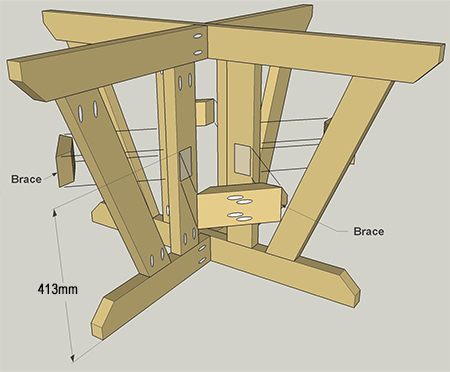
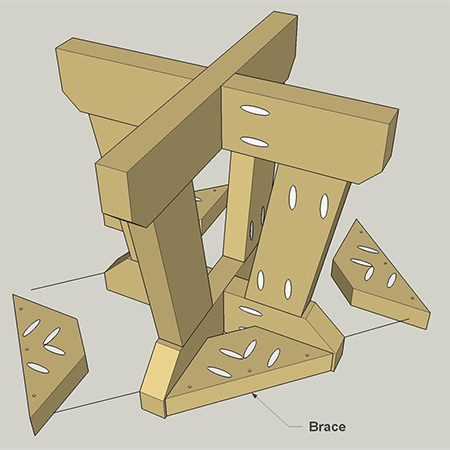
Measure and mark as shown below for mounting the Braces onto the assembled frame using 64mm screws to secure.
Step 7
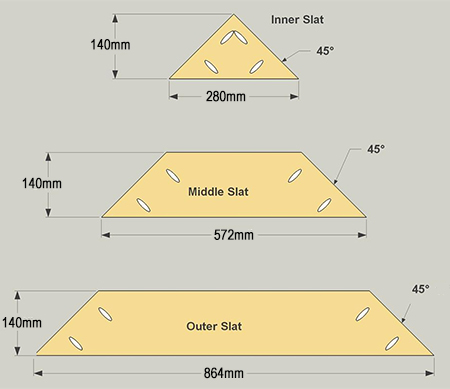
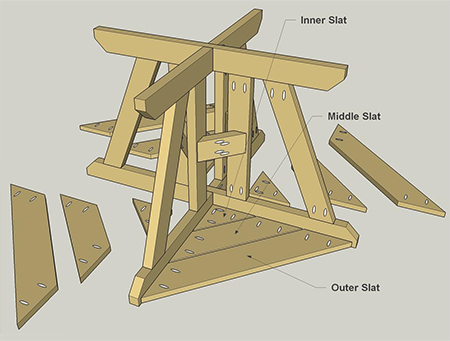
Cut the Inner, Middle and Outer Slats as shown below and then drill pocket-holes in the locations shown on the diagram.
Step 8
With the Base Assembly face down, secure all the Inner Slats then add the Middle Slats and finally the Outer Slats and secure with 38mm screws. Note that there is a slight gap between all the slats.
GOOD TO KNOW: Before moving on to the next step, do all the finishing required on the assembled table. If you are using plugs to cover up the pocket-holes, glue these in place before doing any sanding.
Step 9
Moving onto the stools, cut all the sections to size as shown in the diagram below and then drill pocket-holes in the locations shown. You also need to drill pilot holes in the Braces for attaching the Slats.
Step 10
Build the Full Frames as shown below and centre before securing with 64mm screws.
Step 11
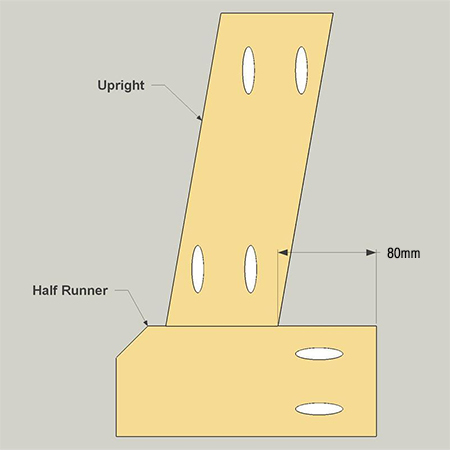
Measure and mark as shown to secure the Upright to the Half Runner and secure with 64mm screws.
Step 12
Use a carpenter's square or corner square to add the Half Rail and then secure with 64mm screws.
Step 13
Assemble the Stool Base as shown in the diagram below using 64mm screws.
Step 14
Time to add the Braces as indicated. Make sure to allow equal space between the tips of the mitres and ends of the Rail and Half Rail.
Step 15
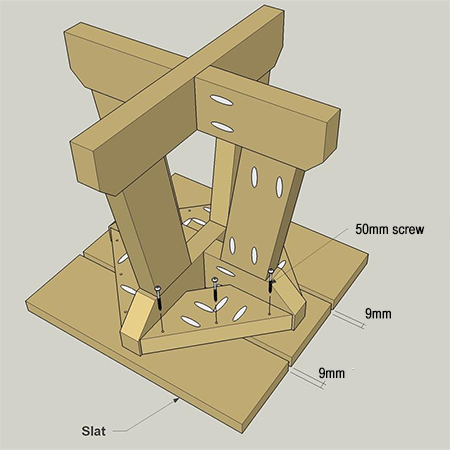
Secure the Slats in position, leaving a small gap between the Slats. Drive in 50mm screws as shown.
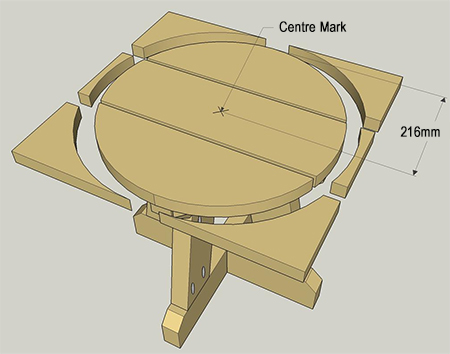
Step 16
To finish off the Stool, use a jigsaw to trim off and create a circular shape. An easy way to draw a perfect circle is to use a hammer, nail and a length of string to hold a pencil. Hammer the nail into the centre point, add the length of string (cut to the size of circle you need) and fasten on the pencil to draw the line.
FINISHING:
Complete any necessary sanding before applying a quality exterior sealer. You can add stain to the sealer or buy a tinted sealer if you want to finish the picnic set with a wood stain.
kregtool.com