
How to Lay a Decorative Brick Path
We are a month away from spring and the start of the rainy season in Gauteng, which means it is the best time for outdoor projects such as laying a decorative brick path.
02/08/2022
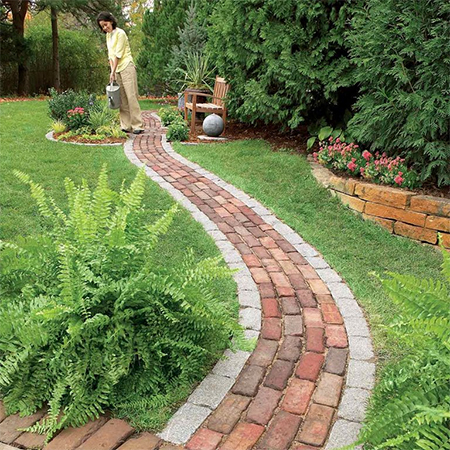
With just a month to go until spring and the start of the rainy season (in Gauteng) and before the lawn starts to put out new growth, is the best time to get stuck into any outdoor projects you have, like laying this decorative brick path. A simple brick path can lead from the house out into the garden, or it can take you to an unexpected spot. You can also use a garden path to lead you to a hidden feature.
Using clay and cement bricks is a great way to use recycled bricks if you know someone who has them, but even buying them new for this project won't break the bank and is still cheaper than other options for laying a garden path. The bricks you use for the garden path can be face bricks, clay stock brick, cement stock bricks or concrete pavers. One thing that is great about this project is that you can do it yourself and have all the supplies you need delivered to site by Builders. It should not take more than a couple of weekends to complete the project and you can hire a labourer for a day to do the hard digging.
Set aside a couple of weekends and order all your tools and supplies at your local Builders and have them deliver everything so that you are ready to go.
YOU WILL NEED:
Calculate how many bricks you need based on the formula of 48 bricks/square metre
Sand
Spray marker paint
OPTIONAL: Landscape edging
Scrap wood for screeding
Wooden stakes
TOOLS:
Garden spade
Garden broom or stiff sweeping brush
Tape measure and pencil
Spirit level and straight edge
Hammer and mason's chisel
Manual hand tamper (or high a mechanical tamper)
Wheelbarrow
Safety and comfort gear
HERE'S HOW:
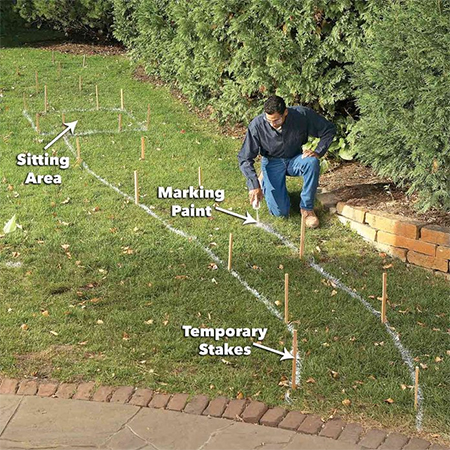
Step 1
Decide where you want to lay the path and mark this area with spray marking paint and then insert wooden stakes, as shown below. Once everything is marked out, you can then calculate the number of bricks you need to order these and the sand. Always calculate in a few extra bricks for breakage, especially when you need to cut bricks to fit.
TIP 1
Gradual curves will be easier and simpler than trying to cut sharp corners or angles.
Step 2
This next step involves quite a bit of hard work, but you can always hire casual labour to do the job for you. You need to dig out a trench that is wide enough and deep enough to lay the bricks so that they will be flush with the surround level. The depth is determined by the layer of soil and the height of the bricks to be laid. The depth should be around 180 to 200mm, which can be variable according to the level and/or any slope.
TIP 2
Make sure to check that there are no municipal services in the area where you will dig for the path. Consider sewer lines and water pipes that are not always laid deep enough, and sprinkler lines.
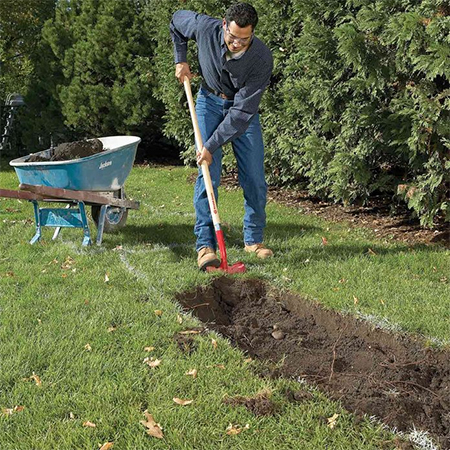
Use a spade the cut in around the edge of the marked area and then start removing the top layer of turf. This can be put aside if you plan to use this somewhere else. After removing the layer of turf, dig out the entire area to the required depth.
Step 3
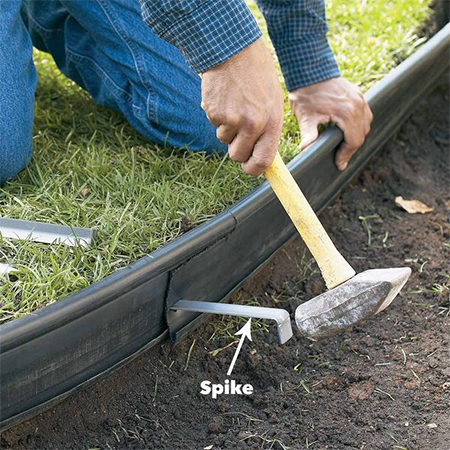
At this stage of the project, you can lay any garden edging that you want to incorporate in the path and install this as recommended by the supplier.
Step 4
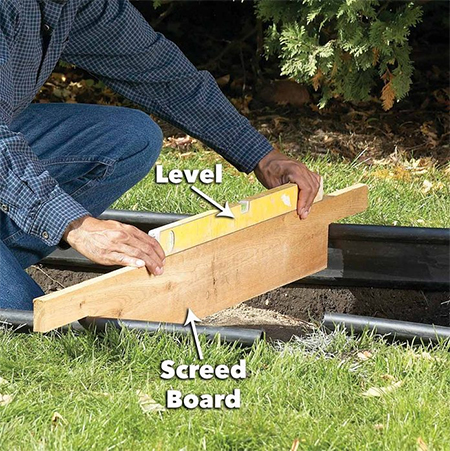
Use scrap timber to make yourself a screed board. This is used to ensure the correct level as you work from one end of the path to the other. Use a shovel to place the sand within the trench.
Step 5
Use a manual or mechanical tamper, which can be hired for a day, to tamp down the sand. Go over the sand a few times until it is even and nicely compressed. Lightly spraying the sand with a hosepipe and sprinkler will help to compact the sand.
TIP 3
Make a tamper using a piece of scrap board attached to a length of pipe or wood.

Step 6
After tamping the sand, use the screed board you made to level out - leaving enough depth for the bricks to be laid on top.

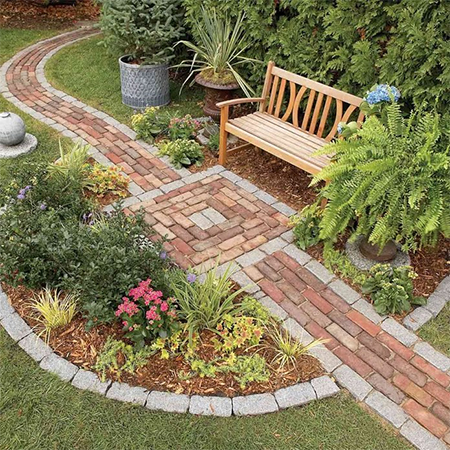
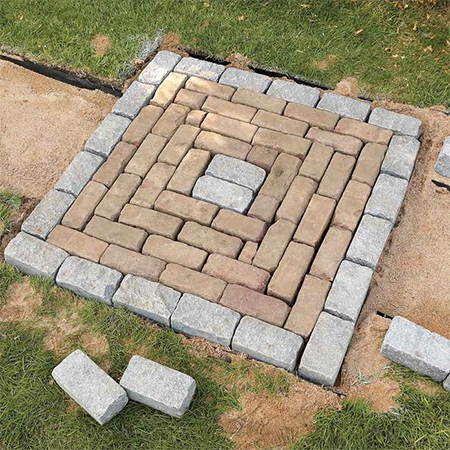
Step 7
For those wanting to incorporate a seating area like the one shown here, start laying the bricks in your designed pattern until the shape is complete. Design the shape so that no brick-cutting is necessary to make the job easier.
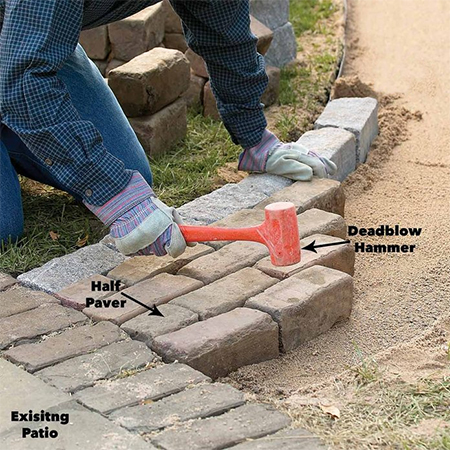
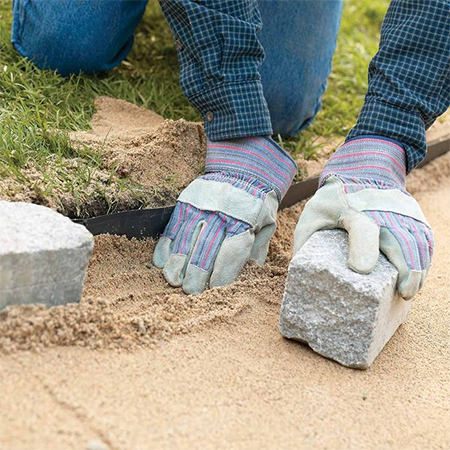
Step 8
Working away from an existing patio, start laying the bricks. The first row will start with full and half-bricks to create the staggered effect of this path design. You can cut a few bricks in half so that they are ready and waiting to be laid.
TIP 4
Have a helper on hand for this step so that they can pass the bricks to you as you work from one end to the other.
TIP 5
To keep the level consistent along the length, use your hand to remove or add extra soil.
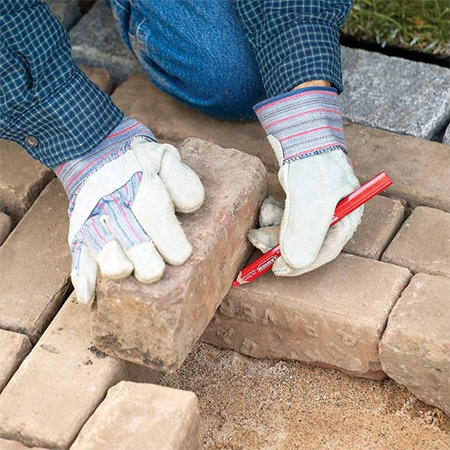
Step 9
As you reach the end of the path, you will need to use half-bricks again to fill in the edge of the line. Cut the bricks using a hammer and mason's chisel.
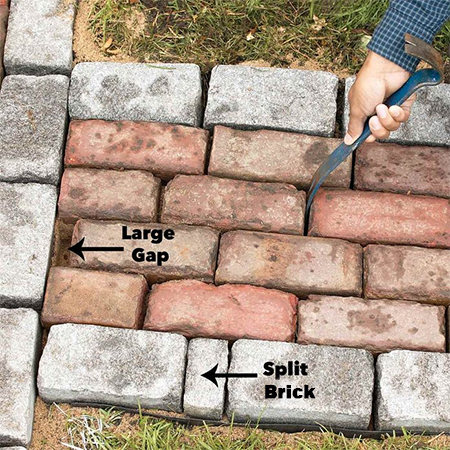
Step 10
Use a tool to lever the bricks tightly together so that there are no large gaps. You can do this intermittently as you lay bricks along the length of the path.
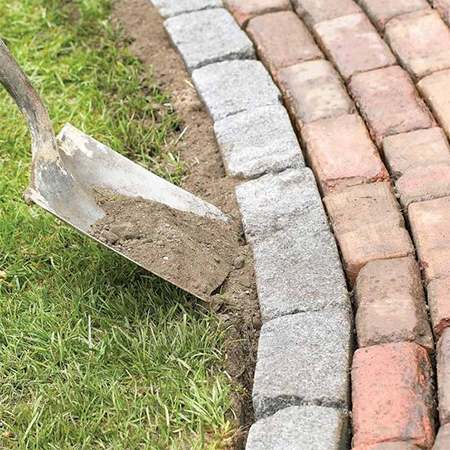
Step 11
Use a spade the fill in around the edge of the laid bricks. If you prefer, you can use a 4:1 mix of sand and cement to make an apron down each side of the brick path.
Step 12
The last thing you need to do to finish this project is to place sand over the bricks to fill up any gaps. Lightly tamp the bricks with the tamper to ensure the sand fills up the gaps and then repeat this process until any gaps are filled.
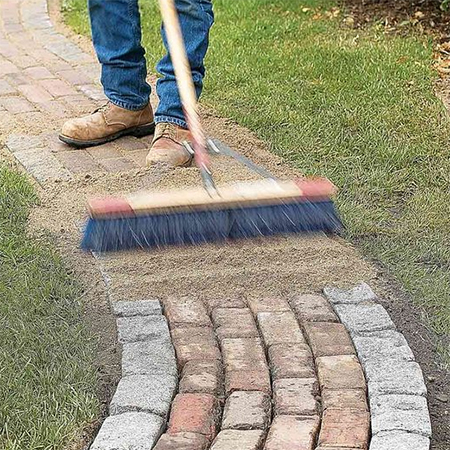
images: family handyman magazine
TIP 6
If, a few days after installation, you notice that gaps reappear, go over again with sand and sweeping brush.