
How To Build Your Own Louvered Roof
In this project, we show you how to build your own louvered roof yourself.
16/02/2023
A
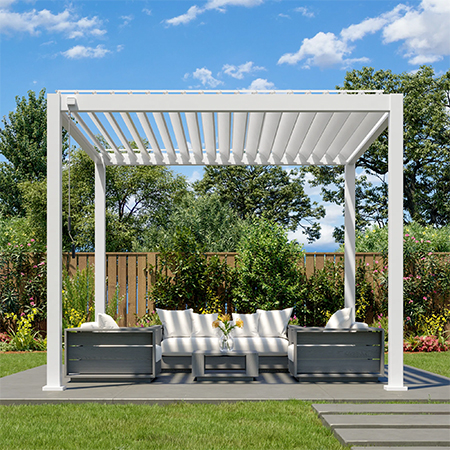
louvered roof has become really popular all over
the world. They enable homes to have a cool,
shaded area where residents may unwind away from
the sweltering sun. Therefore, it is not
surprising that more people have been
constructing
louvered roofs in their backyards.
This is a great project to take on if
you enjoy
DIY projects. You could complete this
project yourself, but it would be easier with
someone else to help you. In this article, we
are going to help you build your own louvered
roof yourself.
Equipment And Tools Required
You will need the following to make your own louvered roof:
- Wooden Posts
- Wooden Beams
- Louvers
- Posts
- Braces
- Brackets
- Roof Bar
- Rails
- Washers
- Machine Bolts
- Nuts
- Deck Screws
- Measuring Tape
- Nails
- Saw
- Drill
- Hammer
Step 1: Prepare Area
Prepare your deck for the posts. Instead of starting with the deck, prepare the ground if you plan to set the posts into it. A good tip is to ensure there is no lawn furniture or other obstructions. Thus, clean the area around the area where the posts will go.
Step 2: Add Your Posts
You must decide how tall you wish for your
roof to be. Usually, 6 to 8 feet from the ground
is a good height. Once you are happy with the
height, you should place the posts into the
ground or drill them into your decking.
When drilling into your decking, you will need a
brace, to help keep your posts secure.
Step 3: Create A Frame
On top of each post, you should drill in a wooden beam, to connect the four posts together. This will make the outline of a frame. Then in the center of the frame you have created, either lengthwise or width wise, you need to add a beam to add more support to the frame. Add machine bolts once you have nailed everything in to provide more support.
Step 4: Add Rails
Now you need to cut your rails to ensure they
are the right size. Install the rails by
drilling them into the interior of your frame.
This is when you need to think about which way
you wish for your louvers to be facing.
As your frame should be split into 2, due to the
center beam, you need four tracks. When drilling
the tracks in, you should drill them in at a 45
degree incline, this will help when opening and
closing the roof later.
Step 5: Install Brackets
If there are no holes in your tracks, you may
need to drill in holes that are all evenly
apart. Yet, you should ensure that the brackets
will still overlap slightly.
Otherwise,
you can start drilling your brackets into the
holes. You want to ensure that you don’t over
tighten the brackets, as they should swing
freely.
Step 6: Cut And Install Louvers
Measure and cut your louvers, so they are the
correct length. The louvers should be able to
stretch from one bracket to the other easily.
Before attaching the louvers, it is your choice
whether you decorate them or leave them plain.
Each side should be drilled into a
bracket.
Step 7: Making The Roof Move
Once all the louvers are attached, you need
to add your roof bar. This should be a long,
thin piece of metal with holes drilled in. With
screws, drill your roof bar on the ends of your
louvers on each side, similar to your brackets.
This will connect the louvers together.
At this stage, you could add a dowel on a hook
or a chain with washer on, to the end louver of
each set to control them. Then your roof is
ready to go and for you to start enjoying the
benefits that a louver roof can have.
Final Thoughts
A louver roof is a lot easier to make than
you may first realize. If you wish to have an
electrical louver roof, then you would have to
hire a professional company to install it for
you. However, you can easily create your own
louvered roof out of any spare wood you have.
By following the steps we have outlined
above, you will be able to make your own louver
roof in no time. Although, we do recommend that
you have someone else on hand to help you
install the roof, as it can be a bit of a
challenge to complete by yourself.
We
hope this article has been helpful. Now you can
create your own louver roof for your backyard.