
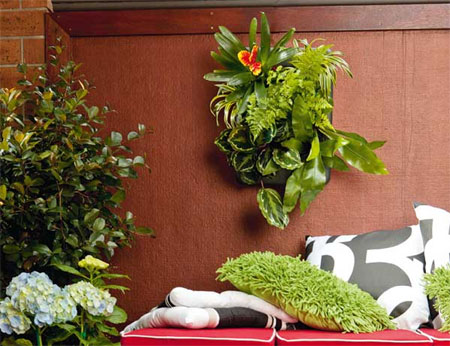
Plant up a vertical garden for indoors or outdoors
Plant a wall-mounted vertical garden to let plants grow over a wall rather than in the ground or in containers. You can use this idea for both indoor and outdoor wall displays.
YOU WILL NEED:
Plastic storage boxes
Craft knife
Drill/Driver and assorted drill/screw bits
Cable ties
Bolts and nuts
Washers
20mm diameter PVC pipe (to a length double that of the storage box)
Rust-Oleum 2X matt black spray paint
Geotextile fabric or landscape fabric
Potting mix
HERE'S HOW:
1. Buy a plastic storage container at your local Builders Warehouse. You will need one that has divided plastic containers, similar to those that hold screws and nails. Rows of soil and plants are held in place by the dividers in the box, which are secured using cable ties attached through holes drilled into the box and the lid.
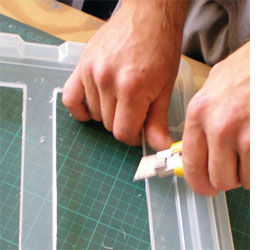
2. Mark around the compartments on the lid about 5cm from the edges, scoring the plastic repeatedly with a craft knife to cut through.
GOOD TO KNOW
Keep the plastic offcuts to attach to the back of the box as reinforcement for securing to the wall.
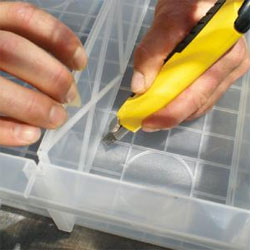
3. Remove the dividers and use a 4mm or 5mm drill bit to make holes in the base edge, about 6cm in from the sides. Drill matching holes in the box then make a hole in the centre of the divider 5mm from the top with two corresponding holes into the lid.
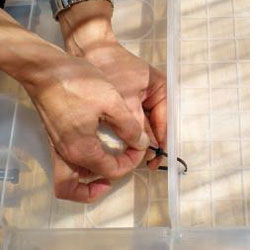
4. Position the dividers back into the box and use cable ties to secure. Drill 4 or 5mm holes through the lid and top of the dividers and use cable ties to secure the lid. Drill 4 or 5mm drainage holes through the box base.
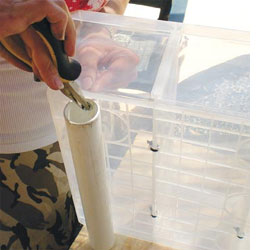
5. Drill 4 or 5mm holes through the bottom of the box and the ends of a 20mm diameter PVC pipe then use stainless bolts, washers and nuts to secure.
6. Spray the box with a plastics primer, leave it to dry then spray two coats of matte black paint and leave to dry.
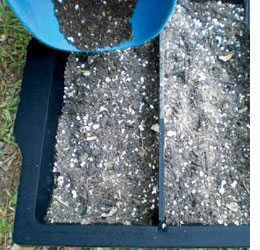
7. Cut geotextile fabric to cover all the drainage holes then use potting mix to fill the compartments, pressing it in firmly. Position another piece of fabric over the box, cut it to size then attach the lid with cable ties through the holes in the lid and dividers. Geotextile fabric prevents soil falling through drainage holes and helps retain moisture for plant roots.
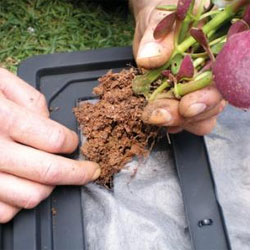
8. Starting at the base, cut holes or horizontal slits in the fabric, feather out the roots of each plant and use a spoon to insert it into a gap, firming the soil around the roots, adding more if needed. Attach the planter to a masonry wall using anchors.
Avoid using big plants that put a lot of weight on the roots and may be dragged out of the soil. Plants that thrive in small amounts of soil are best.
For direct light, choose succulents such as echeveria, sedum and sempervivum. They’re also drought tolerant, making them easy to look after. For a shaded wall, choose bromeliad, small-leaved ferns, birds nest, calathea or begonia as they prefer limited direct sun.
To mount onto the wall, drill out for nylon wall plugs (2 at either side - top and bottom) and then insert screws - leaving the head of the screw to protrude 5 to 6mm out from the wall. Note that the screws should be 16mm longer than the length of the nylon wall plug. Fit keyhole brackets onto the PVC pipe to correspond with the wall-mounted screws, so that the planter fits securely on all four screw heads.