
Decorative Signs for a Veggie or Herb Garden
These decorative signs are ideal for a veggie or herb garden and will make sure you don't forget what is planted and where.
26/05/2019
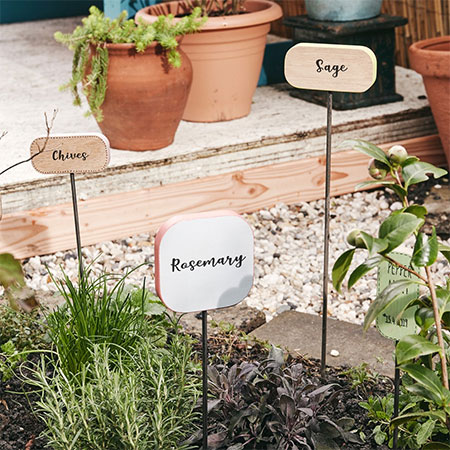
When establishing your own vegetable or herb garden you will want to keep track of what’s growing and where it's planted. These decorative garden signs are easy to make and offer a practical solution for knowing what’s growing and where it is located, and you will find them practical if you have sown a variety of seeds or planted seedlings.
YOU WILL NEED:
Meranti planks or offcuts (or any type of hardwood scraps)
Circular template
Aluminium rod, approx. 6 or 9mm diameter (or substitute with rebar)
TOOLS:
Cordless drill/driver with assorted bits
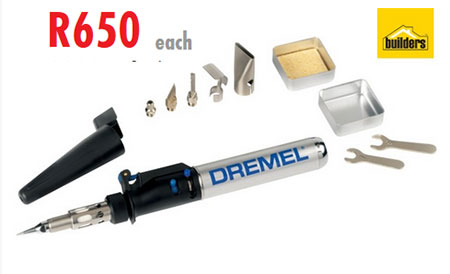
Dremel VersaTip soldering iron
Jigsaw with T101A0 Jigsaw blade
Sandpaper, 120-grit or sanding sponge
Tape measure and pencil and steel ruler
HERE'S HOW:
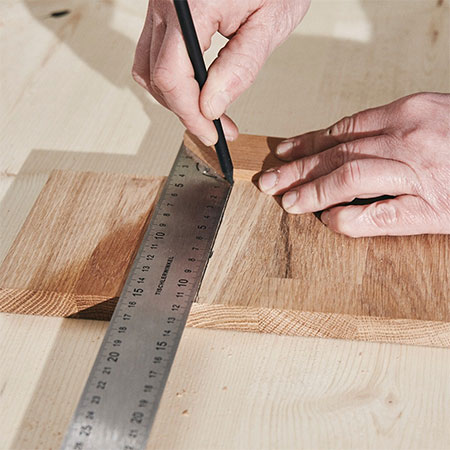
1. Use a steel ruler to mark out the size of your signs. You can make your garden signs as small or as large as you like, or even a combination of both to add more interest.
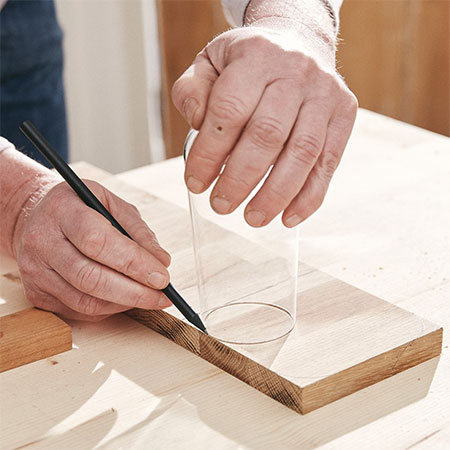
2. Use a circular template to round off the corners - we used a glass.
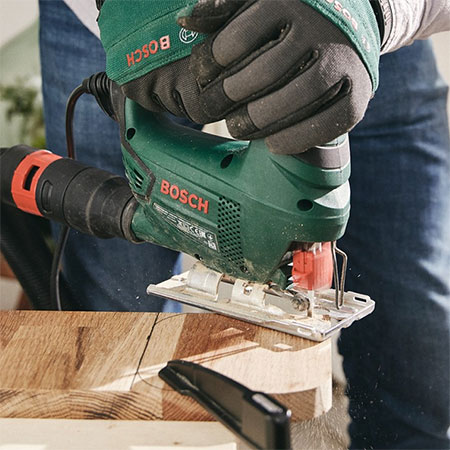
3. Clamp your material to your workbench to cut out the drawn shapes.
4. Sand the cut edges nice and smooth.

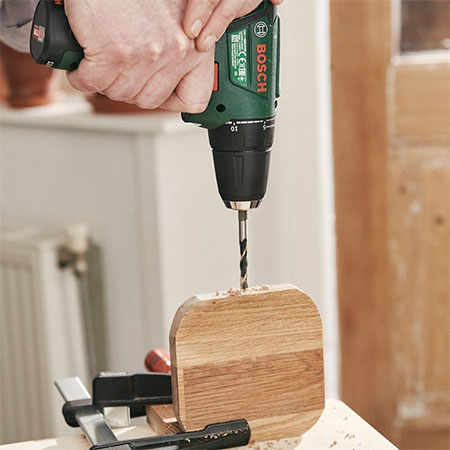
5. Mark the location in the centre of each block for placing onto the aluminium rod.
GOOD TO KNOW: we chose an aluminium rod for this project since it won't rust as quickly as steel.

6. Clamp the block to your work surface as shown below. Choose the diameter of your drill bit according to the thickness of your aluminium rod. Drill the hole about 30mm deep.
7. Painting the wooden signs is optional, but if you do decide the paint them, use a paint suitable for exterior use.

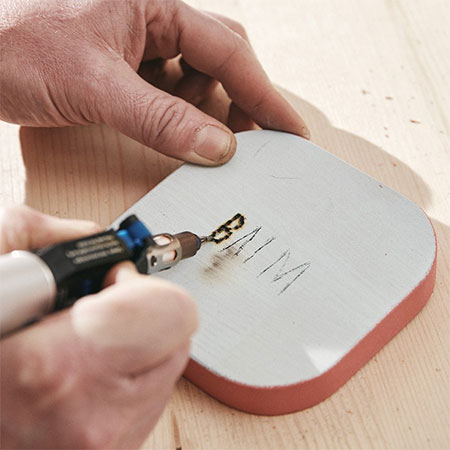
8. Wood burning is an easy way to add permanent wording to your garden signs and also gives the project a particularly attractive finish. Select an interesting font to print out the wording and then use your Dremel VersaTip to burn onto the surface of the signs.
Now all that's left to do is to insert the rod into the hole.
all about diy