
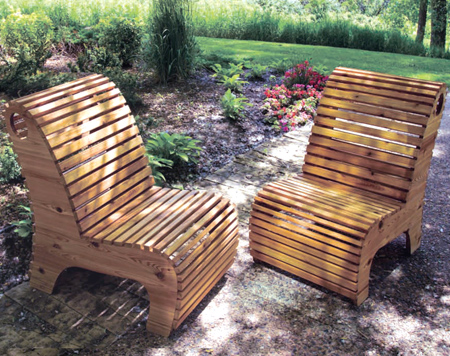
DIY outdoor slat chair
If you need chairs for outdoors, these slat chairs are very comfortable and would look good on a deck or patio, or when creating a cosy corner to sit and relax. They are made of PAR pine that you will find at your local Builders Warehouse and are finished with exterior sealer for maximum protection.
YOU WILL NEED:
QTY |
MATERIAL | W |
L |
ITEM | |||
A |
4 | 19mm plywood | 840 |
840 |
side panels | ||
C1 |
1 | PAR pine | 50 |
560 |
first slat | ||
C2 |
30 | PAR pine | 38 |
560 |
slats | ||
C3 |
10 | PAR pine | 25 |
560 |
slats | ||
C4 |
9 | PAR pine | 19 |
560 |
slats |
Exterior wood glue
120- and 240-grit sanding pads
Exterior sealer
Varnish brush
TOOLS:
Jigsaw, circular saw, mitre saw or table saw
Bar clamps (5 preferably)
Nail gun or hammer
Router or Dremel Trio and roundover bit
Orbital or Random Orbit sander
HERE'S HOW:
Note: The original plan was designed with laminated pine sides, but since our widest laminated pine is 605mm, this works out very expensive. The pine sides have been substituted with 18/19mm plywood to make the chairs more affordable and avoid wastage.
Note: Working with pine can be frustrating as you need to avoid as many defects in the timber as possible. Carefully select your boards and planks and avoid any with knots or defects.
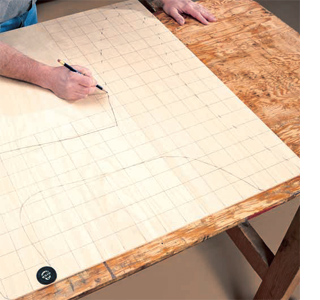
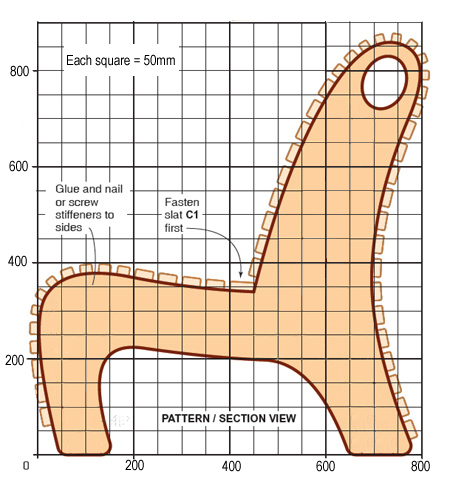
1. Use a large sheet of paper, pencil and steel ruler to transfer a grid design. Use this grid to draw out the shape of the chair sides. A bottle top comes in handy for rounding off the corners on the legs.
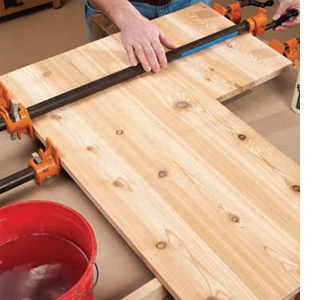
2. Although pine is shown here for the sides, since 605mm wide is the largest laminated pine you can find, substituting with 18mm plywood works out more affordable. Plus, you don't have to join sections of pine together to create the 800 x 800mm board required for each side.
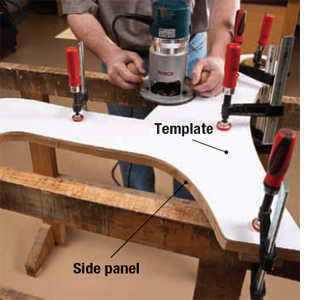
3. You can cut the size sections using a router or jigsaw. Make sure that the board is well secured around the edges to prevent the laminate from splitting apart as you cut. Yet another reason why to use plywood for the sides!
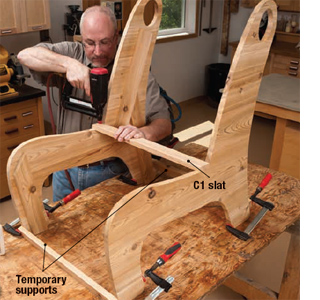
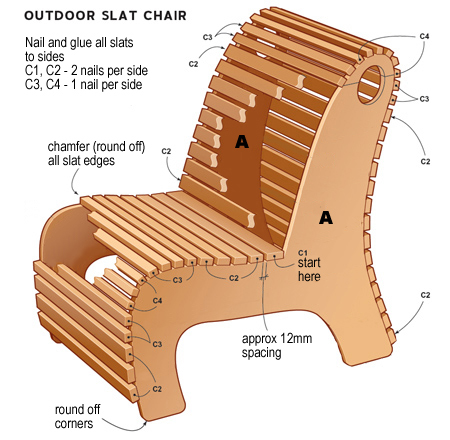
4. Working from the top of the seat down, and up over the backrest, apply exterior wood glue to the frame and nail down the slats.
GOOD TO KNOW
Cut a piece of scrap to serve as a temporary support at the bottom and top of the chair sides.
GOOD TO KNOW
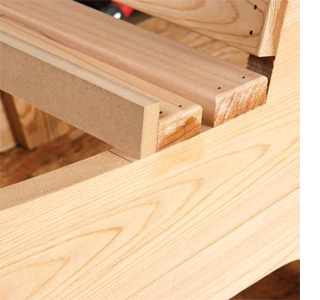
A 12mm scrap of wood comes in handy as a spacer.
Continue to add slats to the top of the seat and backrest, checking the alignment and spacing as you complete.
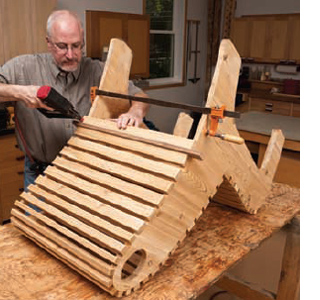
5. Turn the chair assembly upside down to glue and nail the slats to the seat back.
GOOD TO KNOW
A bar or spreader clamp, or a scrap piece of wood, serve to keep the sides apart as you work.
Stop adding slats when the next one would cover any part of the rounded corners of the leg bottoms.
Finishing
Apply exterior sealer to the inside and outside of the chair, making sure to get the brush in between the slats. This penetrating oil is absorbed deeply into the wood to protect and enhance the natural beauty of your new garden chairs. Apply according to the manufacturer's recommended instructions for maximum protection from the elements.
Excerpt from Handyman Club magazine. Great source of advanced and carpentry related projects.