
Build a sandpit for your kids
With summer not that far away, here's a sandpit that you can easily build for the kids that will provide them with fun activities.
07/08/2018
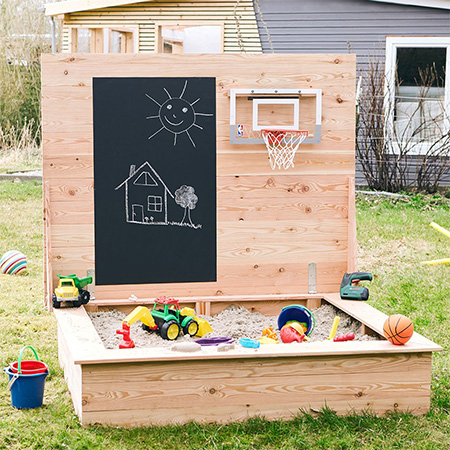
This sandpit is an easy one to build and has a seating area with a chalkboard and space to mount an optional basketball hoop. With summer just around the corner, buy all the materials you need at your local Builders Warehouse and get started on this project.
YOU WILL NEED:
6 of 19 x 94 x 1420mm PAR pine - front / back of base (corners cut at 45-degree mitres)
6 of 19 x 94 x 1158mm PAR pine - sides of base (corners cut at 45-degree mitres)
11 of 32 x 69 x 282mm PAR pine - base frame supports
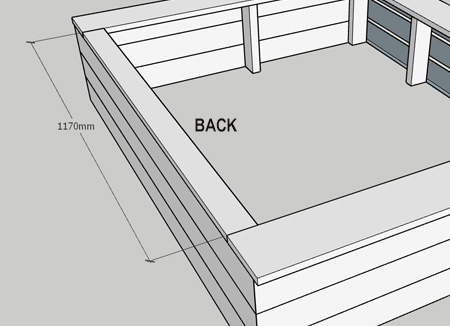
2 of 19 x 144 x 1177mm PAR pine - seat sides
1 of 19 x 144 x 1458mm PAR pine - seat front
1 of 19 x 69 x 1170mm PAR pine - seat back
13 of 12 x 94 x 1526mm PAR pine - back slats
3 of 19 x 94 x 1222mm PAR pine - back supports
2 of 19 x 144 x 560mm PAR pine - back angled sides, cut to shape
3.5 x 30mm screws / 4 x 45mm screws
2 of hinges
2 of eyebolts, 6 x 80 mm
2 of large washers
Pattex No More Nails exterior adhesive
Nylon rope
Aluminium sheet for blackboard, 600 x 1000mm
Rust-Oleum Chalkboard paint and foam roller
OPTIONAL: Pond liner for based
Sandpit sand
TOOLS:
Drill / Drive plus assorted bits
Orbital or multi sander plus 120- and 240-grit sanding pads
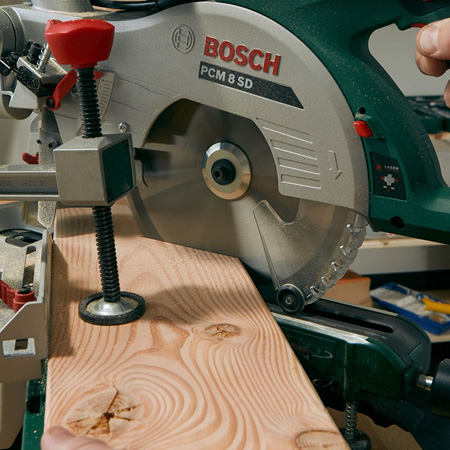
Mitre saw
Bosch Tacker or heavy-duty stapler
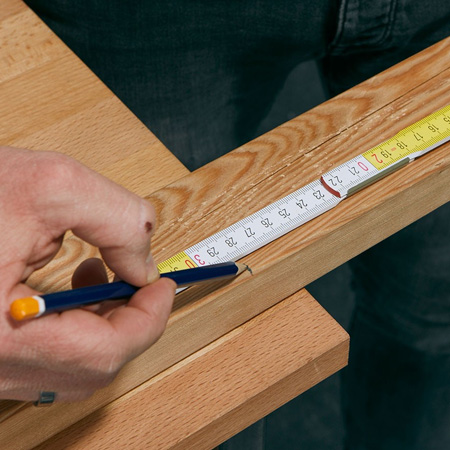
Tape measure and pencil
Buy all the materials and PAR pine for this project at your local Builders Warehouse - or buy online
Not responsible for errors or omissions.
HERE'S HOW;
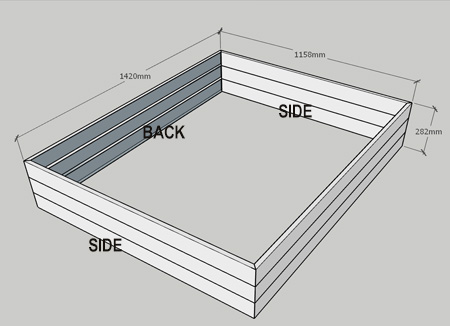
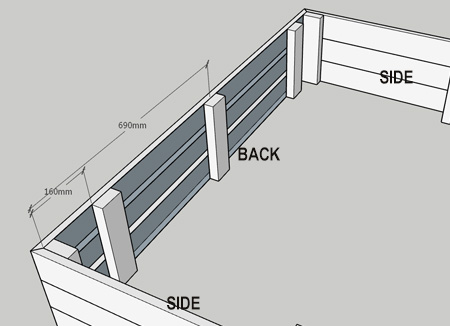
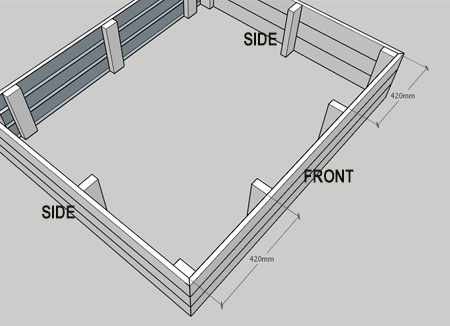
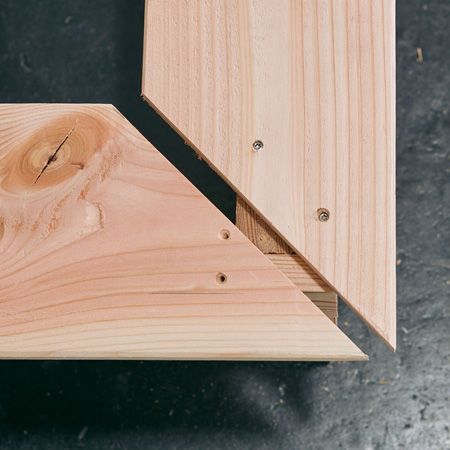
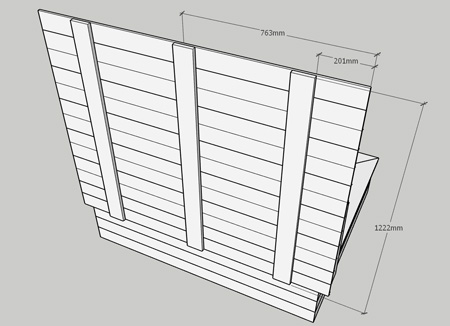
1. The base frame is assembled as shown in the diagram above. You will use 19 x 94mm PAR pine for the base. Cut all corners with a 45-degree bevel.
GOOD TO KNOW: If cost is an issue you can look at substituting the 19mm PAR pine with 12mm PAR pine.
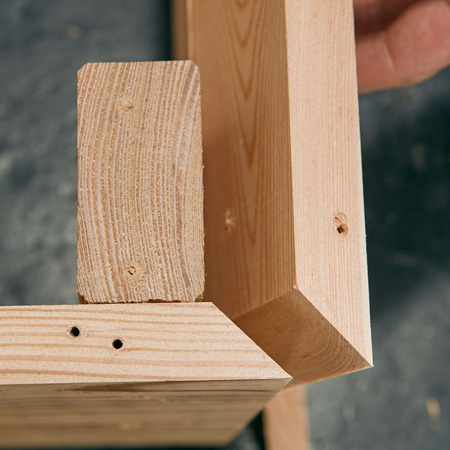
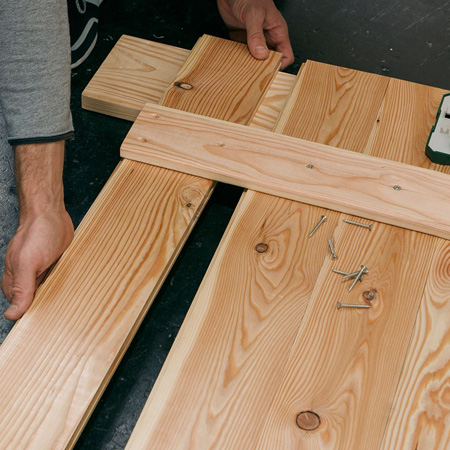
2. Measure, mark and cut the 32 x 69mm PAR pine supports for the base frame. The length is 282mm.
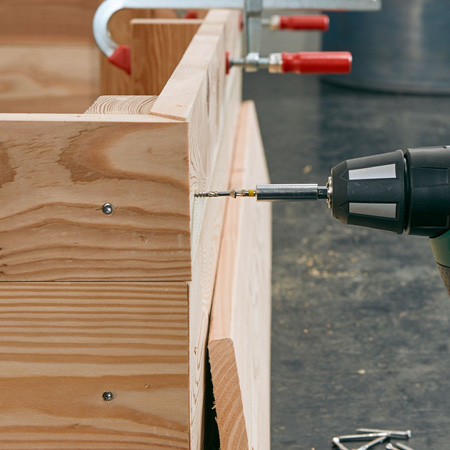
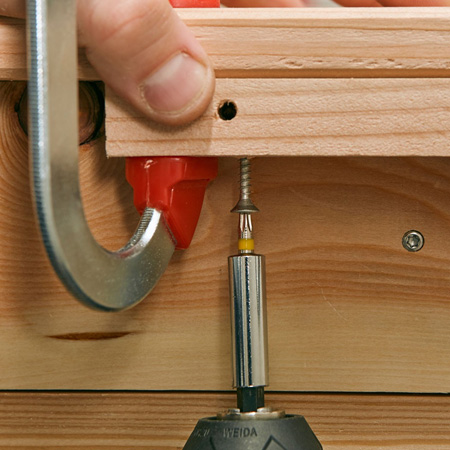
3. Mount the supports as shown in the diagrams below. Drill through the base frame into the supports and secure with 4 x 45mm screws. Countersink all holes.
GOOD TO KNOW: The back supports are placed flat against the back frame section. Check the placement for the remaining supports as shown below.
GOOD TO KNOW: Clamps come in handy if you're working on your own.

4. For the seat front and side sections, cut a 45-degree angle on both ends of the front, but only the front end of the sides. The back of the sides are flush with the back of the base frame.
5. Align the corners of the seat and secure to the frame with 4 x 45mm screws. Countersink all holes so that screw heads are flush or just below the surface of the wood.
6. Place and secure the seat back as shown below.
GOOD TO KNOW: Use a spacer block when attaching the seat sides and front. There is a 19mm overhang - on the outside of the frame - along the sides and front.
7. Sand the entire base frame using 120-grit to remove rough edges and then 240-grit to smooth.
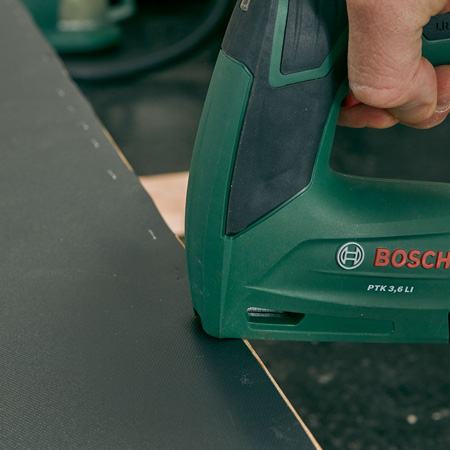
8. If you are adding a pond liner or plastic sheet to the sandpit base, secure this to the bottom of the frame with a Bosch Tacker or heavy-duty staple gun. The liner helps to hold the sand in the base.
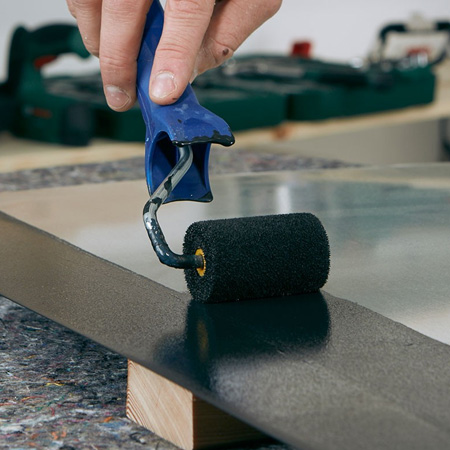
8. Paint the aluminium sheet with chalkboard paint using a foam roller. Follow the recommended instructions on the can for proper application.
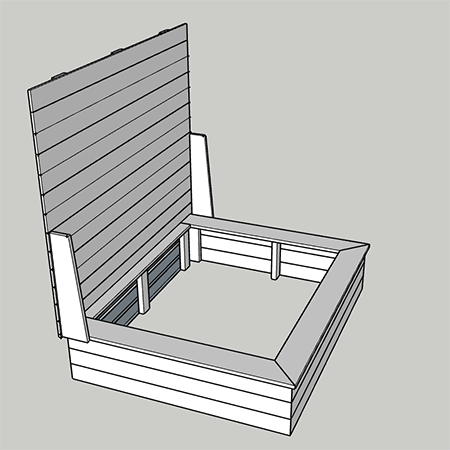
9. Now it's time to assemble the back section. We used 12mm PAR pine for the slats, with 19mm PAR pine supports. Because lighter 12mm planks were used for the lid, DO NOT let children jump on this as it may break. If you are worried about this, spend a little extra and replace the 12mm PAR pine with 19mm PAR pine.
GOOD TO KNOW: Check at your local Builders Warehouse to see if they have stock of tongue and groove boards, as these are easy to join together. If not, use 12 x 94mm PAR pine.
10. The [3] back slats are held in place by the 19 x 94mm PAR pine back supports. Secure the back supports onto the slats using 3.5 x 30mm screws - one in each slat. Place [2] supports 200mm in from the side and the remaining support in the centre.
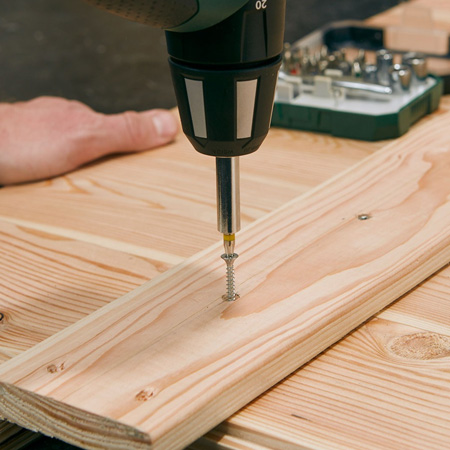
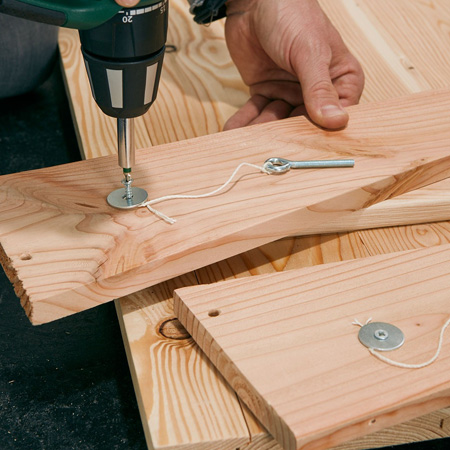
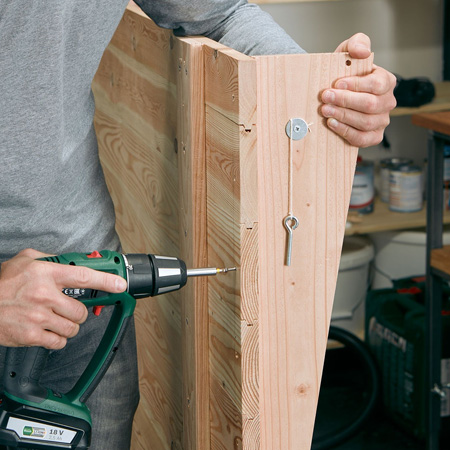
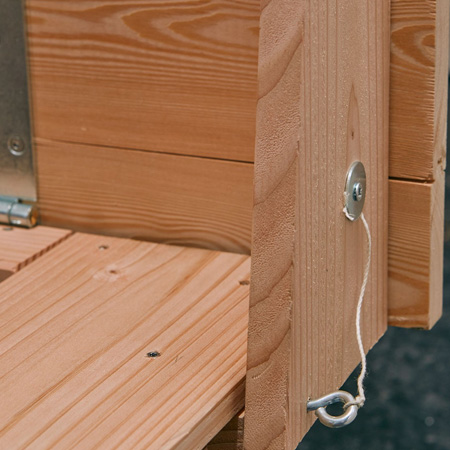
11. The angled pieces on the sides of the back section have holes drilled through them to allow you to insert an eyebolt - see diagram below for cutting the angled pieces. A length of string is threaded through the eyebolt and secured onto the angled section with a large washer. These eyebolts are pushed through a hole in the angled section into the base frame to hold the back section in place when open.
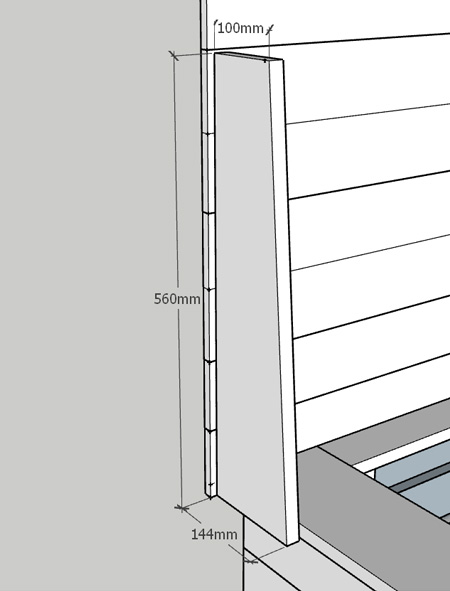
12. Mount the angled sides onto the back at 10mm in from the edge of the back.
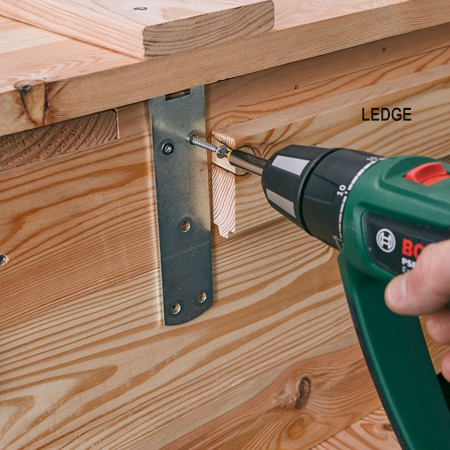
13. Secure the hinges onto the back frame so that your screws go into the back supports on the sides. Use 3.5 x 30mm screws to attach the hinges.

14. Position the lid on the frame to attach the hinges to the base frame and secure through the frame and into the back supports with 4 x 45mm screws.
GOOD TO KNOW: Use an offcut to create a ledge for the lid to sit on top of when open - see image below. Screw the ledge onto the back of the frame using 3.5 x 30mm screws.
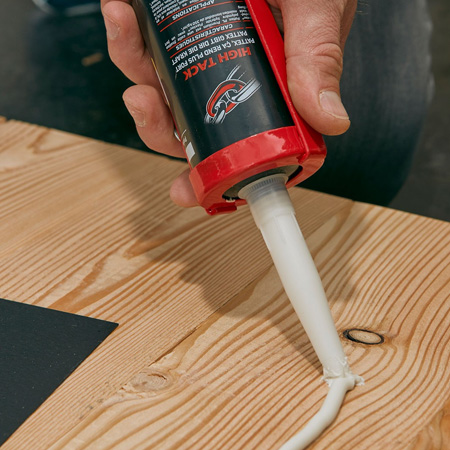
15. Use Pattex No More Nails exterior adhesive to secure the blackboard onto the back.
Finishing
Give the finished sandpit a good sanding all around before applying a clear (or tinted) exterior sealer. Once the sealer is dry, fill with sandpit sand and let the fun begin.