Quick Project: Easy garden fence
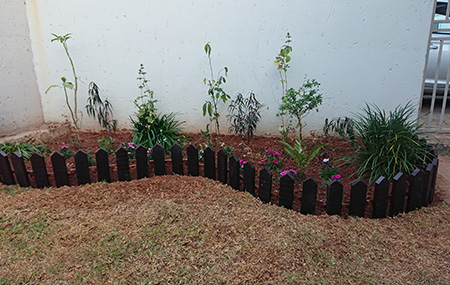
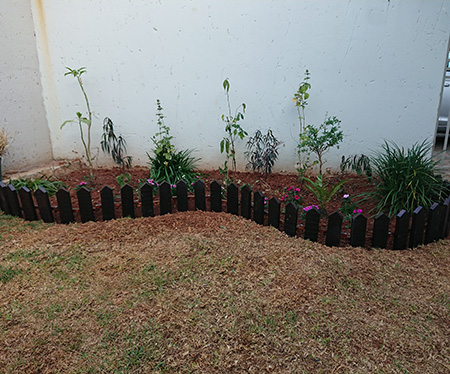
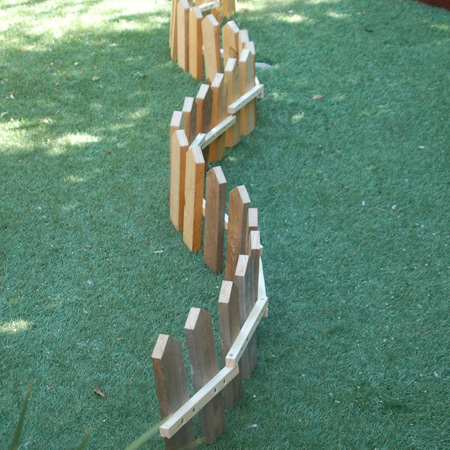
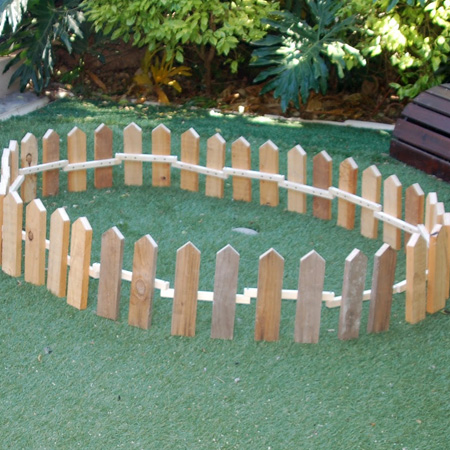
This garden fence made from reclaimed pallets can be curved around a flower bed or laid in almost any shape for instant appeal.
01/08/2018
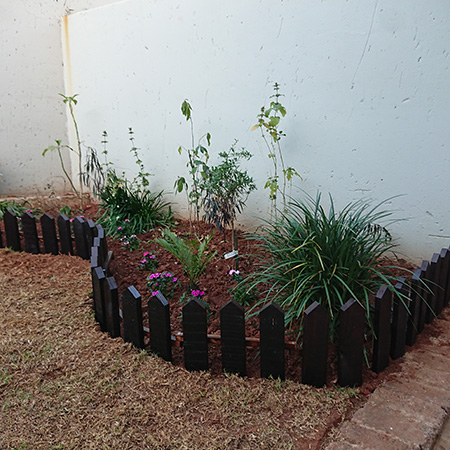
My son and his wife recently moved into their new home. The garden was pretty bare and a flower bed was set out to add some interest and colour to the area. They have a couple of dogs; a Jack Russell and a large 'no name' breed. To keep the dogs out of the flower bed he designed a low fence that could be arranged in a variety of shapes.
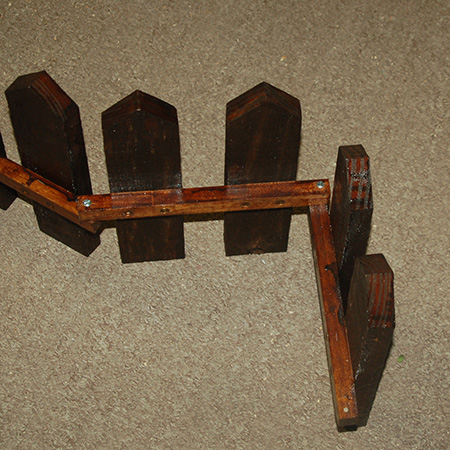
The stakes are joined together in such a way as to allow the fence to be arranged straight or curved, and you can increase the height of the fence if necessary. If you do increase higher than 400mm, add an extra row of supports and joints.
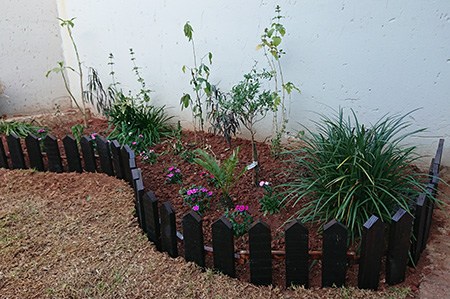
What's nice about this fence is that it isn't stuck in the ground and can be easily removed when you need to trim edges or add more plants to your flower beds. The stakes and support hold the fence together.
HERE'S HOW:
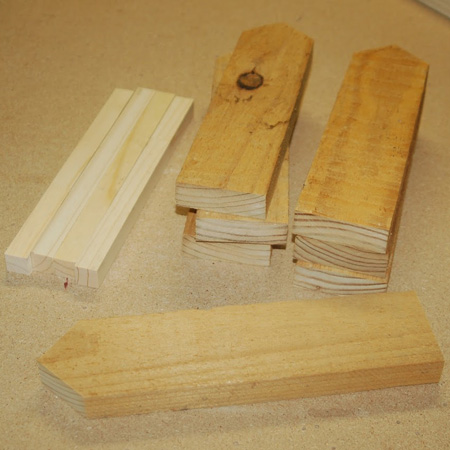
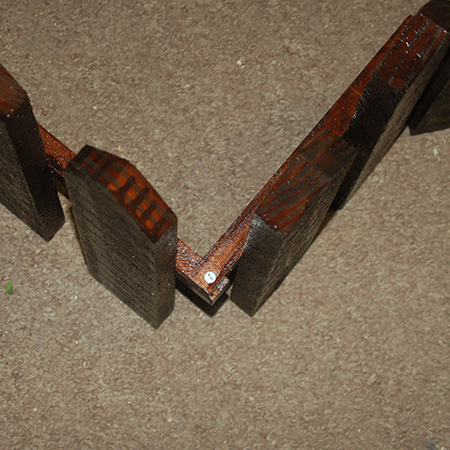
To make the fence you need the stakes/uprights that you can cut from reclaimed wood, or buy PAR pine planks at your nearest Builders store, and lengths of 22 x 22mm PAR pine for the supports. You will also need 6mm bolts, nuts and washers to fasten everything together.
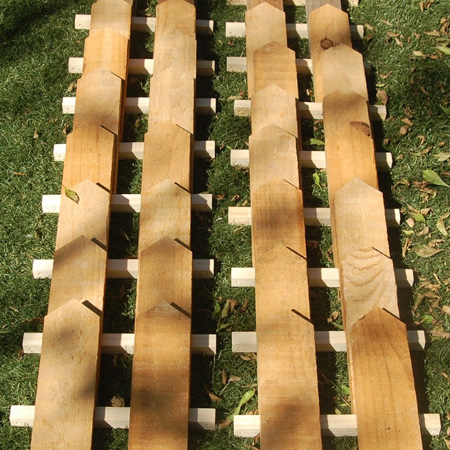
1. Cut the planks to the desired height and add an interesting detail at the top. We added a spiked top but you can add a rounded top if you prefer.
2. Screw the supports onto the back of each plank with 40mm screws. Our sections are two planks wide and you should keep to this if you want to make a curved or shaped fence.
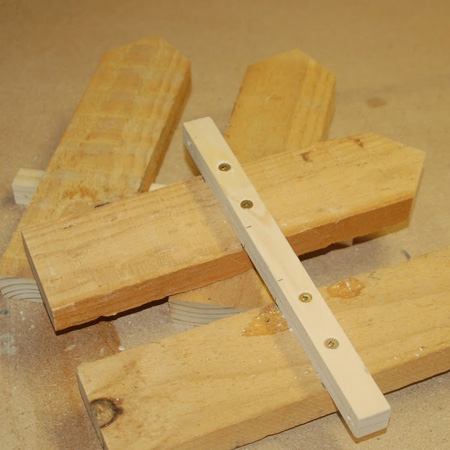
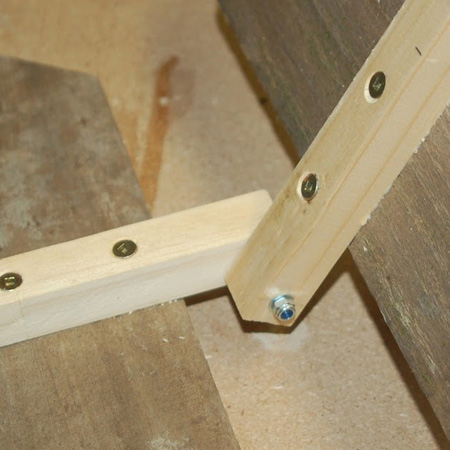
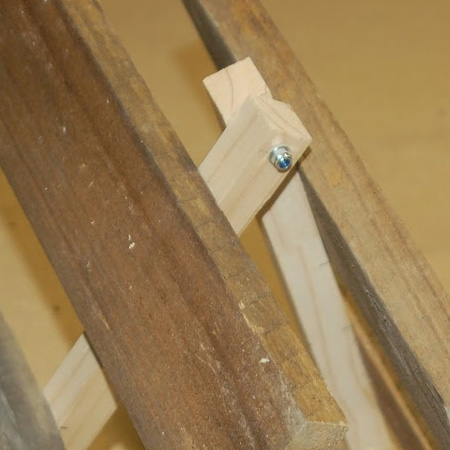
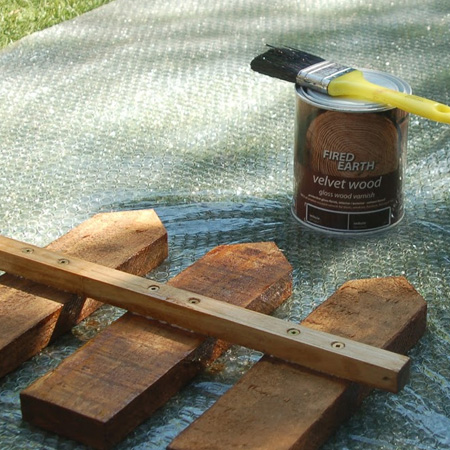
3. At the end of every section, drill a hole to accept a 6mm bolt, washer and nut. We joined two pieces together to show you how they're joined, but you will assemble the pieces after applying the finish.
4. If you want the fence to last, it's important to finish off with a sealer or varnish. We used Fired Earth Velvet Wood in imbuia. Although this is a varnish, and we don't usually use varnish outdoors, the consistency is quite runny and this allows the product to be absorbed into the surface of the wood.
GOOD TO KNOW: We didn't sand the pieces before finishing, as the rough look was great and we wanted to keep this.
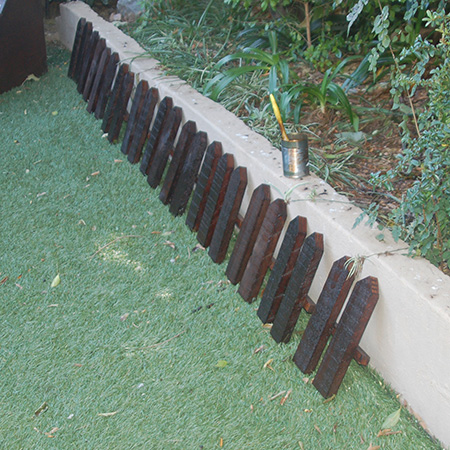
5. After letting everything dry overnight, you can assemble the sections using the bolts, washers and nuts. Make sure that all the sections are securely fastened together.