Make a portable firepit
Add the perfect accessory to your outdoor entertaining area with this portable firepit - you can make on a budget with a little help from Builders Warehouse.
09/10/2018
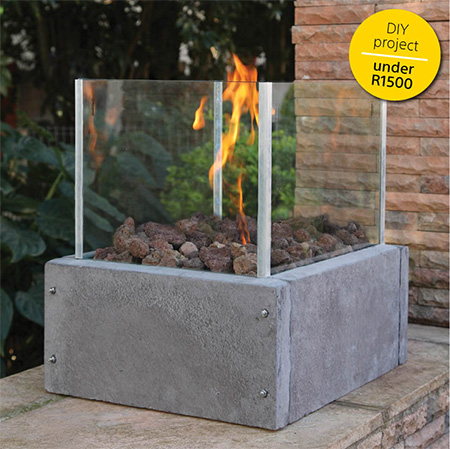
This portable firepit is the perfect accessory for your outdoor entertainment area. You can use it to warm up the space on cool evenings, or light up the fire to set the mood. Buy a bundle of everything you need to make the firepit at Builders Warehouse.
YOU WILL NEED:
4 of 450 x 250 x 40mm pavers
2 of 440 x 300 x tempered glass, 6mm thick
2 of 360 x 300 x tempered glass, 6mm thick
1 of 445 x 360 x 3mm expanded mesh ·
Epoxy glue
Biofuel (not for cooking)
8 x 6mm nuts
Silicone sealer and caulking gun
2 of 364mm aluminium equal angle strips
2 of 417mm aluminium equal angle strips
4 of 300mm aluminium equal angle strips - glass edging
8 of 80 x 6 mm threaded rod
Note: threaded bar comes in 900mm lengths - cut to this size with a hacksaw or jigsaw and steel-cutting jigsaw blade.
Circular tin (we recycled an empty milo tin 160 x 100mm for this project)
TOOLS:
Hammer drill plus 6mm masonry bit
#10 spanner or wrench
450mm bolt cutter or Dremel DSM20
Quick clamps, 2
Corner clamps, 2
Hacksaw or jigsaw and steel-cutting blade
Tape measure and permanent marker ·
*Product prices may vary according to size and region.
HERE'S HOW:
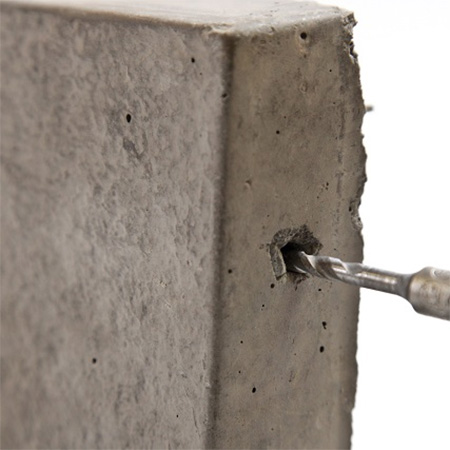
1. Measure and mark with permanent marker for drilling holes 20mm in from each corner on the front of two pavers where the threaded bar will be inserted. Drill the holes all the way through. Match up these holes with the side edge of the unmarked pavers.
2. Into these second two pavers, drill 30mm deep holes at each of these matched points.
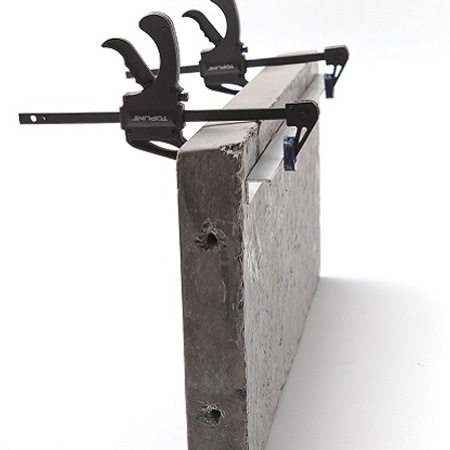
3. Apply epoxy on the threaded bars and insert into the side edges of the [2] unmarked pavers. Leave to set for the specified time.
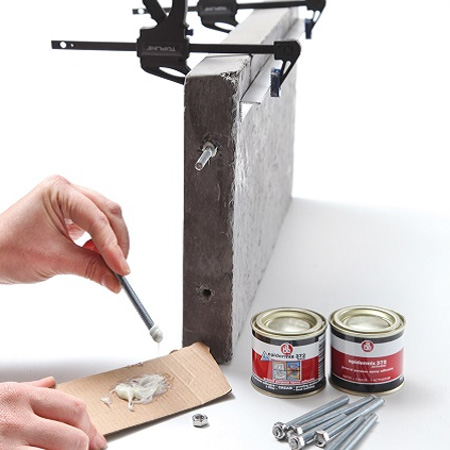
4. Use epoxy glue to secure the 364mm aluminium strips at 20mm from the top edge of the marked pavers - clamp in place. These form the inside of your firepit frame. Repeat for the 417mm aluminium strips on the unmarked pavers.
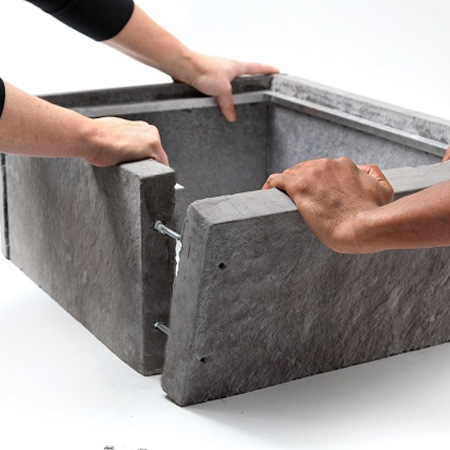
5. Once the epoxy has set hard, assemble the pavers to form a box-shaped frame. Carefully insert the embedded threaded rod through the matching holes in the two marked pavers. Have someone on hand to help you with this step.
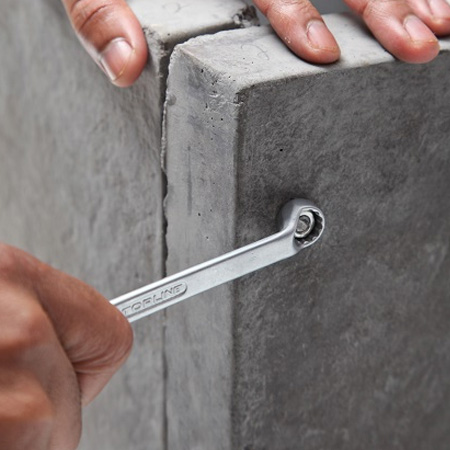
6. Tighten the nuts with a #10 spanner or wrench.
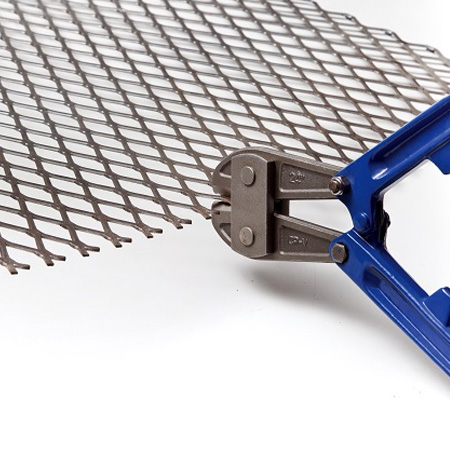
7. Use a bolt cutter - or Dremel DSM20 - to cut the mesh to fit on top of the aluminium strips glued onto the frame. Allow a 6mm gap between the mesh and the paver edge all around the inside of the frame in order to fit the glass between the mesh and the pavers.
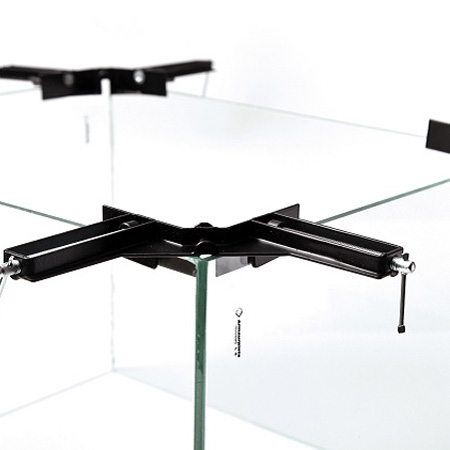
8. Apply a bead of silicone sealer around the outside edge of the two smaller pieces of glass. A caulking gun works best for this as it allows you to apply even, consistent pressure as you squeeze out the silicone. Line this up with the larger pieces of glass and secure with the corner clamps until the silicone is set hard.
9. Apply silicone sealer to the inside edges of the 300mm aluminium strips and attach these to the outer corners of your glass frame for a neat finish that hides the exposed glue edges.
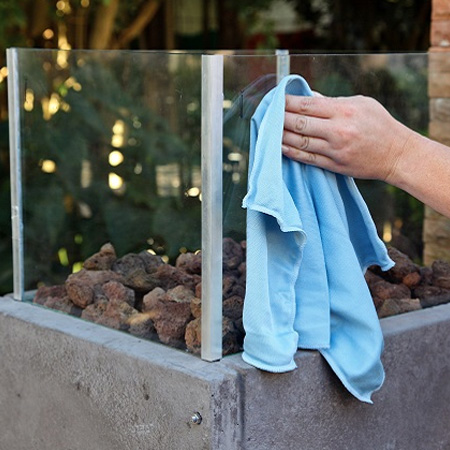
10. Once the silicone has hardened, place the glass frame on the aluminium strips inside the paver frame.
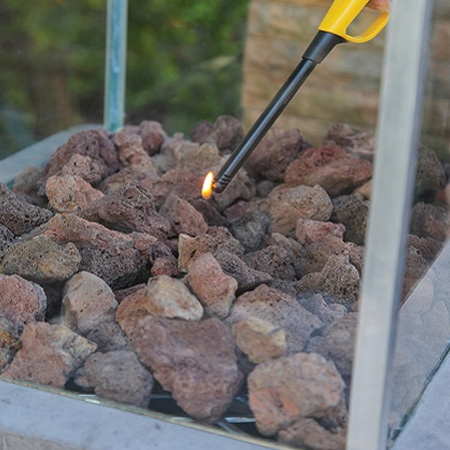
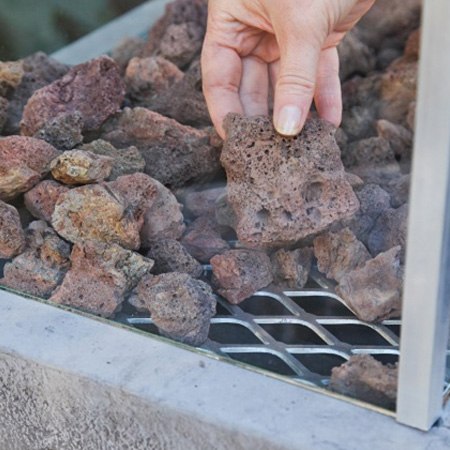
11. Position the biofuel container inside the frame and place the mesh over the top. Cover the mesh with pebbles, lava rocks or ceramic briquettes.
GOOD TO KNOW: The depth of the biofuel container determines the length of time you will have a heating flame. If you want the fire to last a shorter time we suggest using an empty tuna tin on top of your larger tin.
Now you're ready to light up your portable firepit. Move aside a few pebbles and use a long fire lighter.