
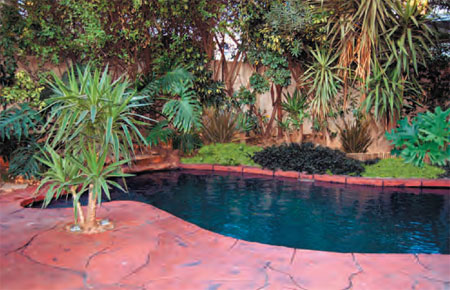
Give your pool a makeover
During the winter of 2010 I gave our pool a makeover using Cemcrete. The pool was previously painted with epoxy paint that, due to incorrect application, only lasted six months. I am not blaming the epoxy pool paint, only the idiot that applied it. Anyway, time for a new look and this time I decided a new look was in order and chose Cemcrete PoolCrete.
Apologies for the poor image quality. My PC has bombed, crashed and burped so many times that some images have been lost and I had to grab these images from Home-Dzine Online back issues!
This is what the pool looked like after the original epoxy pool paint application. It was gorgeous for one summer and then the epoxy pool paint started to peel off in big chunks. Upon contacting the contractor, I was informed that the Joburg agent appointed by them did not do the correct preparation before applying the epoxy paint. Now I’m back at square one, plus the additional nightmare of stripping off what remains of the epoxy paint!
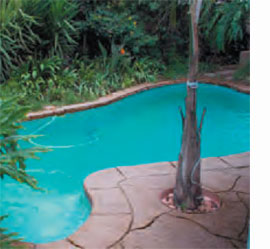
This time I’m going for a more practical and eco-friendly option by using Cemcrete PoolCrete in a charcoal colour to coat the pool. Cemcrete PoolCrete is a smooth plaster which becomes a very hard integral part of the pool structure. It is applied directly to the gunite, hand-packed concrete shell or scratch coat plaster.
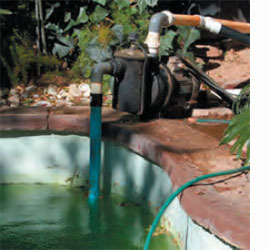
Empty the pool
Put the pump on waste to empty the pool. I attached the hose for the creepy and weighed down the bottom end by attaching a brick with duct tape. It stopped halfway down and I then used a old, freestanding pool pump with 40mm pipes to empty the rest.
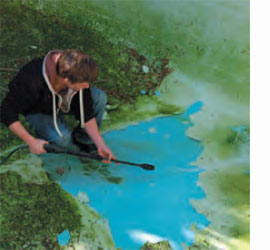
Remove old coating
Luckily I have a Bosch High Pressure spray, which does indeed make the job a lot easier, especially in view of the fact that the epoxy paint is already peeling off.
If you don’t own a high pressure sprayer you can always hire one for the day. Using a hire pressure spray makes the job quicker and easier, otherwise you will have to scrape all the old paint off.
Where you are applying PoolCrete on top of old pool plaster, the old plaster can either be completely removed back to the cement shell, or, if hard and firm, the surface can be hacked every 50mm about 6mm deep and 25mm in diameter. After hacking the entire surface should be acid-washed using a solution of 1 part hydrochloric acid and 3 parts water followed by a vigorous wire brushing and flushing with clean water.
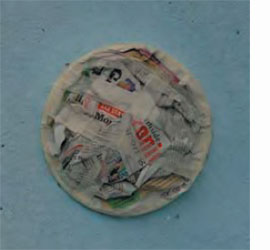
Cover up any fittings or lights in the pool with masking tape and newspaper. You don't want these to be damaged. When applying masking tape, remember to leave a gap around the edge of the tape so that the Cemcrete PoolCreate can be applied without any gaps. If you have mosaic tiles around the top of the pool, these will also need to be covered and protected.
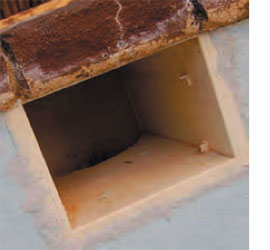
Before applying Cemcrete PoolCrete you have the perfect opportunity to perform any minor repairs to the pool finish. In my case there was a few small leaks around the weir inlet and Pattex AquaMend was used to fill in the gaps between the plastic weir casing and pool surround.
Weather
Do not apply when there is a risk of rain within 8 hours. The floor of the pool should be protected from frost/freezing until it is covered with water.
Suitable surfaces
You can use Cemcrete PoolCrete on gunite, hand packed concrete or scratch-coat cement plaster.
Surface preparation
All surfaces should be true in plane, hard and slightly rough to form a mechanical key. Dirty surfaces, particularly on the floor, should be acid-washed and vigorously brushed and flushed with plenty of clean water.
Slush coat
You need to apply a slush coat comprising PoolCrete Primer in a solution of 1 volume Flexbond and 4 volumes water. Mix slush well and stipple onto the old plaster using either a block brush, soft carpet brush or broom.
To stipple, dip the brush into the runny mix and spatter onto the pool wall. You need to cover as much of the wall as you can to provide a rough surface for the PoolCrete.
Start at the deep end of the pool and stipple the walls, returning back to the deep end to stipple on the floor of the pool.
Allow slurry coat to harden for a day.
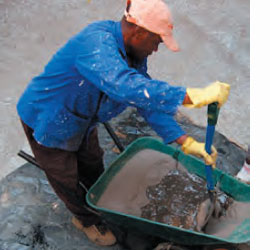
Mixing
Mix PoolCrete with clean water (approx. 6 to 7 litres per 40kg bag) to a stiff workable plaster mix. The mixed plaster must look almost too stiff.
Note: Do not add calcium chloride to coloured PoolCrete.
If mixing is done on the bottom of the pool, take care not to remove the slurry coat. For this project we placed a large sheet of plastic on the bottom of the pool and placed a wheel-barrow on top for all the mixing.
You do not need to wet the slurry coat before applying PoolCrete.
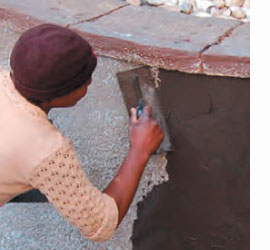
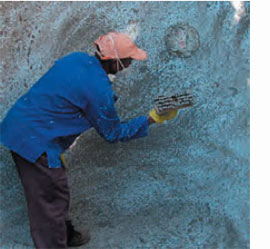
Apply PoolCrete
You will need a pool trowel and a hawk to apply PoolCrete to the walls. This was Nancy and my first attempt at plastering, and, after some practice, we did in fact manage to get it right. PS. Note that I'm the one taking the pics - leaving Nancy to do all the hard work...!
Apply PoolCrete 6mm thick with flexible rounded steel trowels. Allow to stiffen for approximately 30 minutes, depending on the weather, and re-trowel. When almost set, final trowelling should take place. Wet plaster slightly while trowelling to avoid black trowel marks.
The walls of the pool should be plastered first and then the floor. Commence at the deep end, which should have no standing water. All plastering must be completed in one day to avoid 'dry' joints.
Curing
Commence filling the pool from the deep end on the day following the day of application. Damp down exposed PoolCrete every hour to prevent premature drying. Protect the plaster from staining (particularly from mud splashes) until pool is filled.
Note: Do not introduce an automatic cleaner to the pool for 3 weeks. During this period use the pool brush only.
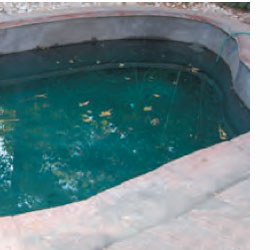
BTW... I am re-posting this article in March 2015. The pool still looks fantastic and there have been no problems with the Cemcrete PoolCrete finish. And it is now April 2018 - still looking good!