Concrete bench with pebble inlay
Concrete garden furniture is almost indestructible, and this concrete garden bench has a decorative pebble inlay in the seat.
10/07/2018

Find all the supplies that you need for to make this concrete garden bench at your local Builders Warehouse. The design incorporates steel rebar for structural strenth and to reduce cracks.

The forms for the bench are made using 12mm and 16mm shutterply (or whatever thickness is available) and you can modify the measurements if you want to make a shorter or slightly longer bench)
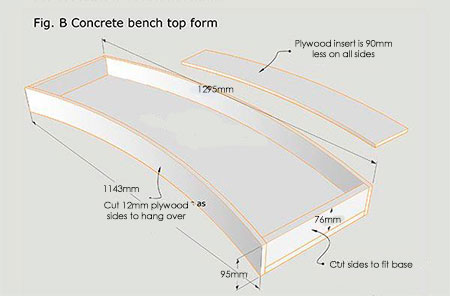
You need to make a form for the seat (as above) and for the supports (as below).
YOU WILL NEED:
12mm & 13mm shutterply, cut as per drawings above, plus offcut for the insert
Plus 1 of 268mm x 1040mm for the seat insert
3 bags of/cement mix (containing cement, sharp sand and gravel)
Thin-set mortar for pebble inlay
4 of 1200mm steel rebar
4 of 350mm steel rebar
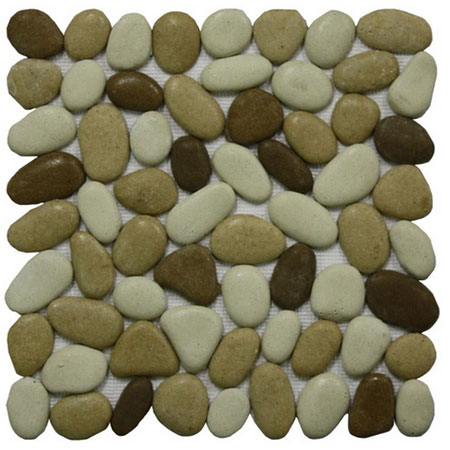
Smooth pebbles - mosaic pebbles are great for this project
Brick or stone sealer
Plastic pipe, plant pot or PVC for seat supports
Wheelbarrow
Spade
Finishing trowel
Tape measure and pencil
Clamps
Workbenches, trestles or saw horses
Drill / Driver plus assorted bits
No More Nails adhesive
Waterbased sealer
Vaseline or wax paste
Rubber mallet
HERE'S HOW:
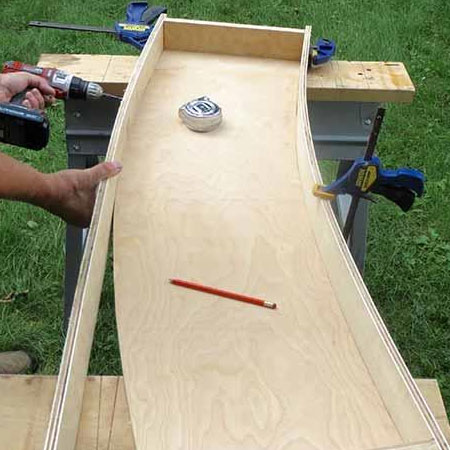
1. Use the Fig A. and Fig B. above to cut out all the elements to make the seat form. Bend and secure the sides onto the curved frame. A pair of clamps will help hold the pieces as you bend and secure onto the form top.
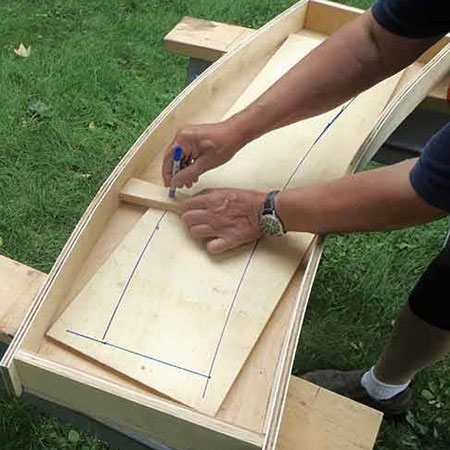
2. Place the square, uncut insert into the form and use a scribing tool to shape as per the seat form. Cut the insert to size and glue inside the form.
GOOD TO KNOW: This insert allows for thin pebbles, but if you're pebbles are thicker you can doubble-up on the insert to allow for this.
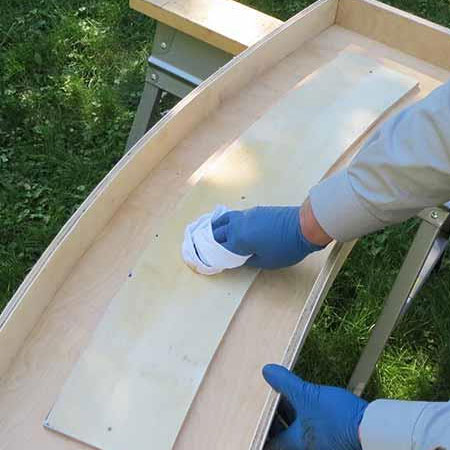
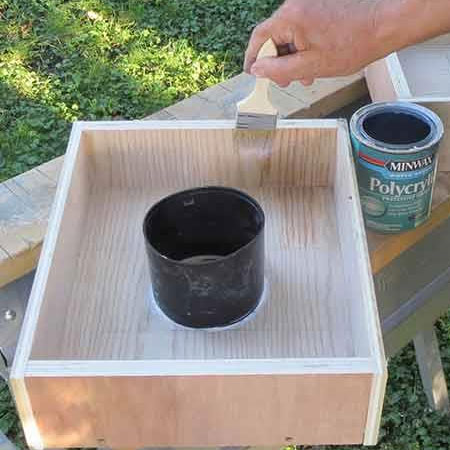
3. Apply sealer to the inside of the frame, let dry and then wipe on a liberal layer of Vaseline or wax paste. You ideally want to form a barrier so that the concrete doesn't stick to the frame and makes it easy to remove once you're done.
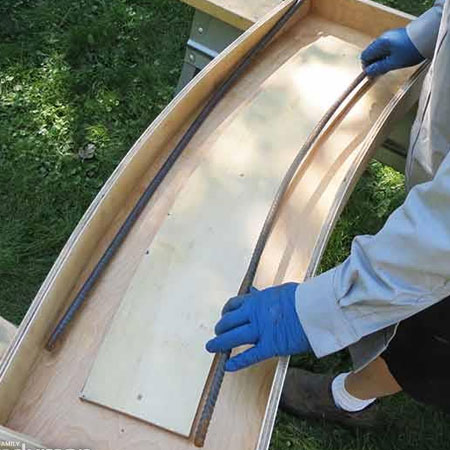
4. Bend the rebar into a gentle curve and place inside the seat form.
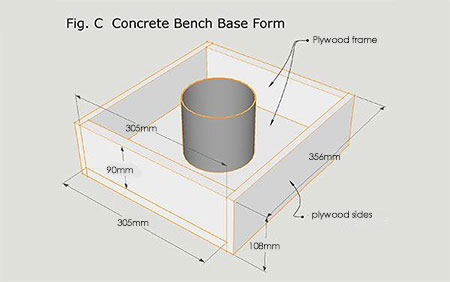
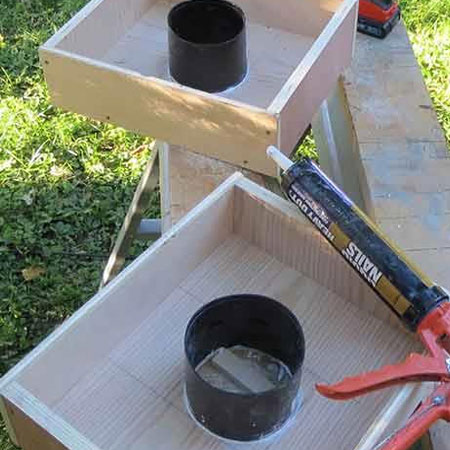
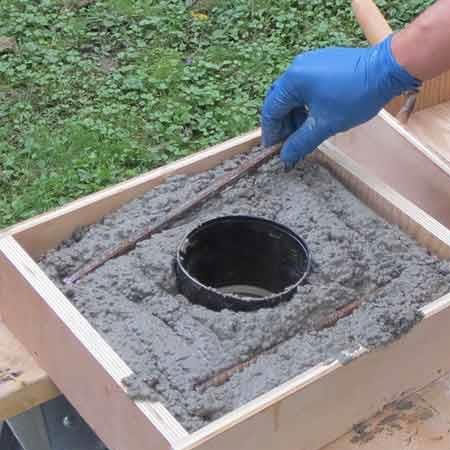
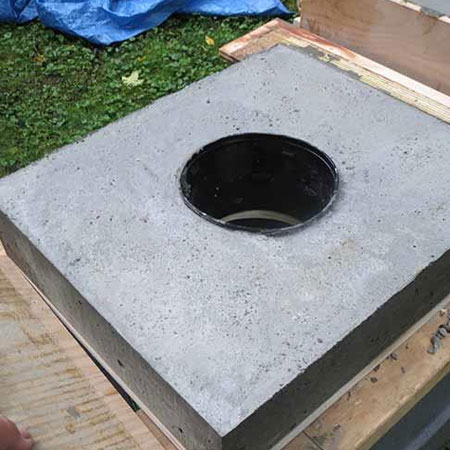
5. To assemble the forms for the seat supports (Fig C.) you need to trace the outline of your circular form onto the plywood and cut this out. The plastic form can be a PVC pipe, a plastic plant pot, or something similar of about 130mm diameter.

6. Insert the circular forms into the assembled forms for the seat supports and apply adhesive around to close off. Let this dry overnight.
7. Treat the inside of the seat supports as you did for the seat form.
GOOD TO KNOW: It is preferable that this project be done on a cool day and in a shady spot to prevent the cement from drying too quickly.
8. Using a wheelbarrow and spade, mix the concrete to a sloppy consistency similar to porridge. The mix should hold it's shape when placed in the form and not be too runny.
GOOD TO KNOW: Always wear protective clothing, gloves and safety glasses when working with cement)
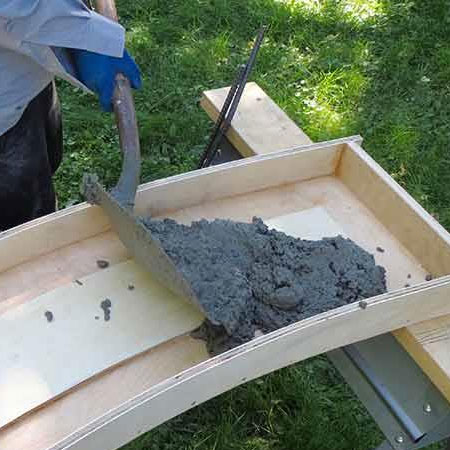
9. Fill the seat form to half and gently tap with a rubber mallet to release trapped air bubbles then fill up to about two thirds and repeat. Tap all the way around the frame.
10. Place the remaining [2] rebars inside the form before filling up and tapping with a mallet.
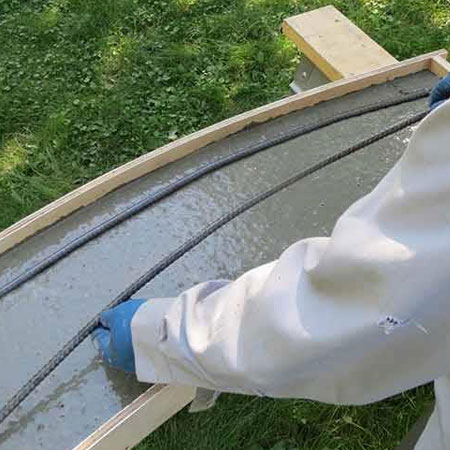
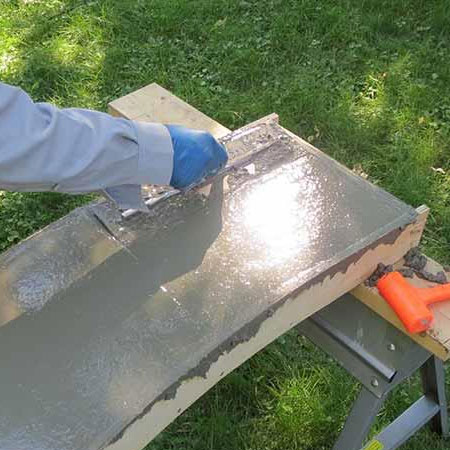
11. Float off the concrete with a finishing trowel for a smooth finish.
12. Make the seat supports in the same way.
GOOD TO KNOW: Cover the filled forms with tarp or plastic and leave for about 40 to 48 hours. In hot weather, lightly mist the concrete with a host pipe every evening.
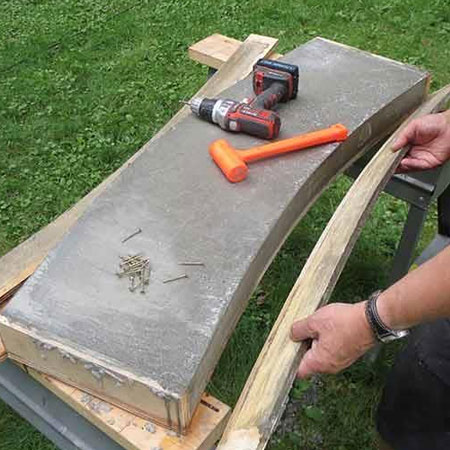
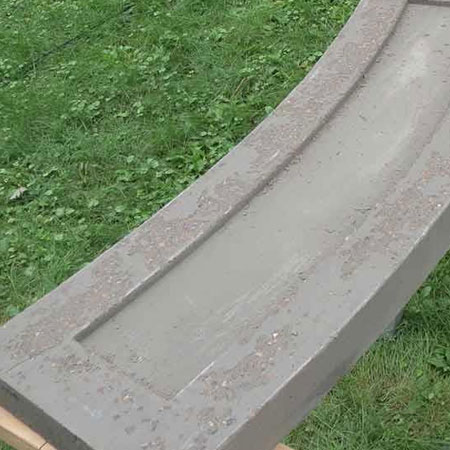
13. Unscrew the frame to remove the form from the seat and suppports. It's not completely cured at this time, so be gentle.
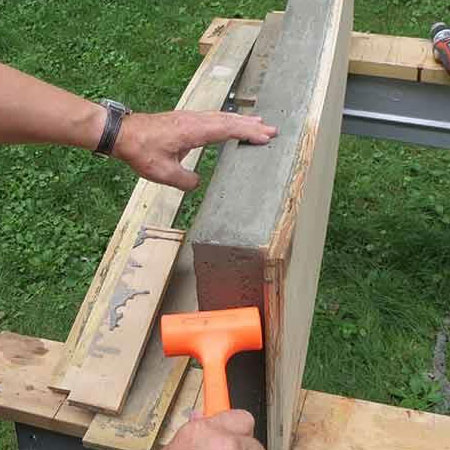
14. The top might be difficult to remove, and if it is, tip onto its side to gently tap the top form until it comes loose. Take your time and don't rush.
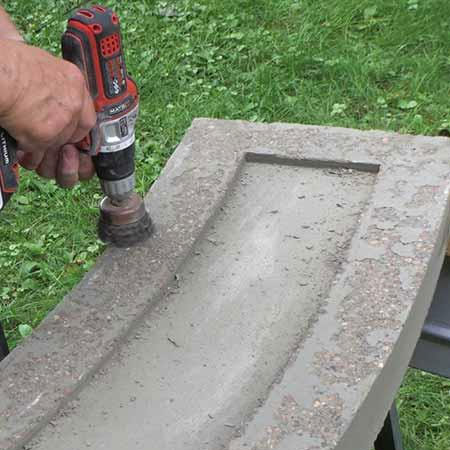
15. If the top is rough you can use a wire brush attachment in your drill / drive to smooth off the surface.
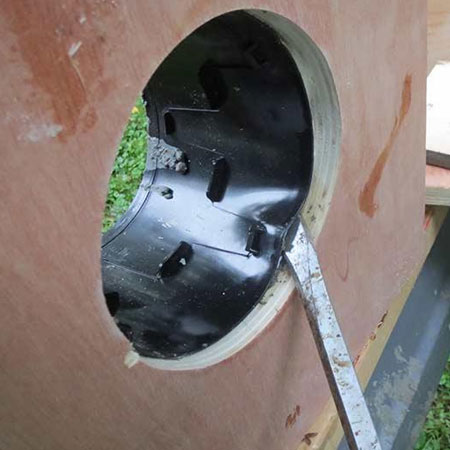
16. Repeat the removal process for the seat supports.
17. You will need to pry the edges of the plastic insert loose to be able to pull this out. Wiggle and pull until it's easy to grab with a pair of pliers.
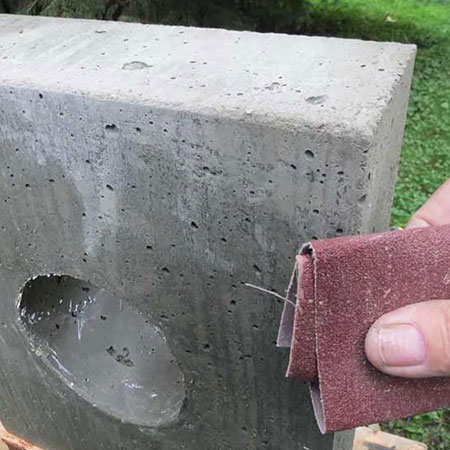
18. Smooth off any rough edges with 80-grit sandpaper.
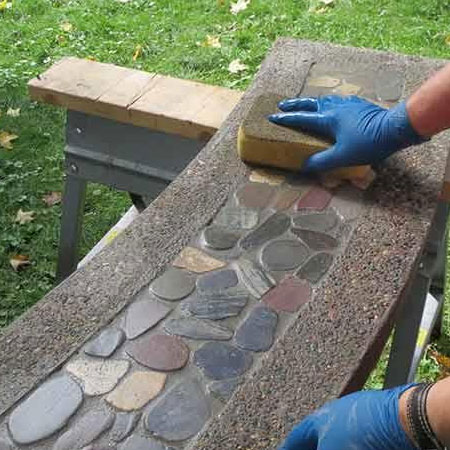
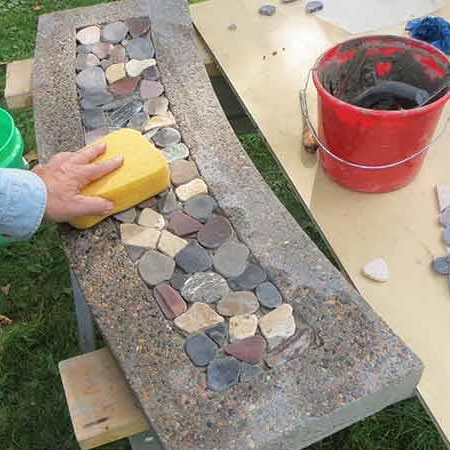
19. Now you're ready to add the pebble inlay. Mix up a batch of thin-set mortar and lay your pebbles on top of this. Make sure that all the pebbles are about the same height.

20. Wipe away any mortar on top of the pebbles before it has time to dry. Allow to dry overnight.
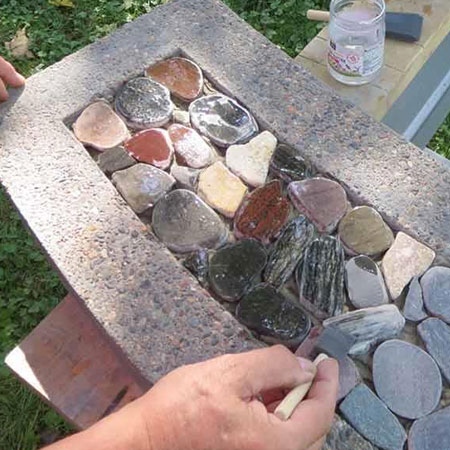
21. Apply two coats of stone or brick sealer onto the pebbles and let this dry.
22. Finally, apply the mortar as a grout to fill the gaps between the pebbles.
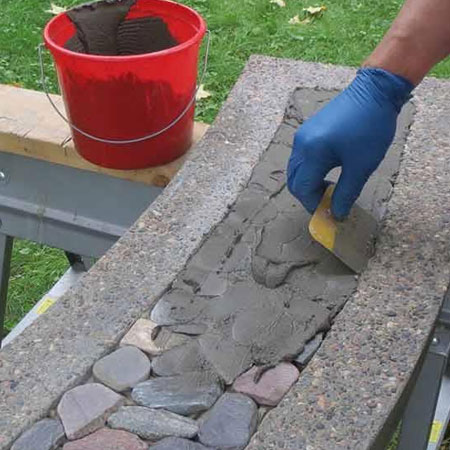
23. Wipe away any remaining grout to reveal the pebble inlay.
Let the bench sit unassembled for a couple of days and then use construction adhesive to secure the seat onto the supports. It's necessary to leave for another couple of days to make sure everything is set before you use your bench. If you wish, you can apply concrete sealer over the bench to give added protection and enhance the look of concrete.