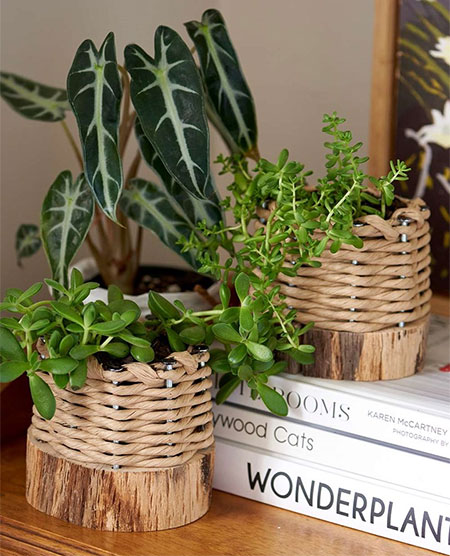
Make Pretty Basket Planters
Add a bit of texture and interest to a display of plants with these pretty woven baskets that you can make in an hour.
11/04/2021
better homes and gardens magazine
Weaving is a great craft to know and one of the easiest ways to make your own baskets. For this project, you only need a couple of basic tools and some potted succulents - nothing fancy.
Set up a wonderful plant display in the home by making these pretty woven baskets. They are made using a solid wood base cut from a tree in the garden and natural twine. You could also use rope or raffia for the basket work, it is entirely up to you. You can also make these pretty woven baskets in any size and just need to make the base bigger to allow for the size of your potted plants.
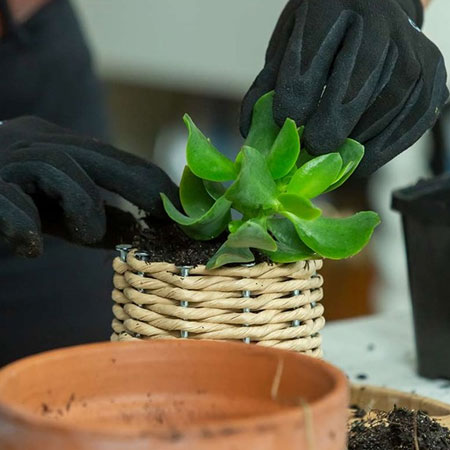
The size of our basket planters is determined by the size of the pots for our plants. The plants are potted in plain plastic pots, which will be hidden by the basket weave on the outside. When planting up your basket planters, use plants that don't require a lot of watering. Succulents are the best for these planters so that you don't have to worry about excess water leaking out at the base of the planter. Alternatively, add a container to the base of the completed basket to catch any water.
YOU WILL NEED:
Pre-cut wooden bases
Twine, rope, coir, sisal or raffia for the basket
Potting soil or moss
Succulents or plants in plastic pots
TOOLS:
Drill / Driver plus 3mm wood or HSS drill bit
Hammer and 10cm nails
Tape measure and marker pen
HERE'S HOW:
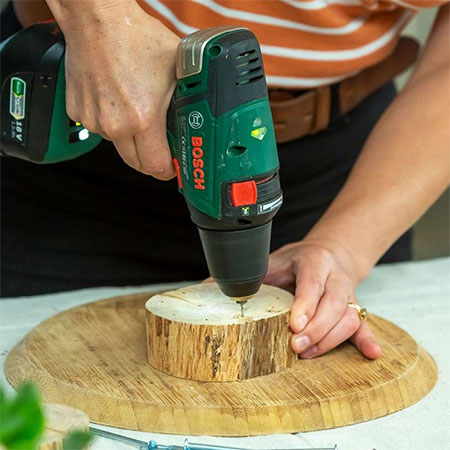
Step 1
Measure and mark the location for the nails that will hold the basket together. The ones shown below are 2cm apart. If you are making a bigger basket, stick to this distance. Use a drill and 3mm bit to drill holes at the marked location. Drilling holes beforehand will prevent the wood from splitting when you hammer in the nails.
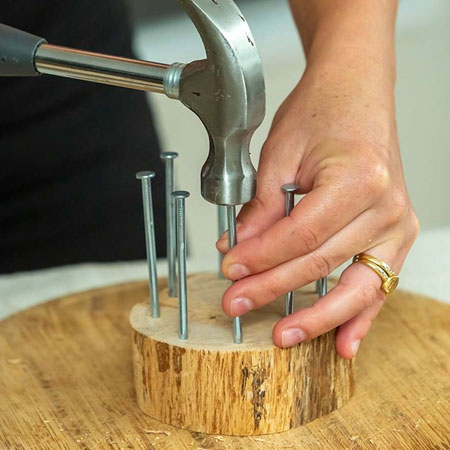
Step 2
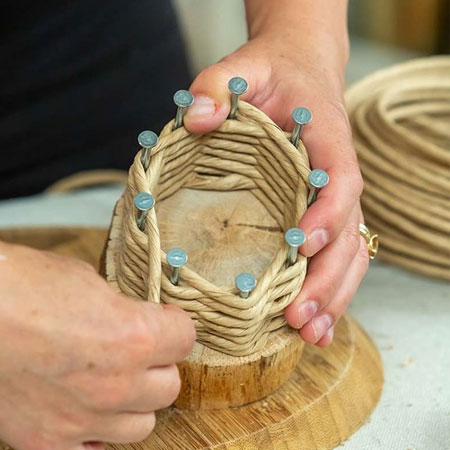
Use the hammer to drive the nails in the pre-drilled holes. You want the nails to be firmly fixed in the wooden base and also to stand upright. Check that the nails are well-fitted before moving on to the weaving.
GOOD TO KNOW: Use an uneven number of nails for the basket frame. We used 9 nails for our small baskets.
Step 3
Leaving a long tail in the centre when you start weaving, work from the base up. The process for weaving is a simple one: go around the outside and then the inside until you have completed the entire basket frame.
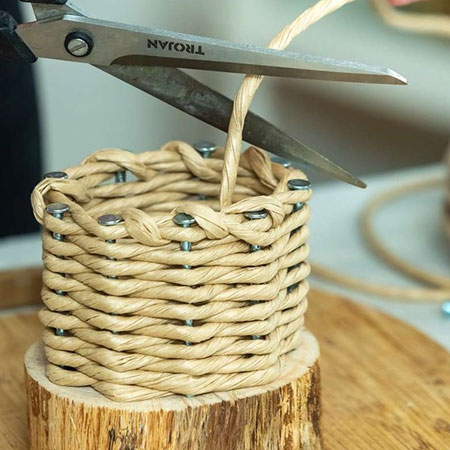
Step 4
For the last (top) row of the basket, thread the twine or rope through previous rows all the way around the top to finish off. Trim off the end tail and also thread this through a previous row and let it hang in the middle. Once filled with soil, you won't see the first or last tails.
Step 5
If you are adding a container to the basket planter, put this in now before placing your potted succulent inside the basket. Fill up the top with a potting mix or moss to hide the plastic pot from view.