
Make a Window Planter Box for the home
Even though it's winter right now, you can get started on making one or two of these window planter boxes to fill up with colourful flowers when spring arrives.
16/06/2020
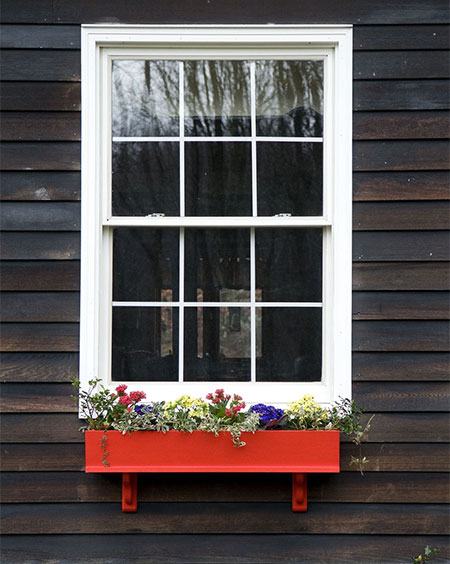
Nothing adds quite as much colour and curb appeal than a window box filled with colourful flowers. Even though it is winter right now, there's nothing to stop you making a window planter box or two ready for filling up with colourful annuals or blooming plants.
This window planter box is made using PAR pine that you can find at any Builders store and then painted with an exterior paint that offers protection from the elements. Alternatively, you can stain and seal the window box for a more natural window planter.
YOU WILL NEED:
1 of 914 x 142mm pine - front
1 of 914 x 153mm pine - back
1 of 914 x 160mm pine - base
2 of 134 x 130mm pine - sides
2 of 330 x 54mm pine - cleats
2 of 150 x 150mm pine - brackets
Deck screws
Nylon wall plugs and screws, for mounting to wall
TOOLS:
Drill / Driver
Jigsaw
Router and decorative bit
Orbital sander with 120- and 180-grit sanding pads
Tape measure and pencil
HERE'S HOW:
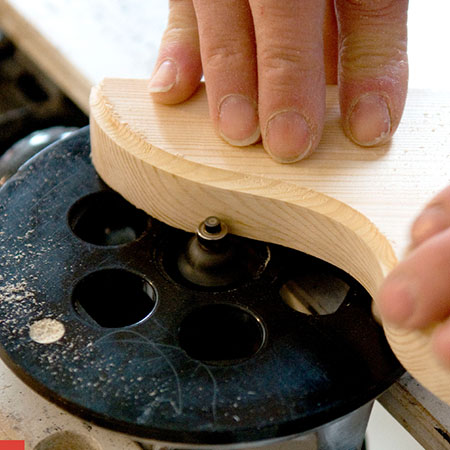
- Cut and Trim the Brackets
1. Start off the process by cutting a decorative shape for the brackets that will support the window box. You will find plenty of ideas and inspiration that you can put to good use to find the perfect shape.
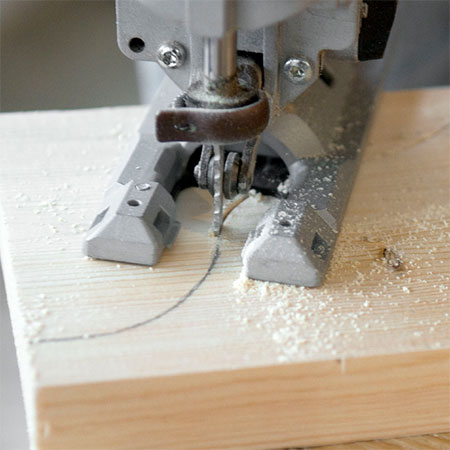
2. To add further decoration to the brackets, you can use a router and decorative bit to profile the edges of the brackets. Once completed, sand the two brackets smooth to finish.
- Assemble the box for the planter
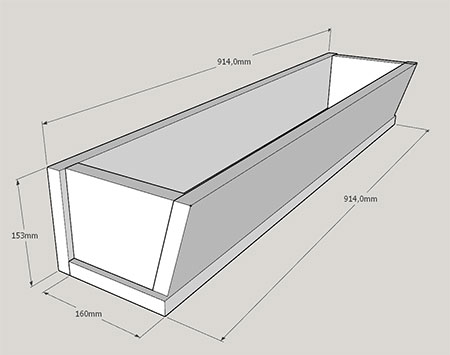
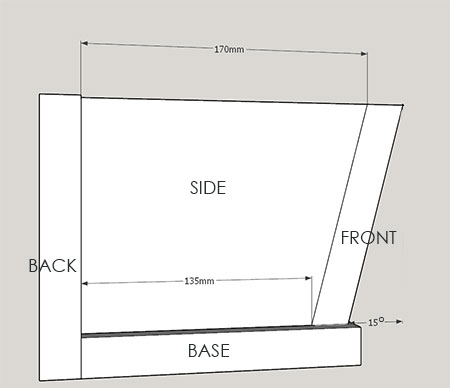
3. Using the diagrams above, first cut the front section with a 15-degree angle. You will also need to cut the [2] side sections according to the measurements in the diagram above.
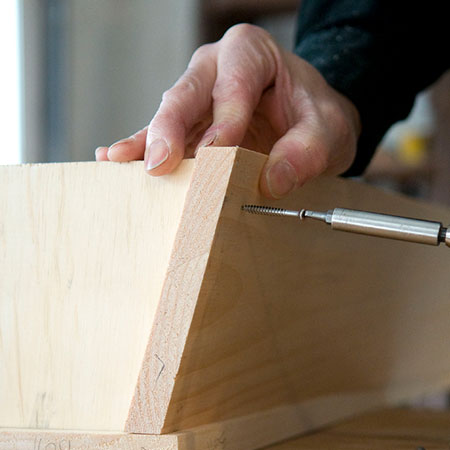
4. When all the pieces are ready to assemble, use deck screws to join the sections. Secure the [2] side pieces to the back and base sections and then secure the back to the base. Note that both side sections are 10mm in from the edge of the base on both ends.
GOOD TO KNOW: Pre-drill countersunk pilot holes for all screws.
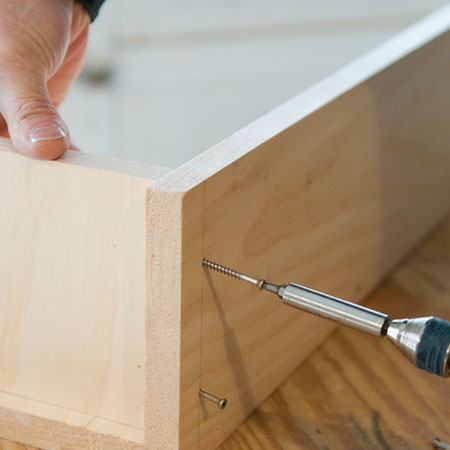
5. Position the front section against the edge of the [2] sides and secure with screws. Also, secure the front section with screws through the base.
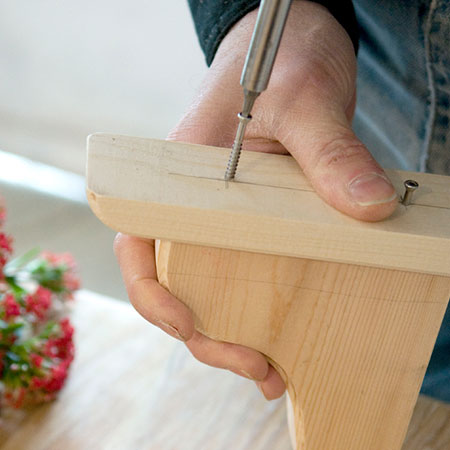
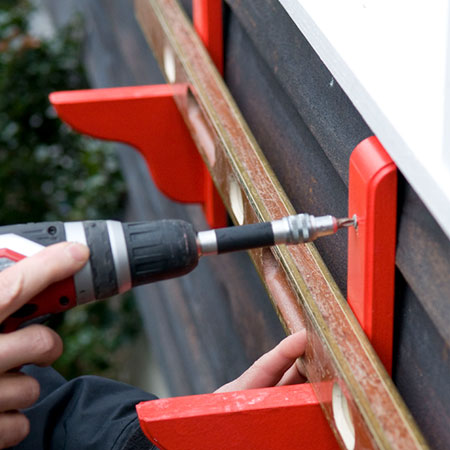
6. Secure the [2] brackets to the [2] cleats, with the bottom of the bracket at about 20mm up from the bottom edge of the cleat. This will allow plenty of space for the window box to sit securely on top of the brackets.
- Finishing
Sand the entire assembly and wipe clean to remove all traces of dust. At this stage, you can apply an exterior spray paint (enamel), exterior acrylic paint, or a wood stain and exterior sealer.
7. Use nylon wall plugs and screws to secure the bracket assembly to the wall, or wood screws if you are mounting onto siding.
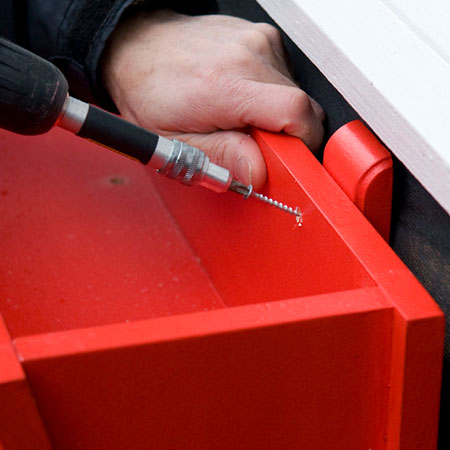
8. Secure the window box to the cleats through the back section and through the base into the supporting brackets.
popular mechanics