
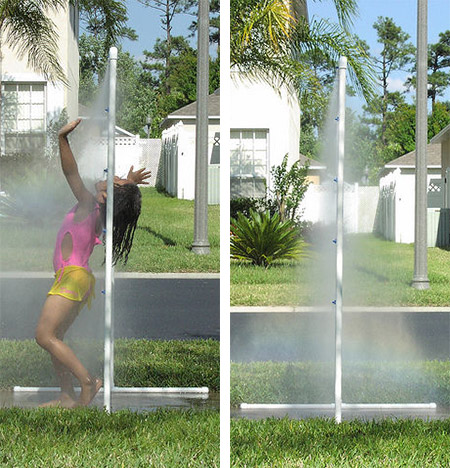
Summer spray fun
This project is a must build for summer, especially if you don't have a swimming pool. A trip down to your local hardware store for a few supplies and some basic tools are all that you need to create this summer spray.
instructables
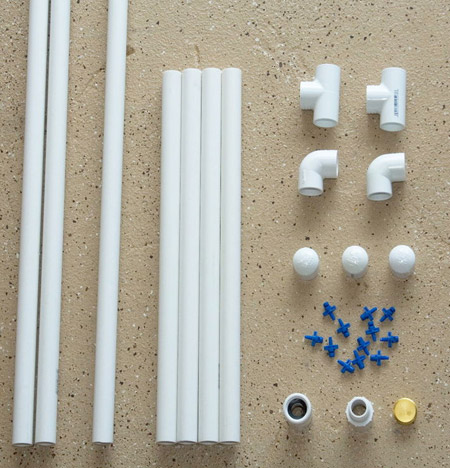
YOU WILL NEED:
2 lengths of 40mm PVC plumbing pipe
3 end caps
1 hose connector
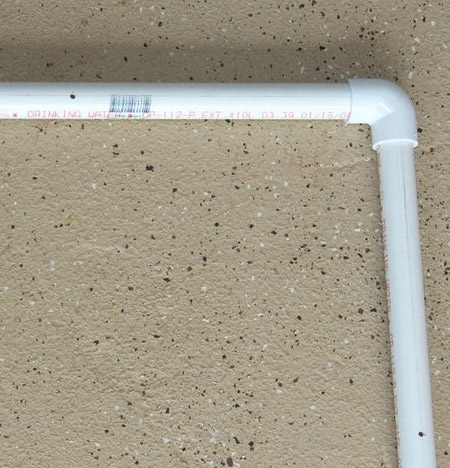
2 elbow joints (90 degree)
2 T connections
12 quarter circle irrigation spray heads
Pencil
Tape measure
Drill/Driver and 2/3mm drill bit
Jigsaw
Pattex Tangit cement glue
Pattex Smart Universal silicone sealer
Find PVC pipe and fittings, plus all other supplies at your local Builders Warehouse
HERE'S HOW:
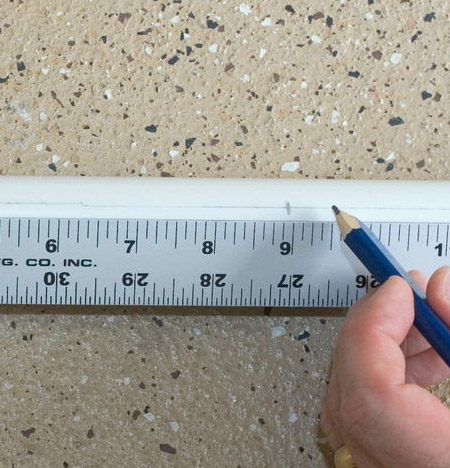
1. Cut pipes
[2] of 150cm
[1] of 120cm
[4] of 45cm
2. Make a centre line
All sprays need to be pointing more or less in the same direction, so start out by making a centre line on the three longest pieces of pipe. Hold two pieces of pipe next to one another and use one as a guide to mark the other. The angle you hold your pen/pencil at isn't important, just keep it the same and you'll end up with a straight line.
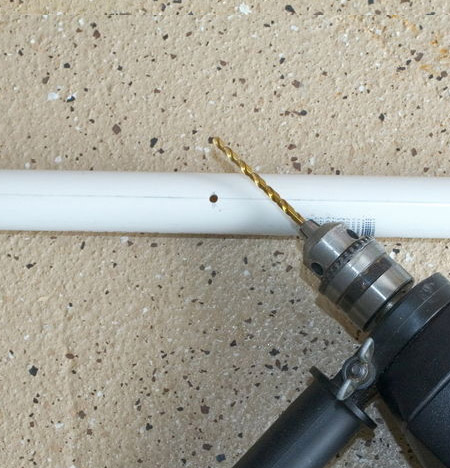
3. Mark locations for the sprays
This project uses 12 sprays: four on each side and four along the top. Measure and mark along the pipe for placement of the sprays to provide nice coverage on the sides.
Drill holes where marked. You will need to determine the right size drill bit for the sprays that you use. Rather have a tight fit and have to force the sprays in. You will also need to drill a hole for the hose connector.
4. Assemble upright pipes
Make sure there are no PVC chips or other debris in the pipes before assembly. Fit the drilled pipes together to form a "U" shape with all the drilled holes facing up. The drilled holes on the side pieces should be closest to the end with elbow joint (near cross piece). Once you're satisfied glue up the "U", making sure the holes stay facing up.
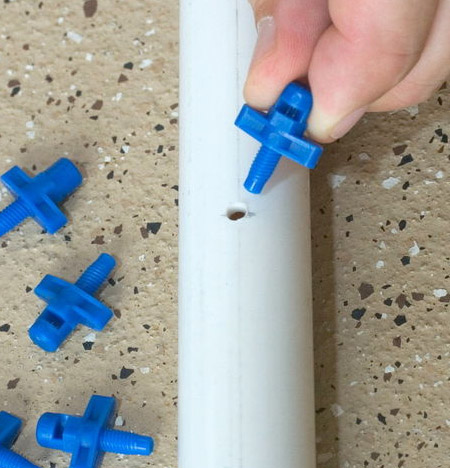
5. Screw in sprays
Screw the sprays into the holes. You'll need to bear down at first to get the threads to bite, but after a turn or two they'll burrow into the pipe just fine. When you get down to the last turn or so, align the jet so it faces inwards. Angle the spray near the corners towards the centre so that the water goes where the action is. Use Pattex Smart Universal Silicone Sealer around all the sprays and let this dry.
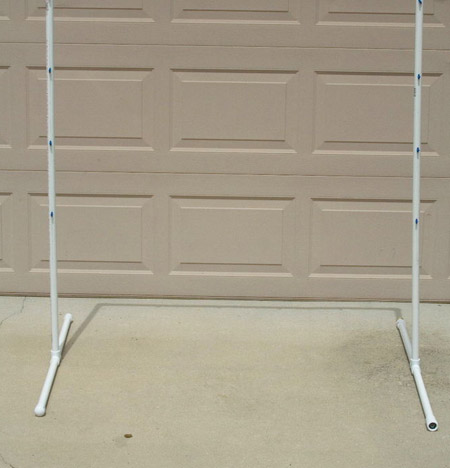
6. Glue base
Now that the "U" is glued up and the sprays installed, we need a base to stand it up on. Check the fit of all your parts and glue them up.
7. Attach base
Assemble the "U" and the base without glue. Make sure the base pieces are parallel with each other, and perpendicular to the plane of the "U". Line up the base pieces parallel to the edges and you're ready for glue.
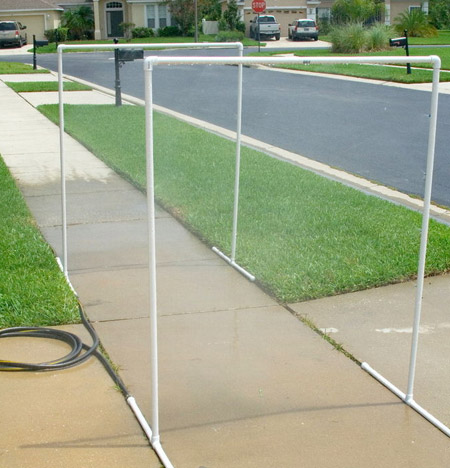
Try it out
Let the glue dry before testing.
Turn the water on low enough that you get a little spray from all the misters. Check and adjust the direction of the sprays to direct the water towards the centre.
Turn it on full and look for leaks and apply more silicone sealer where necessary.