
Make a reclaimed timber garden swing chair
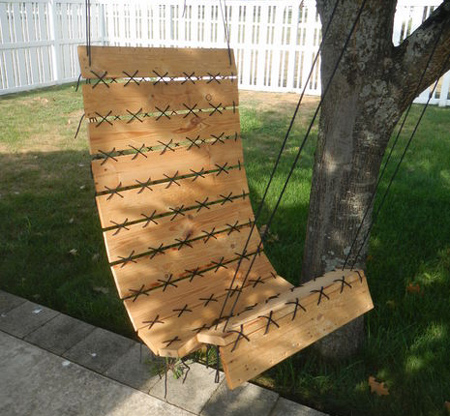
The ideas for using reclaimed timber just keep on coming. These reclaimed timber garden swing chair is made from timber pallets and is just the place to relax in the shade of some trees on a hot summer day.
instructables.com
I know that there are a lot of different kinds of chair instructables already, but I have never seen a chair like this before. It is so easy to make and it is comfortable because it conforms to your body. I don't know how I came up with the idea and as I was making it I wasn't even sure if it would work out. But it did and I am very happy with the results.
This instructable will show you everything I did to make the chair, but I am sure you will find ways you can customize yours to meet your needs.
YOU WILL NEED:
Timber pallets
Nylon cord
TOOLS:
Drill/Driver and assorted bits
Jigsaw, circular saw or table saw
Lighter
Grab everything you need for this project at your local Builders Warehouse.
HERE'S HOW:
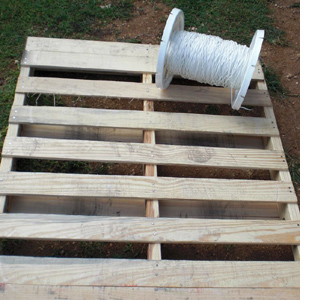
I used a reclaimed pallet because it was free.
Wear a dust mask and gloves when working with any type of treated wood.
When you are finished with all the cuts and have drilled all your holes, it is important that you seal the wood. You can stain before you seal if you want a darker colour.
There are many different ways to take apart pallets in order to use the wood for something else. I have found that prying them apart causes a lot of damage to the wood and is a lot more work then is necessary. So, my preferred method is to cut the pieces apart using an all-purpose saw .
DIY TIP:
Check for bits of nails in the wood before you start cutting.
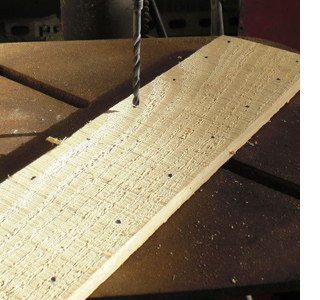
Decide how wide you would like your chair. I guess you should base the size on the butt that will be sitting in it. The amount of boards needed is also up to you. I ended up using 16 boards for my chair.
Mark the holes for placing the laces - I put my laces 15mm in from the edge of each board and placed them 50mm apart.
I started by drilling all the holes in my first board and then I used that board as a template for the remainder. Use a 5mm wood bit, or a bit that is slightly larger than the diameter of the nylon cord you will be using.
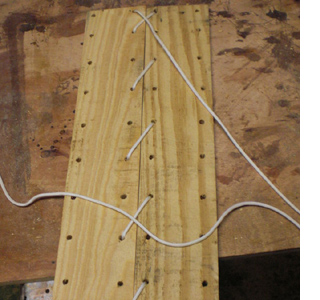
Place two of your boards next to one another and thread the cord through them as you would lace up a pair of shoes. Once you reach the end cut the nylon cord - making sure you leave enough slack to tie a double knot at the end. Now pull the cord out and use it to measure the rest of the pieces you will need.
GOOD TO KNOW
When you cut the rest make sure you leave a little room for error. It's better to have too much then to have too little and have to start over.
Melt the ends of the cord with a lighter, so that it is easy to get the cord through the holes.
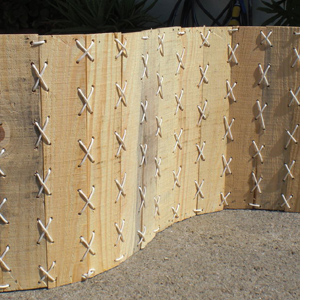
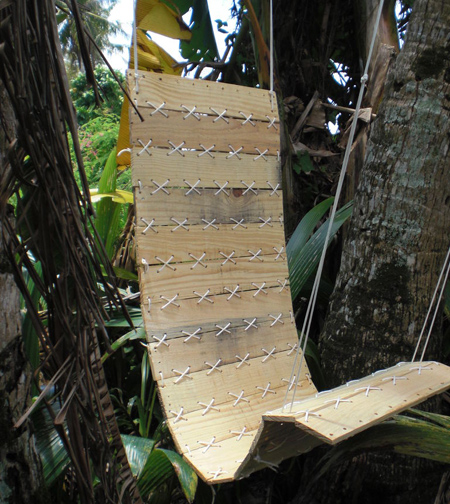
Start lacing all the boards together. Always make sure you have any 'good' sides facing up as you join the boards together. And that all the knots will be underneath the boards. Once you have finished a section - go back and pull each "X" to get the slack out before tying a double knot to secure.
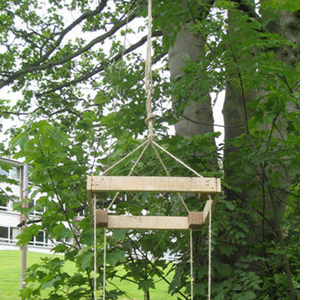
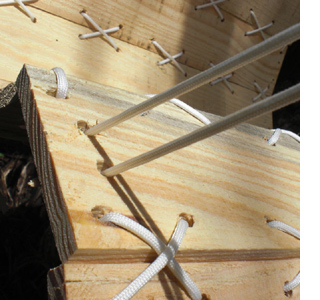
Now you are ready to hang the chair from whatever structure you have available. I used some PAR pine between the trees in my garden. Just drill a couple of holes in each of the four corners you would like to hang the chair from and thread the nylon cord through them.
instructables.com
I put the front cords back one board from the end, so that it would be more comfortable on the back of my legs. For a somewhat laid back chair, attach the front and back cords further apart from each other.
For an upright chair, like mine, put them closer together with the back cords high. The whole thing is completely adjustable to your liking, so tweak it until it's comfortable for you.
GOOD TO KNOW:
I used two strands of paracord per corner, which is strong enough to hold me, but you might want to braid more together for added strength.
Getting into the chair can be a little tricky (kind of like getting into a hammock) but once you do relax and enjoy.