DIY Concrete Water Feature
Purchasing even a basic water feature can cost anywhere from R800 upwards, but you can make your own custom concrete water feature with a few basic supplies.
15/05/2020
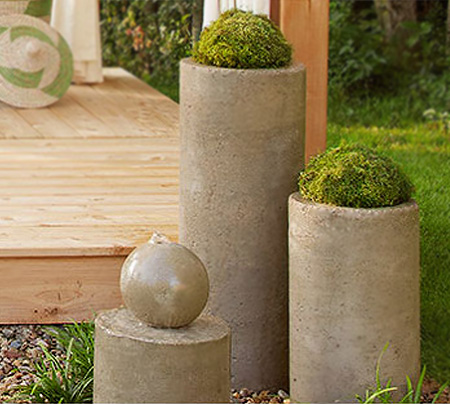
Buying a simple water feature can cost anywhere from R800 upwards depending on the size and the amount of plumbing required. Off Tap Plumbing Pty Ltd, a plumber in Randwick, NSW says that the plumbing for a water fountain varies depending on how much pipework is needed and the location of the current water supply, for smaller installations a plumber is not required. Or you could make your own custom concrete water feature with a few basic supplies that you will find at your local Builders Warehouse and a cardboard carpet tube.
Your front yard is the key element in impressing your visitors, which is why you want to add personality and style to this area with a well planned design and careful selection of garden elements. There are plenty of ideas for small front yard landscaping, and we give you detailed step-by-step instructions to adding an elegant water fountain.
YOU WILL NEED:
Cardboard tube as concrete form*
1 litre plastic container, such as an empty paint pot
Glass or plastic light globe
Plastic square or rectangular tub for the fountain base
Cement, coarse sand and pea gravel
Spray n cook
Rubbish bags
Duct tape
Small pebbles or gravel
Small water pump and tubing
TOOLS:
Stanley knife, craft knife or junior hacksaw
Bucket for mixing (or wheelbarrow)
Trowel
Rubber gloves and safety glasses
Hammer
Tape measure and pencil
*You can ask for these from carpet installers, since for some strange reason we can't buy circular forms in hardware stores
HERE'S HOW:
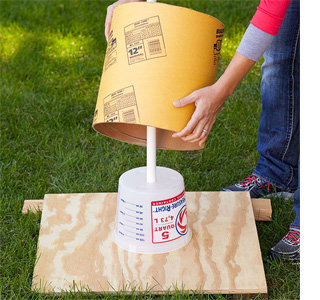
1. On a cardboard tube measure and mark 300mm up from one end around the outside. Join the marks to draw a line and cut the tube. Use a 20mm spade bit to drill a hole in the base of the plastic container to allow for fitting the 20mm dia. PVC pipe. You will need two pieces of PVC pipe - one roughly 600mm long and one 350mm long.
2. Place the plastic container in the centre of a square piece of scrap wood. Push the PVC pipe through the hole to a depth of about 50mm. Place the tube over the top of the plastic container. Mark the end of the pipe where it comes out of the form, so that you will know if it moves while you are pouring in the cement mix.
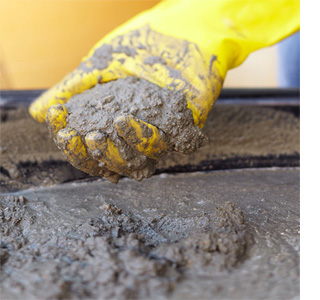
3. Pop on your rubber gloves and mix the cement: 1 cement : 1 coarse sand : 1 pea gravel with enough water to make the concrete sluggishly pourable or the consistency or porridge. You should be able to squeeze a handful of the mix and have it hold its shape in your hand.
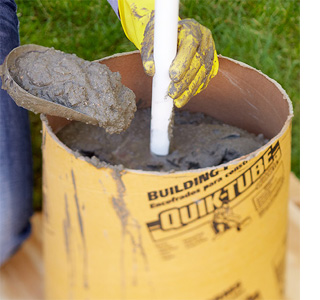
4. Use a trowel to fill up the tube. Make sure the plastic tub remains centered as you pack the cement. Use the tip of the trowel to gently push the mix to ensure no gaps or pockets. Continue adding mix until you reach the top edge of the form, making sure the PVC pipe remains centered. Smooth even with the top of the form. Tap the tube to remove any air pockets.
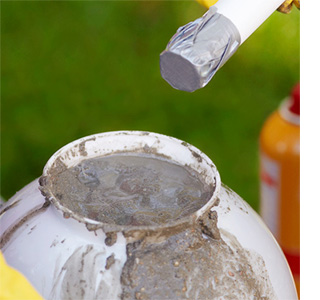
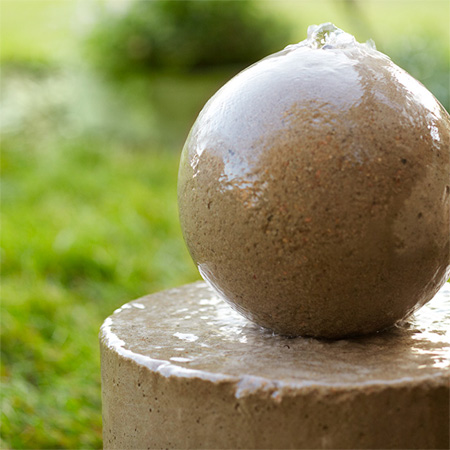
5. Apply spray n cook to the inside of the globe and fill with cement mix. Place on a level surface and insert the taped end of the PVC pipe until it touches the centre of the globe at the bottom. Top up with cement to bring it even with the top of the opening.
GOOD TO KNOW: If the PVC pipe moves around, use duct tape pressed on top and secured on the sides of the globe to hold in place.
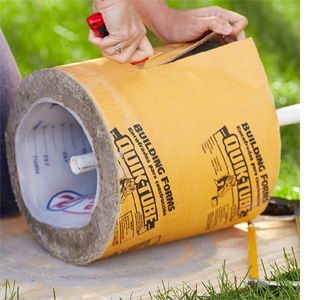
6. Let the concrete cure overnight. Cut the sides of the tube with a craft knife to remove it. Use a junior hacksaw to cut the PVC pipe even with the top of the base.
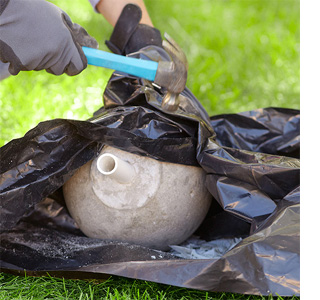
7. Pop on your gloves and eye protection and place the globe inside a plastic sheet or rubbish bag. Tap with a hammer until it breaks and falls away from the concrete. Use the prongs on the hammer to lift off any stubborn pieces and then discard of safely.
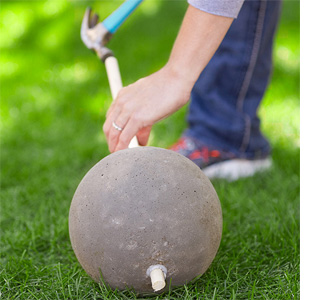
8. Use a hammer to drive a dowel through the PVC pipe to break through the duct tape and any concrete build up on the opposite end. Clean up the edges of the pipe with a craft knife. Use a hacksaw to cut the pipe flush with the concrete.
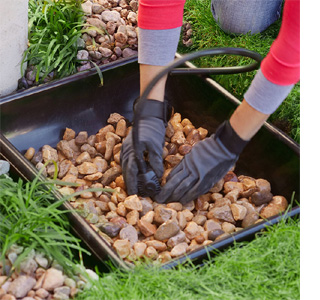
9. Dig a hole to accommodate the size of your plastic tray. It should be shallow enough to allow the lip of the tub to be flush with the ground.
GOOD TO KNOW: Level the bottom of the hole. You want water to be able to collect at the centre.
10. Wash off any loose dirt and add a layer of pebbles or gravel to the bottom of the tub. Attach a length of hose to the pump and center the pump on the bottom of the tray. Add more pebbles to hold it in place. Guide the electrical cord to the outside edge of the tray and cover it with rock.
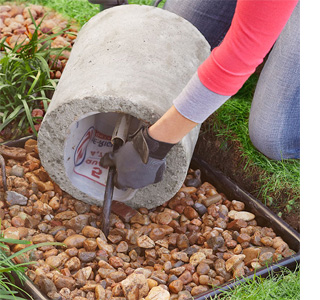
11. Thread the hose hose through the PVC pipe in the base of the column and place centrally on the tray full of rocks.
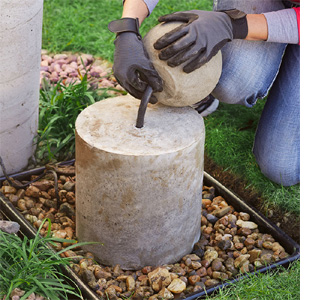
12. Test fit the globe on the base by threading the hose through the PVC pipe. Trim the hose flush with the pipe in the top of the sphere.
13. Spread exterior silicone around the top of the column and underside of the globe. Place the globe on the column so the PVC pipes touch. Add silicone to the space between the hose and the PVC pipe at the top of the globe, but avoid getting any inside the hose.
GOOD TO KNOW: Allow the silicone to dry thoroughly before running water through the hose.
14. Fill the tray to the top with water. Switch on to check the flow of water to the top of the globe. Always unplug the fountain when you’re not around and refill the tray before each use.