
Quick Project: Build a Privacy Fence
If you have overlooking neighbours, this quick and easy fence will give you the privacy you need.
03/08/2019
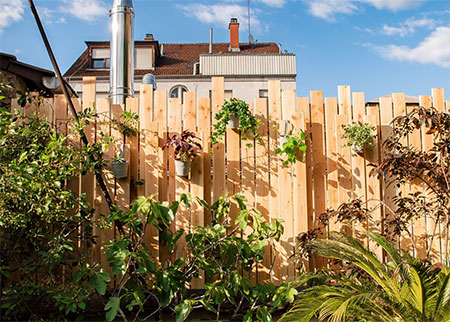
This privacy fence is a quick project that you can easily complete in a weekend and all your supplies can be purchased at your nearest Builders Warehouse or Builders store.
We offer two options for building the privacy fence: use 22mm thick PAR pine for a sturdy fence, or use 12mm thick PAR pine to save on costs. Both work well for this type of project, and as long as you regularly apply a protective finish on a regular basis, the privacy fence should last a long time.
YOU WILL NEED:
9 of 22 or 12 x 94mm PAR pine (adjust quantity to size of fence required)
4 x 50mm screws
TOOLS:
Drill / Driver plus assorted bits
Jigsaw
Sander plus 120-grit sanding pads
Clamps
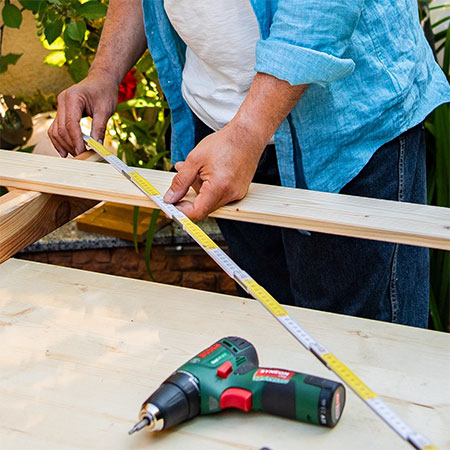
Tape measure and pencil
Workbenches or long table
HERE'S HOW:
1. To assemble a 1 metre length of privacy fence, cut [2] 50 x 76mm pine crossbeams to 1200mm length.
GOOD TO KNOW: You can modify the privacy screen to fit into any space. The larger the space, the more panels you can assemble and connect together.
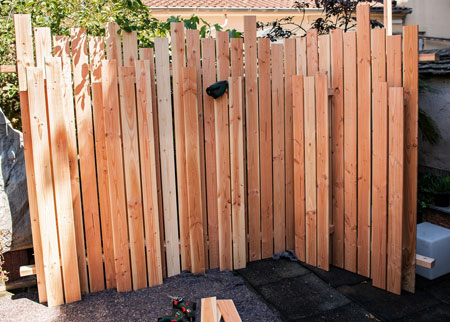
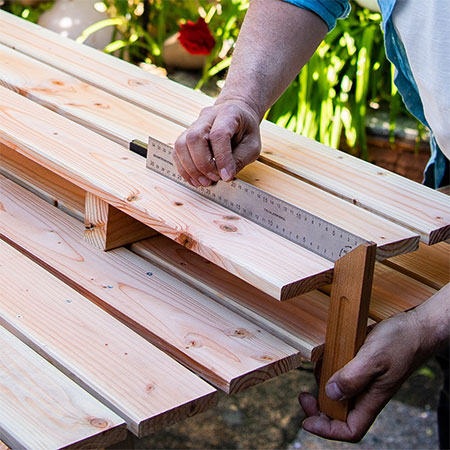
2. Place the cut crosspieces onto a couple of workbenches. Position a slat at each end of the crosspieces.. For this project the two end slats are 800mm apart (top and bottom). Allow a 200mm overhang under the position of the bottom crosspiece.
GOOD TO KNOW: The slats are perpendicular to the crossbeams so that your privacy screen stands up straight when you’re done. To check the alignment, measure the diagonal between the two ends of the crossbeams - opposite corners - to determine a 90-degree angle or the spacing is equal.
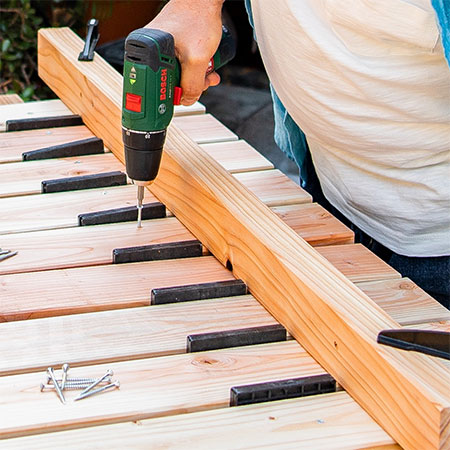
3. Fix these end slats with [2] screws at each overlapping point.
4. Place the remaining slats between to two end slats, The slats need to be placed with equal gaps between the slats.
GOOD TO KNOW: To determine how much space to allow between the slats, Push the slats to one side and measure the ‘remaining’ distance between them. Divide the distance by 8 to know how much of a gap to leave between each slat and then use a spacer to ensure proper gap size.
5. Use an offcut as a straightedge to mark the holes for the screws. . Attach each slat to the crossbeam underneath with [2] screws.
GOOD TO KNOW: To add a little something extra to our privacy fence, we added a second layer of wooden slats to sit in front. This part is entirely up to you and can even be left off if you are worried about costs.
6. For each decorative panel, cut [2] crosspieces to 300mm in length. Place on the front of the privacy screen and screw in place.
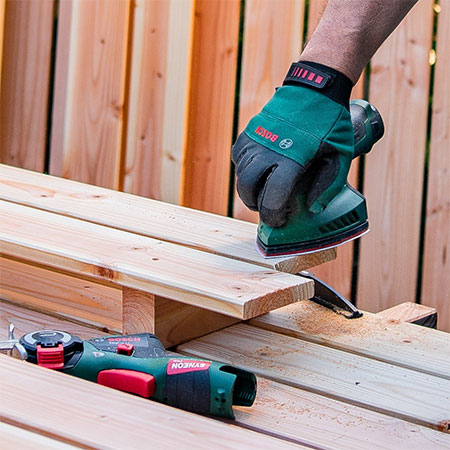
7. Sand all the cut edges smooth after completing each panel.
Finishing
Where the crossbeam protrude at the ends you can join the panels together, allowing to add as many extra panels as you need to complete your privacy screen. You can also turn the panels into a corner, if desired.
IMPORTANT: When assembling extra panels, stagger the arrangement of the crossbeams so that they overlap each other at the ends to make it easy for joining together with screws.
While not shown here, it is necessary to apply an exterior sealer to protect the privacy fence from the elements. You have several choices here; from creosote to exterior wood sealer and you will find everything you need at your local Builders.
Now you need to secure the screen in place: and there are various options depending on where the screen will finally be placed. You can drill holes and screw it in place or build a support so that it can stand freely.

all about diy