
A DIY Window Frame Garden Feature
This simple DIY feature for the garden lets you display a variety of succulents either on a feature wall outside the house or on a porch or deck wall.
20/11/2020
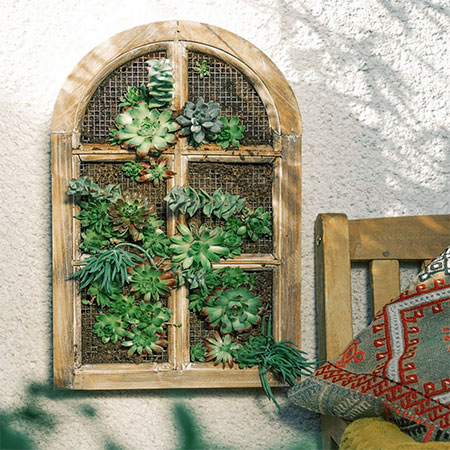
Here's a simple way to add an interesting feature either on an outdoor garden wall, on a balcony, a porch or patio wall, or even on an indoor wall that is close to a window that receives a lot of natural light. This succulent window feature is ideal for those who only have a small garden or balcony and want to incorporate more greenery into the space. Plus, succulents come in a variety of different types and a range of beautiful green hues with blue or red tints.
YOU WILL NEED:
An old window frame, or make your own using scrap wood you have lying around
Formica laminate or wood veneer
Wooden slats 22 x 22mm PAR pine - we used 12 x 30mm strips but you may have to substitute this
Cup hooks
5 Steel angle brackets and 16mm screws
3 x 30mm screws
Waterproof wood glue
Wire or plastic mesh
Plywood or Masonite backing board, cut to fit
TOOLS:
Drill / Driver or cordless screwdriver plus assorted bits
Jigsaw
Bosch Tacker or heavy-duty staple gun
Tape measure and pencil
Clamps
Safety gear
HERE'S HOW:
1. If you aren't able to source an old window frame for this project, it's easy enough knock one together using scrap wood you might have lying around or reclaimed pallet wood.
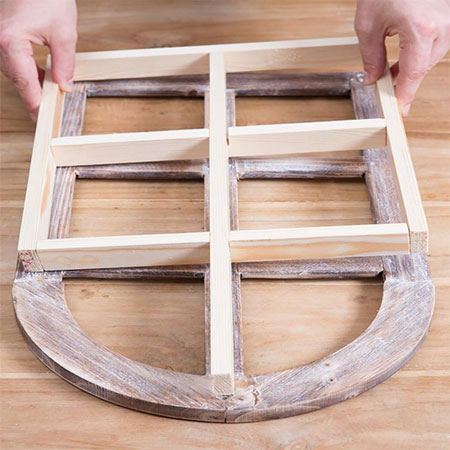
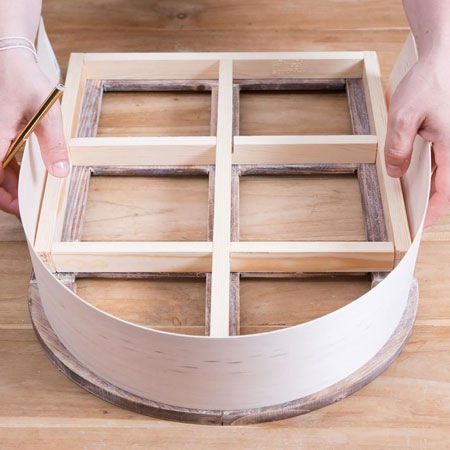
2. Once you have a window frame ready, you can make a frame to fit on the back of the window. Follow the step below for making the frame.
3. Carefully measure the dimensions of the window, measuring and noting all the measurements.
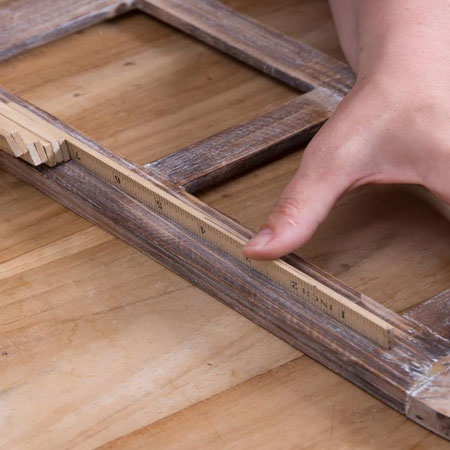
4. With all your measurements double-checked, cut the strips to the required length to assemble the frame.
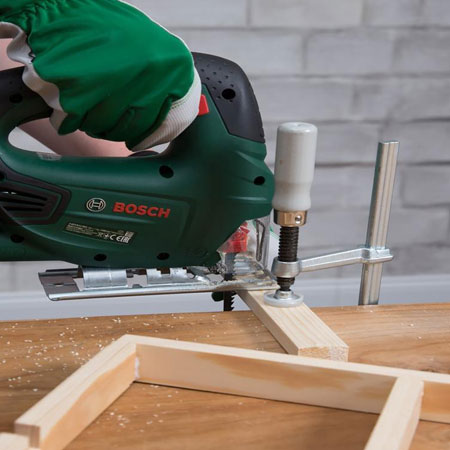
5. Assemble the outer section of the frame with wood glue and 30mm screws before measuring, marking and cutting to fit the centre support of the frame. Glue in place but DO NOT attach the frame to the window just yet.
GOOD TO KNOW: Because certain pieces of the frame will overlap, you will need to mark the locations for drilling lap joints. A lap joint is where one piece of wood intersects another and both are cut at halfway in order to fit over each other.

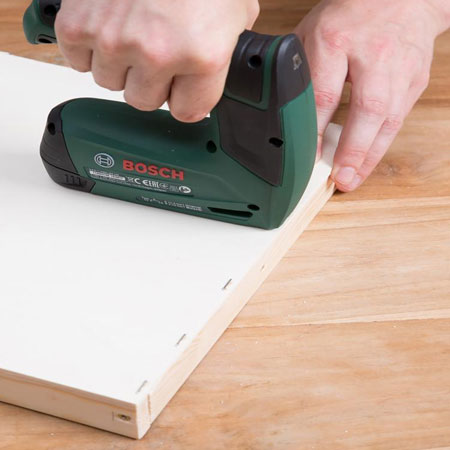
6. Cut your laminate or veneer to a width of that of the wooden frame that sits on the back of the window. The length should fit around the frame, as shown below.
7. Use a stapler to secure the laminate or veneer around the outside of the frame. Look at the image above to see how the laminate or veneer will sit around the frame at the back of the window.

8. To add the back to the wooden frame, cut a piece of 3mm plywood or Masonite to the size of the frame and secure this in place with your Bosch Tacker or staple gun.
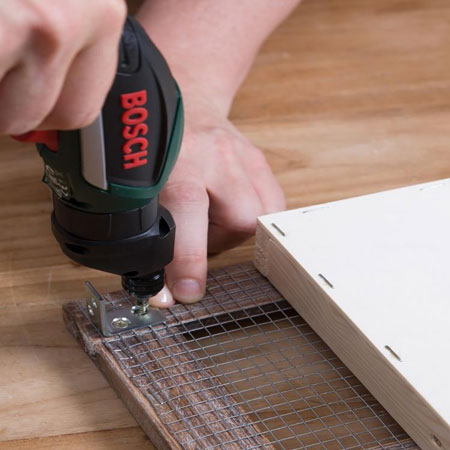
9. Cut the wire or plastic mesh to the shape of the window and secure in place with your stapler. Attach the steel angle brackets at the [4] square corners and [1] at the top in the centre of the arch.
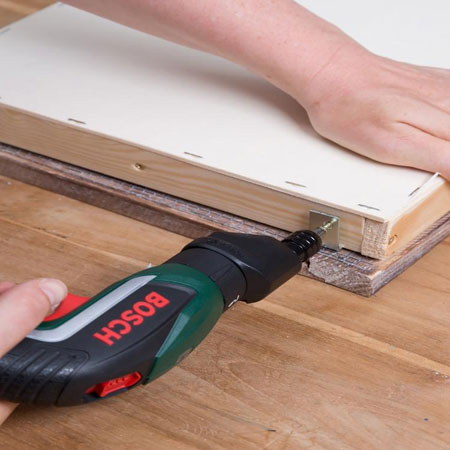
10. Now you can secure the wooden frame onto the window using the steel angle brackets, as shown below.
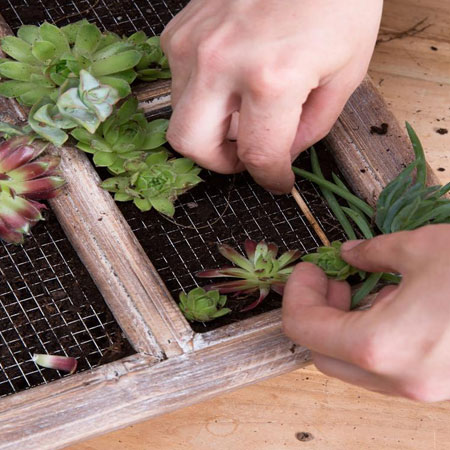
Filling the frame
Working from above (top face), fill the frame with potting soil and gently place your succulents within this. I like to have some moss on hand to fill in any blank spots.
Rather than watering the plants, use a misting spray or spray bottle to fresh with water when necessary.
all about DIY