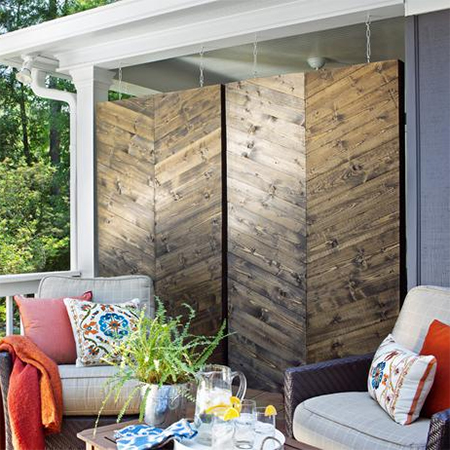
DIY privacy screen for patio or balcony
This pine privacy screen is perfect for a patio or balcony. You will find a selection of PAR pine products at your local Builders and you can modify the size of the panels to fit your particular situation - or build extra panels if you need more privacy for a large patio or entertainment area.
hgtv.com
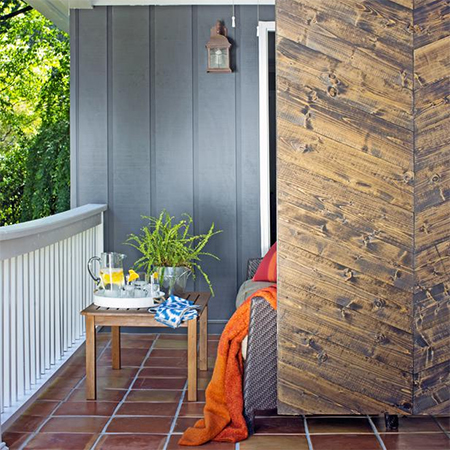
Use PAR pine timber to build a privacy screen to close off a patio or balcony. If you don't have a place to hang the screen, modify the design by adding feet to the panels so that they stand on their own.
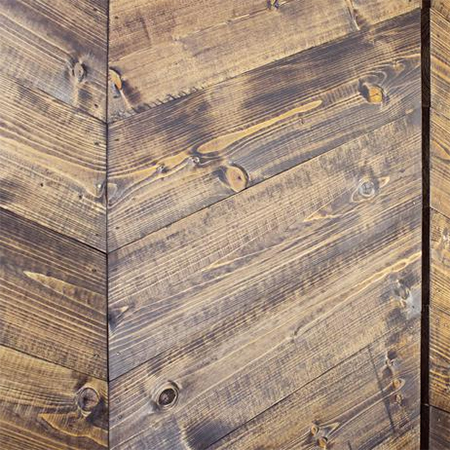
The PAR pine planks are arranged in a herringbone pattern and lightly burnt with a Dremel VersaFlame blowtorch for a stunning detailed effect.
YOU WILL NEED:
20 x 69mm wide PAR pine for the panels and frame
Exterior sealer or varnish
4 x 50mm cut screws (for frame)
4 x 35mm cut screws (for panels)
4 steel corner braces and 25mm cut screws
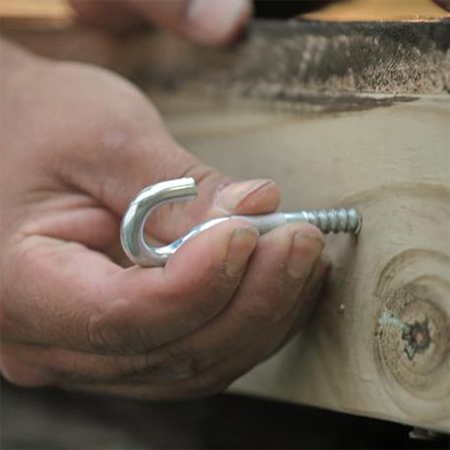
4 large heavy-duty eye hooks
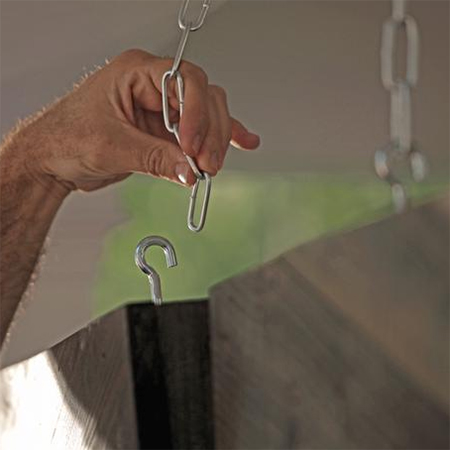
Lengths of chain for hanging the screen
TOOLS:
Drill / Driver + assorted bits
Orbital sander + 120- and 240-grit sanding pads
Carpenter's square
Painting equipment
Tape measure and pencil
Jigsaw, circular saw or mitre saw
You will find everything you need for this project at your local Builders Warehouse.
HERE'S HOW:
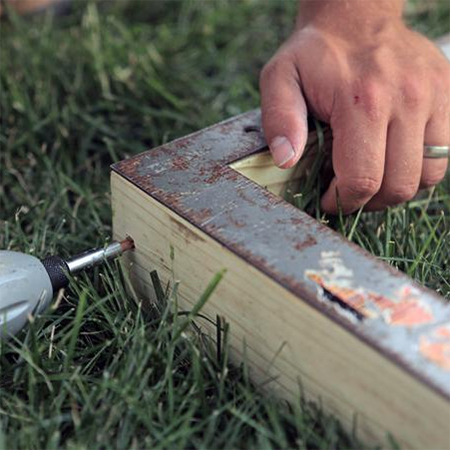
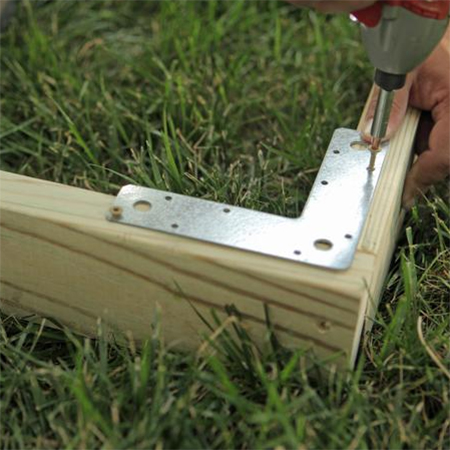
1. Determine the size of the screen you need and make the frame according to this size. Have PAR pine cut to size (or cut your own using a jigsaw, circular saw or mitre saw). Join the frame together using 4 x 50mm cut screws.
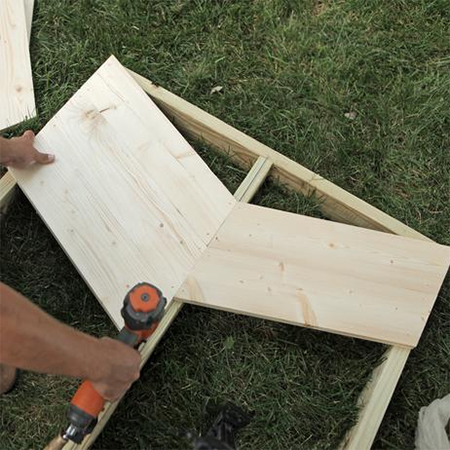
2. Mount a centre beam for added strength and stability. Mark a line down the centre beam as a guide for mounting the front panels.

3. Secure steel corner braces on all corners using 25mm cut screws.
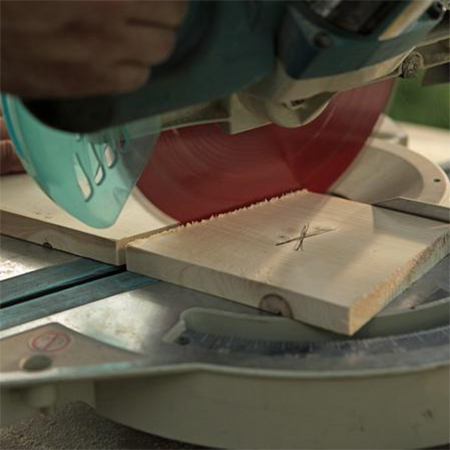
4. Using a mitre saw to cut a test piece to determine the angle for the herringbone design. The cutting angle is approximately 22.5-degrees, but test this on your own frame. Also mark the test piece for the length of each panel.
5. Secure the panels to the frame, following the centre guide line on both sides, and using 4 x 35mm cut screws. Leave awkward angles until last.
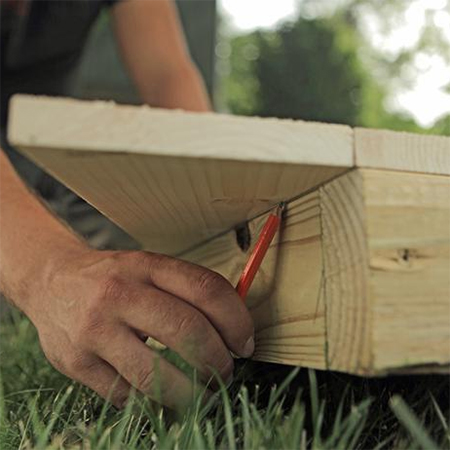
6. For the remaining panels use a pencil to mark for cutting to fit and attach in the same way.
7. Screw in heavy-duty eye hooks at the top of the frame and in the ceiling beam. If there is no ceiling beam use expanding anchor bolts with hooks.
8. Cut the chain to length and hang your new privacy panels.
Finishing
Sand all rough edges with 120- and then 240-grit sanding pads. Before sealing or applying exterior varnish you have the option to use a Dremel VersaFlame or blowtorch to lightly singe the surface of the timber to create a dramatic grain effect.