
Make This Patio Umbrella Stand And Table
Use plywood and pine, or replace with meranti or saligna, to make this practical patio table and umbrella stand.
21/07/2020
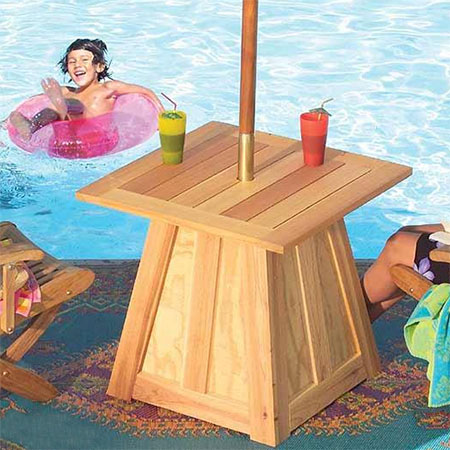
This DIY patio table and umbrella stand might look like a difficult project, but take a look at the step-by-step instructions below and you will see that it is quite an easy project for the DIY enthusiast with basic skills. Make a date to set aside a weekend to get stuck into this project so that you have a patio table and umbrella ready for spring.
To make the patio table and umbrella stand you will need plywood and pine, or you can replace the pine with meranti or saligna, both of which are ideal for outdoor projects. If you do use pine, just remember to regularly apply an exterior sealer every 18 to 24 months.
YOU WILL NEED:
A 4 of 546mm base x 327mm top x 606mm tall - plywood side panel
B 4 of 38mm x 38mm x 597mm pressure- treated inside corner cleats
C 4 of 22mm x 67mm x 680mm corner stiles
D 4 of 22mm x 90mm x 680mm corner stiles
E 4 of 22mm x 90mm x approx. 444mm lower rails
F 4 of 22mm x 90mm x approx. 241mm upper rails
G 4 of 22mm x 90mm x 492mm centre stiles
H 6 of 25mm x 90mm x 102mm x 560mm top slats
J 2 of 25mm x 90mm x 102mm x approx. 560mm short frame sides
K 2 of 25mm x 90mm x 102mm x 737mm long frame sides
L 4 of 38mm x 38mm x 254mm inside top cleats
25, 30, 50 and 60mm cut screws
38mm pocket-hole screws
Waterproof wood glue
1 of 600mm length of PVC pipe (check diameter against diameter of umbrella stem)
Eye bolt and nut
Sealer, oil or exterior varnish to finish
Cement and sand mix
Bucket
Dust tape
TOOLS:
Drill / Driver or Combi Drill plus assorted bits
Multi or orbital sander plus assorted sanding pads
Mitre saw
Table saw
Jigsaw or circular saw
Pocket-hole jig
Clamps
Spirit level
Tape measure and pencil
HERE'S HOW:
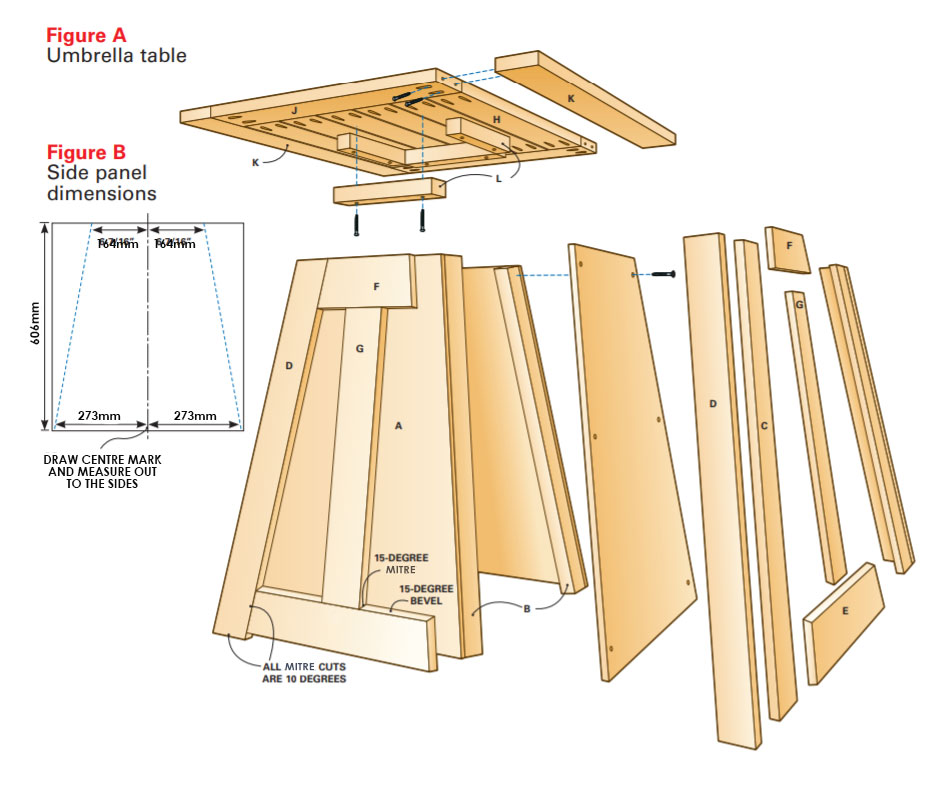
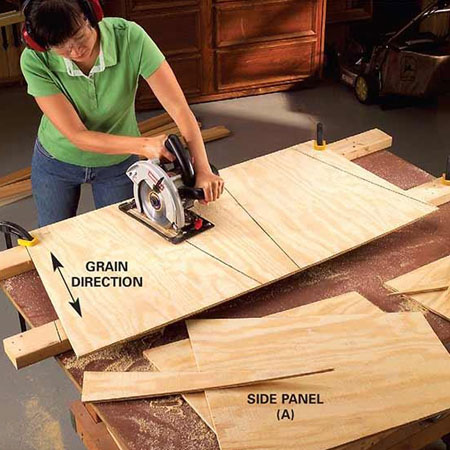
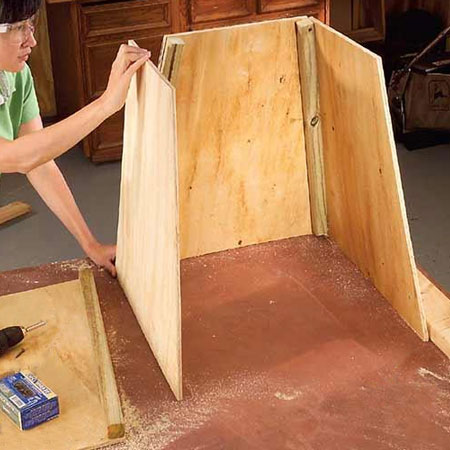
1. Before you can start to assemble, you will need to cut the plywood panels for the base of the table. Cut all [4] sides (A) from a sheet of plywood (Figure B).
GOOD TO KNOW: If your cuts aren't exactly perfect, don't worry since they will be hidden behind the rails and stiles.
2. To start assembling the base, secure the corner cleats (B) to [2] of the side panels with [4] screws along each edge. Secure the other two side panels in the same way - shown below.
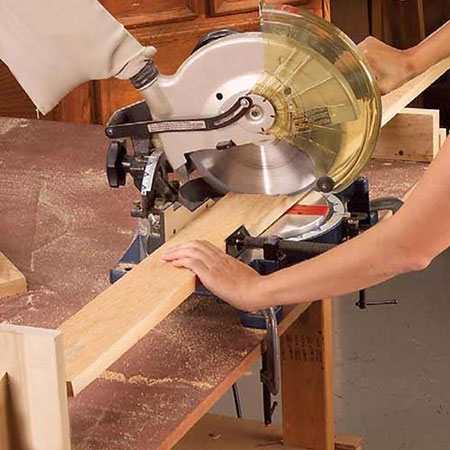
3. Set your mitre saw for a 10-degree angle to cut the stiles (C & D).
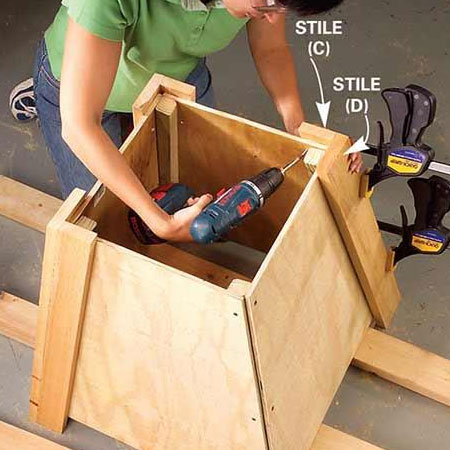
4. Place the base on some scrap pieces so that you can glue and clamp the stiles (C & D) to each other. Also, spread glue on the stiles and screw them to each corner from inside - as shown below.
Keep in mind that these instructions are Imperial and not Metric and will need to be converted. I use this handy conversion calculator.
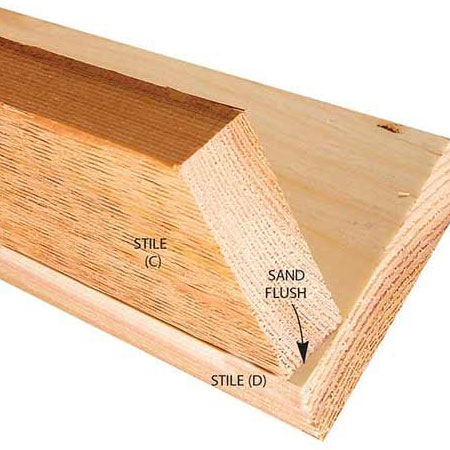
QUICK TIP: You don't need
complicated mitre cuts - When cut at a 10-degree
angle, the ends of the stiles (C & D) won’t line
up evenly,
but you can simply sand the
protruding corners flush. If you prefer
perfection - pivot your mitre saw to mitre 10-degrees
and tilt
to bevel 10-degrees.
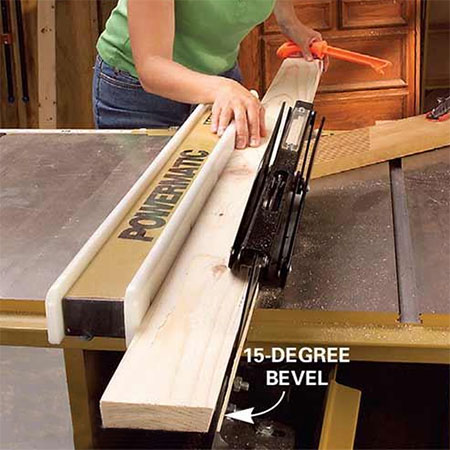
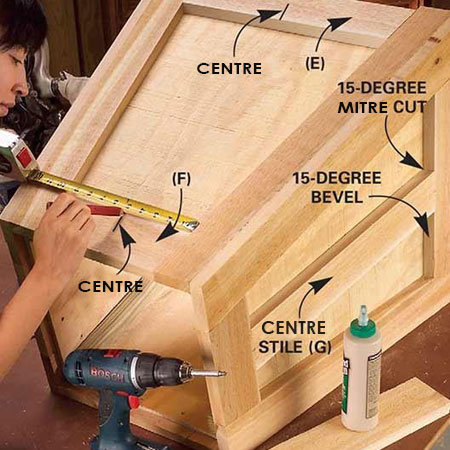
5. Set your table saw to cut a 15-degree and for a bevel along the top edge of the lower rails (E). This will allow water to drain off.
GOOD TO KNOW: I don't have a table saw, but you can still do this cut with a circular saw if you raise the lower rails on a plank and clamp firmly in place at either end. OR you can leave this off completely.
6. Attach the rails (E & F) with glue and screws driven from inside. Then mark their centres, position the centre stiles (G) and fasten them.
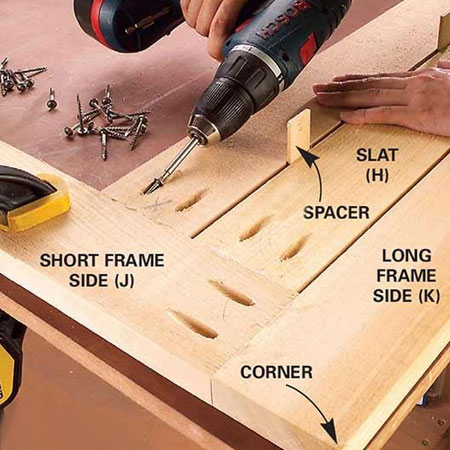
7. Lay out all the pieces
for the tabletop (Figure A)
making sure the best faces are face down. Mark
the pocket-hole
side before drilling [2]
pocket-holes per end. Secure one corner with
wood glue and pocket-hole screws and then
position the slats (H)
with 3mm spacers to fasten in place.
GOOD TO KNOW: Use clamps to ensure all pieces are flush along the joints.
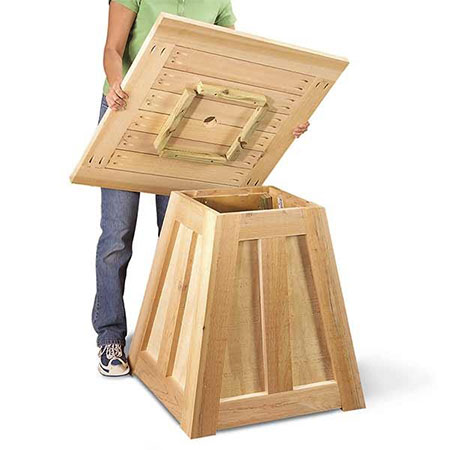
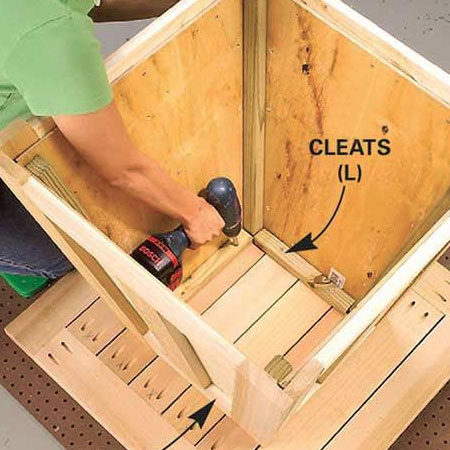
8. Now you are ready to centre the base on the tabletop by adding cleats (L) to the tabletop with 50mm screws. Be careful not to overdrive the screws or they will protrude through the top. Drive screws through the upper rails (F) into the cleats.
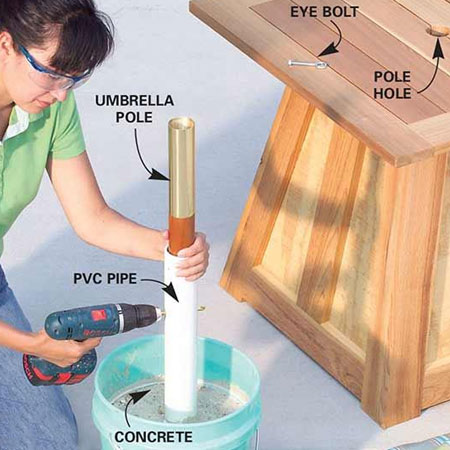
9. Make a simple and stable base for your umbrella by repurposing an HTH chlorine bucket or similar. Mix 4 parts sand with 1 part cement and water in the bucket. Wrap the base of the PVC pipe with duct tape to keep the concrete out. Set the pipe into the cement mix and push down to the bottom of the bucket. Hold a spirit level against the pipe to make sure it’s standing vertical.
10. To be able to insert the stem of your umbrella into the base, place the stem of your umbrella in the PVC pipe to drill a hole through the PVC pipe and the stem of your umbrella. The diameter of the hole should be slightly larger than the diameter of the eye bolt used to secure the two together.
family handyman