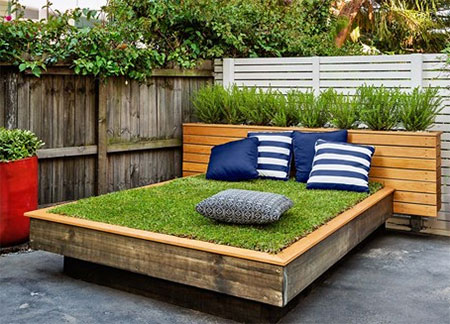
A DIY Day Bed that Adds a Touch of Green
If you love to relax in the garden but don't have a comfortable place to lounge, this DIY day bed is just the thing.
23/09/2019
bhg.com.au
This DIY day bed is great for a garden that doesn't have a large lawn area and is easy to make. You can lounge and relax in the garden on artificial or instant lawn and add some greenery to an otherwise blank garden or courtyard.
You can make the day bed using PAR pine or untreated pine that you can buy at Builders Warehouse, or you can use reclaimed wood to make the day bed.
Remember that the finished day bed will remain outdoors, so do apply a quality exterior sealer to protect the wood from the elements. We recommend using Woodoc 50 or Woodoc 55 (coastal regions).

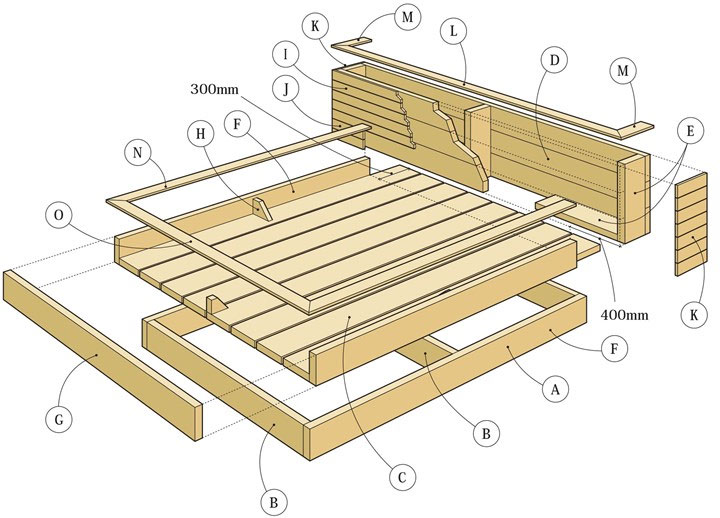
YOU WILL NEED:
A - 2 of 200 x 50 x 2300mm pine - Base, sides
B - 3 of 200 x 50 x 1400mm pine - Base, ends
C - 8 of 200 x 50 x 2400mm pine - Base, floor
D - 6 of 200 x 50 x 2400mm pine - Head sides
E - 5 of 200 x 50 x 600mm pine - Head, blocks
F - 2 of 200 x 50 x 2100mm pine - Bed frame, sides
G - 1 of 200 x 50 x 1800mm pine - Bed frame, end
H - 3 of 150 x 100 x 50mm pine - Bed frame, braces
I - 5 of 86 x 19 x 2438mm pine - Long cladding
J - 4 of 86 x 19 x 319mm pine - Short cladding
K - 14 of 86 x 19 x 300mm pine - Side cladding
L - 1 of 86 x 19 x 2448mm pine - Long capping
M - 2 of 86 x 19 x 324mm pine - Side capping
N - 2 of 86 x 19 x 2086mm pine - Side bed, capping
O - 1 of 86 x 19 x 1810mm pine - End bed, capping
Have all your materials pre-cut for easy assembly
100mm and 50mm screws
Landscaping fabric
Instant lawn or artificial turf
Woodoc 50 or 55 to protect
TOOLS:
Drill / Driver plus assorted bits
Orbital Sander and assorted sanding pads / sandpaper
Jigsaw
HERE'S HOW:
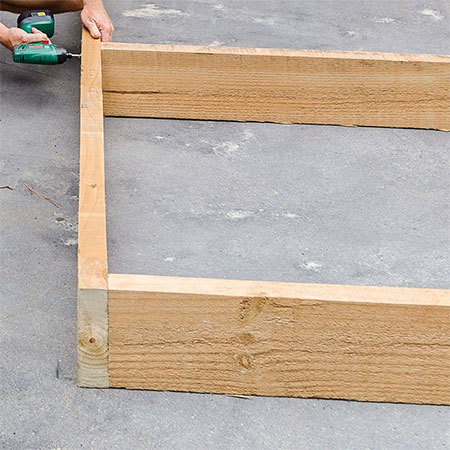
1. Start off by joining the [A] sides to the [B] ends. Place one at each end and one in the centre and secure with 100mm screws.
GOOD TO KNOW: For all screws pre-drill a pilot hole before driving in your screws
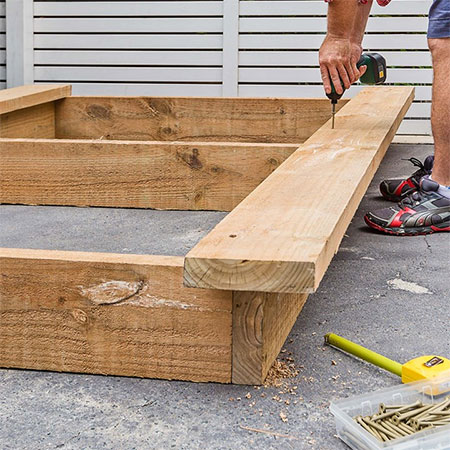
2. Attach the [C] outer base floor with a 100mm overhang at end and sides. Make sure they are flush with the top of bed. Now you can evenly space the remaining base floor pieces in between. Screw all in place.
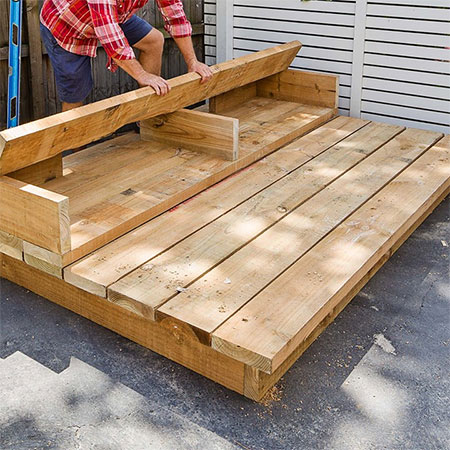
3. Position [E] blocks on the edges at each end of bed - with one in the centre. You also need to add another block at each end, running along top edge of bed flush with end blocks. Lay the [D] head sides on top and secure with screws. Repeat for the other side. Place this assembly at the top (head) of bed so it overhangs each side by 400mm. Screw down through blocks into bed.
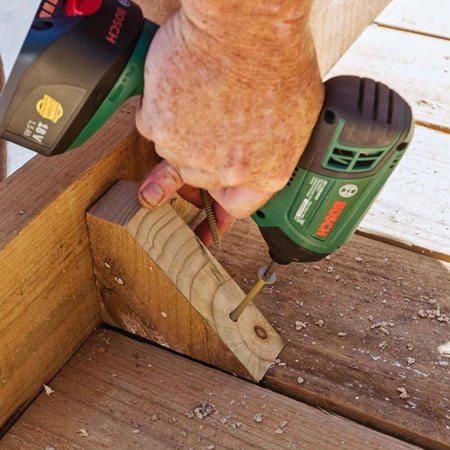
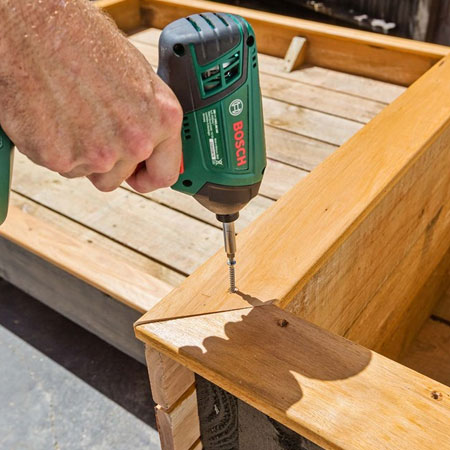
4. Sand the outer sides of the [F] bed frame sides and ends [G] and mount on temporary (200mm) blocks so they butt up to underside of base floor. Screw the ends to sides and through frame pieces into the base floor.

5. Use your jigsaw to cut [H] bed frame braces from offcuts and screw onto the sides and floor for extra support.
6. If you are applying stain to your DIY day bed, you can now apply to the bed frame and bed head. You will also need to cut long [I], short [J] and side [K] cladding to fit.
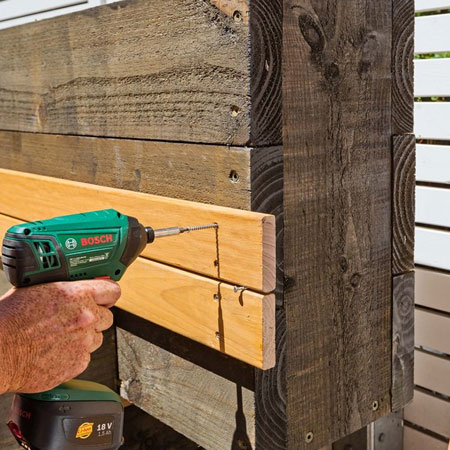
7. Position the first long cladding on bed frame along the bed head. Continue to secure cladding, leaving a 4mm gap between each board. Fix short cladding under long boards so they butt up to bed frame. Screw side cladding pieces to each end so they line up with face boards.
GOOD TO KNOW: Use an offcut to ensure it overhangs ends of bedhead equally all round.
8. To finish off your day bed, add the mitre capping [L, M, N, O]. Allow a 5mm overhang around the edges they sit on. Screw to secure in place.
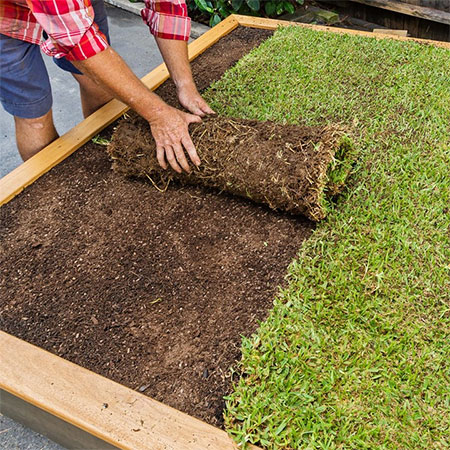
9. Put down landscaping fabric before rolling on the instant lawn or artificial turf. Water well once laid and water at least once a week to keep the grass nice and green (if using instant lawn).