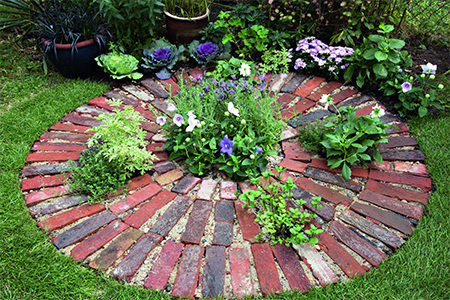
Lay a Decorative Brick Seating Area for your Garden
If you don't have a dedicated place to sit in the garden, this DIY decorative brick seating area is affordable and can be completed in a day.
15/01/2022
bunnings.com.au
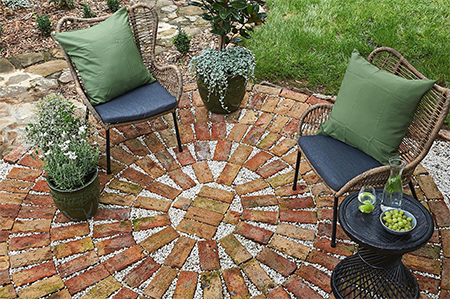
Having a dedicated seating area in the garden lets you enjoy a moment of tranquillity whilst surrounding yourself with the scents and sights of outdoors. If your garden lacks a place to set down a couple of chairs to sit and have a sundowner, this DIY brick circle provides the perfect spot.
Laid out using inexpensive clay bricks, or you can substitute with face bricks, this brick circle will only take you a day to lay and will be ready for use in a day or two for you to set out a couple of chairs and a table and take a seat.
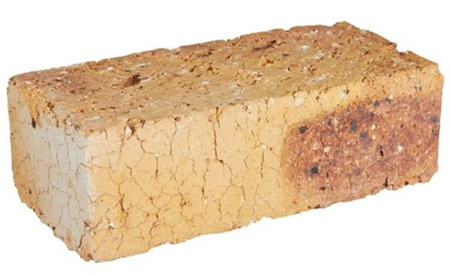
Mutch Verona clay bricks cost R2.99 each at Builders and you can have them delivered to your door.
YOU WILL NEED:
Clay stock bricks or face bricks, approx. 300
2 of 20kg bags cement
6 of 20kg sand gravel
8 x 20kg bags sand
Wooden stages and string line
White gravel or small pebbles
Quantities based on a 2.7-metre diameter brick circle
TOOLS:
Spade and shovel
Rake
Steel straightedge or plank
Rubber mallet
Wheelbarrow
Tamper
Garden hose
Soft sweeping brush
Tape measure and spray marker
Safety gear: gloves, dust mask, safety glasses
HERE'S HOW:
Step 1
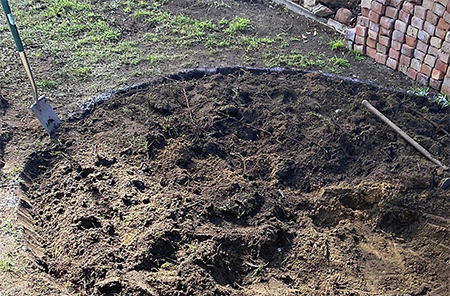
Select the perfect location for the brick circle, preferably one that will provide some shade during the hottest time of the day. Plant a stake where the approximate centre will be and use a length of string and spray marker (available at Builders) to draw out the circle.
Step 2
With the shape drawn out, use a spade to cut around the edges of the shape and to remove the soil to a 12-centimetre depth. Go over this with a rake to remove any large stones or rocks that will interfere with the laying process. Finish off by going over the top of the soil with a straightedge or plank to create a reasonably flat surface.
Step 3
Spread the gravel over the area using a rake and then compress this with a tamper. Using the shovel, mix 4 parts sand with 1 part cement in a wheelbarrow and spread this over the compacted gravel. You ideally want a base that is at least 2 centimetres in thickness before laying the bricks.
Step 4
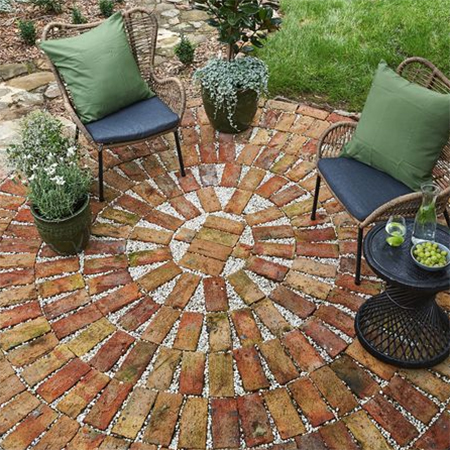
You can draw up a basic plan for how you would like to lay the bricks in a design as long as you keep the bricks as closely packed together as possible.
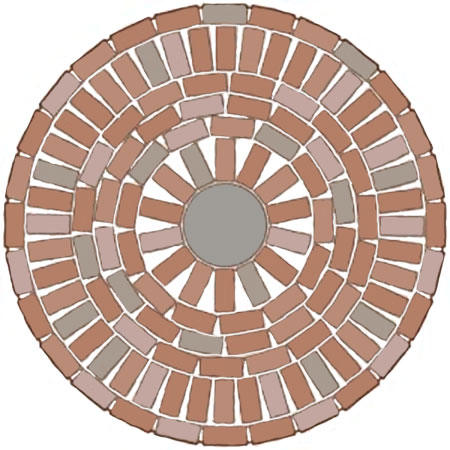
You can vary the materials, design and shape of the brick circle to your own needs.
pinterest.com/pin/527484175110897943/
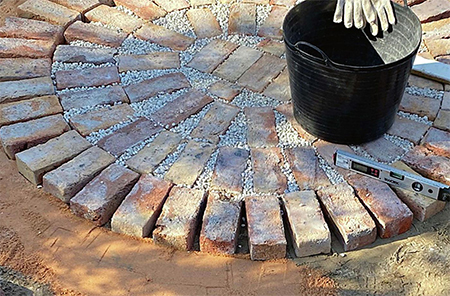
Step 5
Start laying the bricks from the centre outwards tapping them into the base with a rubber mallet. As you work, you can also use the straightedge to confirm that all the bricks are at the same level. It is easy to make any adjustments at this stage
Step 6
After completing the brick circle, mix 4 parts sand to 1 part cement and sweep this into the gaps between the bricks. It should fill up the gaps to about halfway. Finish off with a layer of white gravel or small pebbles. Sprinkle the area with a light going over with a hosepipe and let it cure for a couple of days before putting the brick circle to use.
Finishing
Sprinkle the area with a light going over with a hosepipe and let it cure for a couple of days before putting the brick circle to use.