
Build a Low-Maintenance Water Feature or Pond for the Garden
Most families spend a lot of time outdoors in the spring and summer and building a water feature, small or large, adds a tranquil and cooling feature to a garden.
07/08/2022
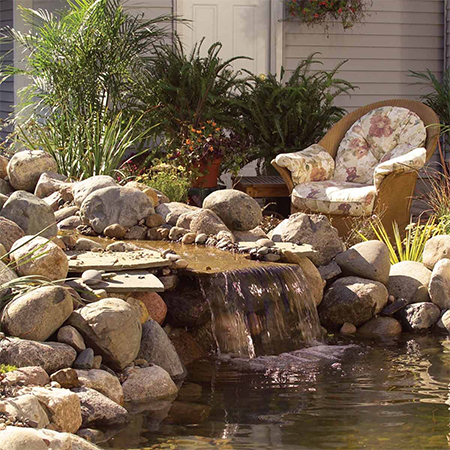
Any garden will benefit from the addition of a water feature. Even a small, simple water feature will bring a cooling element to your outdoor space and set the atmosphere for relaxation. A water feature can be small or large depending on the size of the garden and we offer a few tips and guidelines to setting up a low-maintenance water feature simply for aesthetics or to have a couple of Koi swimming around and that will add investment and make for an interesting focal point.

TIP 1
Buying medium-sized rocks can work out expensive but a better solution would be to make your own rocks using spray insulation foam. I normally use Alcolin Filla Foam (R170 per can at Builders) and this will make quite a few rocks of assorted sizes.
If you want to make your own rocks, enter "expanding foam rocks" into your search bar and you will find plenty of online tutorials and videos. The rocks are super-easy to make in all sizes and you can paint these with realistic rock effects using paving paint.
How to Make Artificial Rocks
To make artificial rocks for a water feature is easy and all you need is some chicken wire, spray foam and a utility knife. Shape the chicken wire into the size of rock you want to make. You can also pack the form with newspaper to give it more bulk. Once you have the shape, spray on the expanding foam and let it do its thing. Use a utility knife to make any adjustments to the shape and then paint with paving paint.

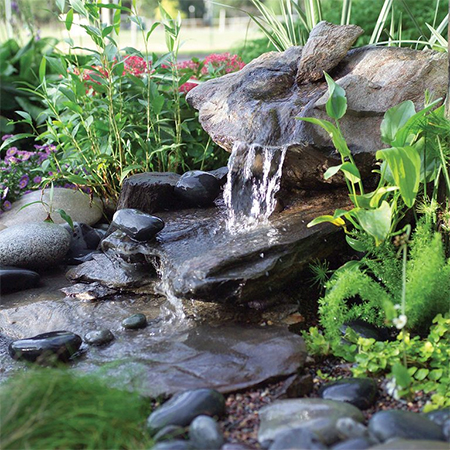
How to Make a Water Feature or Pond
Building a water feature for a garden is not as difficult as you might think. There are a few basic ground rules that should be followed, and you will need some accessories, but if done right, a water feature can provide interest and be fairly low-maintenance. Plus, there is nothing like the sounds of cool, running water tinkling in the background while you relax in the garden.
YOU WILL NEED:
Pond liner, the thicker the better
Pond or water feature pump
OPTIONAL: Landscaping fabric
Assorted pebbles and rocks, real and artificial
Sharp sand (gritty river sand is best)
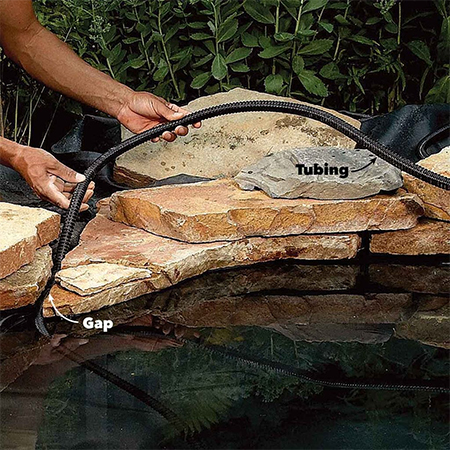
Silicone tubing and fittings
Utility knife
Screwdrivers
Spade, fork, and shovel
Wheel barrow
Protective glove
HERE'S HOW:
Set aside a couple of weekends for this project, preferably now before the rainy season starts. You should also select a good spot for the water feature, one that is close to power for running the pump and water to top up the water feature from time to time.
TIP 2
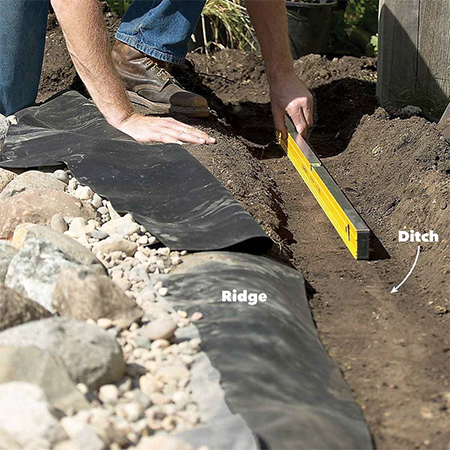
Make sure that the pond liner is large enough to cover the hole and extend at least 50cm over the surrounding area. This is where rocks and pebbles will be placed to secure the liner in position.
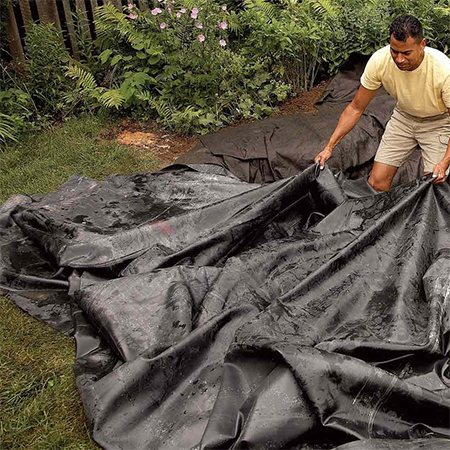
Step 1
Dig out the hole for where you want to place the water feature or pond. Remove any sharp rocks from the area as these might damage or puncture the pond liner. Lay down the landscaping fabric if you are using this and place the pond liner in the dugout hole and over the landscaping fabric, working from the centre outwards until the liner fits snugly around the shape. A thicker pond liner will offer less risk of being damaged than a thin one, so keep this in mind when selecting the pond liner.
TIP 3
Manually position rocks around the edge of the liner and inside the hole and use a spade to carefully fill in with pebbles.
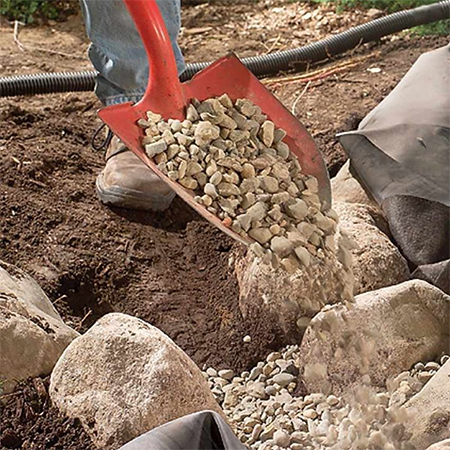
Step 2
When you start filling the hole with rocks - do it by hand. The last thing you want is to damage the pond liner before you fill up with water. Note that the pond liner needs to be covered up as much as possible. Over time, sunlight will degrade the rubber and make it brittle and easy to rupture.
TIP 4
Having a raised barrier around the edge of the pond liner and a dug out ditch will ensure that rainwater and debris does not flow into the water.
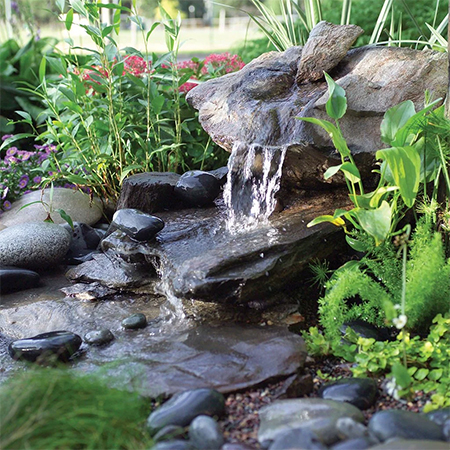
Step 3
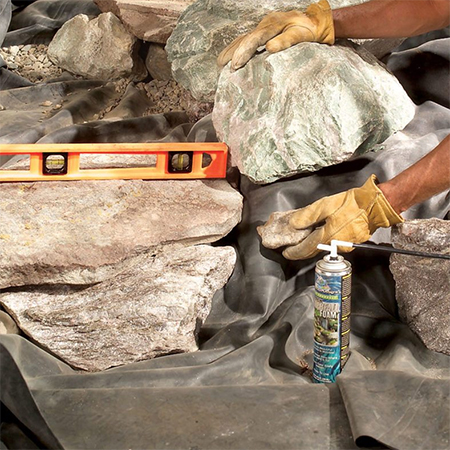
Position all the rocks how you would like them, particularly if you are designing a waterfall feature that will allow the water to trickle down into the main pond. To secure the rocks in place and fill any gaps you can use expanding foam spray. This will hold the rocks firmly in place and ensure that water runs back into the pond.
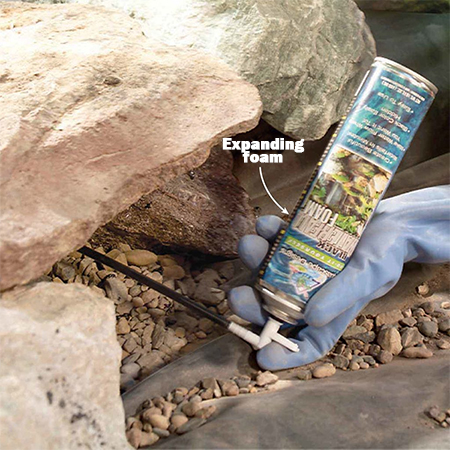
Make sure the rocks are set in the right place before you fill any gaps with expanding spray foam.
Step 4
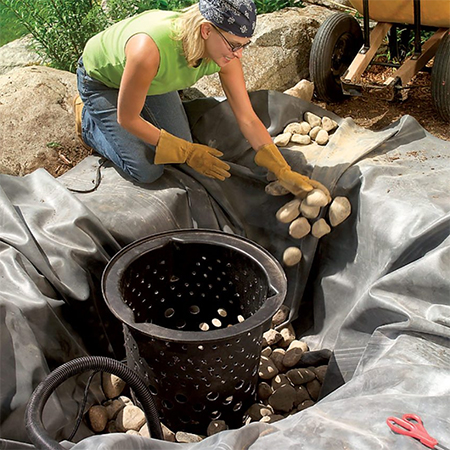
To keep the feature as low maintenance as possible, placing the water pump in the right position is important. If you simply install in the pond, it will quickly become blocked with all the debris that collects at the bottom and this will involve regularly having to unblock the pump.
TIP 5
By digging a deeper hole to house the pump and placing it in a plastic bucket or tub and surrounding this with small pebbles around and on top, will keep out debris and ensure the pump does not easily block up.
Step 5
It is important to place the pump electric cord and silicone tubing out of harm's way. Both can be hidden amongst the rocks but do make sure that they are easy to get to if they need to be replaced for any reason.
Fill the pond with water and switch on to test that everything works as it should and then grab a chair and relax!
images: family handyman magazine