
Plumbing catastrophe
Catastrophe at my home this morning upon discovering that my main stockcock tap was leaking, and not in a small way. I could actually hear running water in my office, which is about three metres away. Thank goodness I could hear it, or who knows how much water would have been wasted.
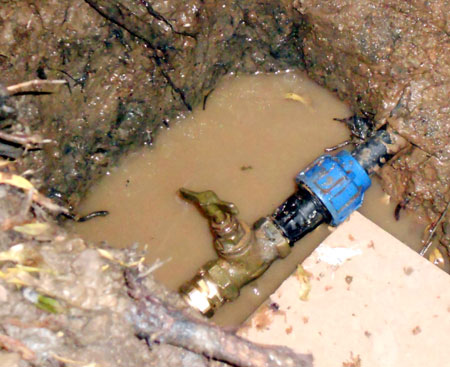
Managed to turn off the water with the tap, which meant that I didn't have to go looking for a way to switch off the municipal supply to the house. I put in a call to my local plumber and while waiting for the plumber to arrive, I grabbed a fork and spade and started digging away to enlarge the hole. Might as well do it, as you'll be charged an hourly rate if the plumber does it for you.
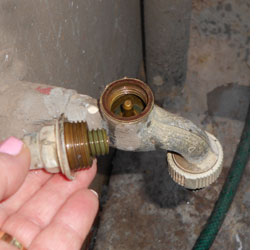
Thankfully, it was only the tap washer that needed to be replaced and the job was finish and klaar in 20 minutes, which included repairing two of my garden taps as well. On both garden taps only the washer needed to be replaced, and I probably would have done this myself, but since he was on site I asked him to do it for me. Replacing a tap seal is a fairly simple procedure - so I took some pics while he was busy.
IMPORTANT: First off, switch off the water at the main stockcock.
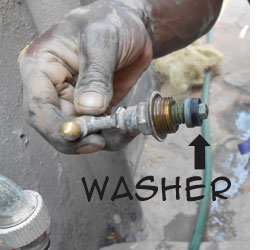
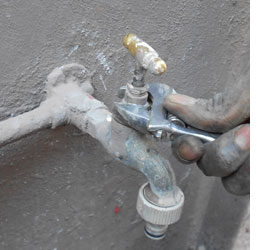
You will need a wrench to unscrew the top of the tap to get to the inner workings.
In the top image you can see the seal on the shaft in the top of the tap.
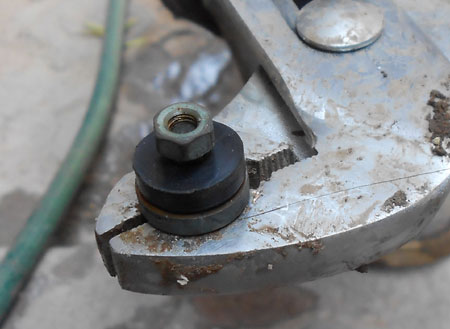
Now you can put everything back together again, making sure that you don't overtighten.
You will find more instructions here for repairs to a leaky outdoor tap.