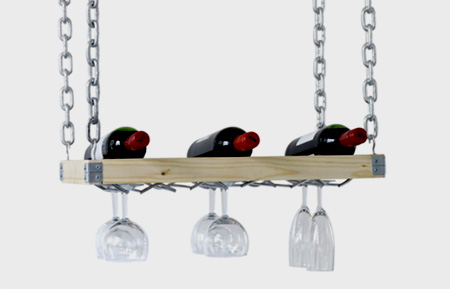
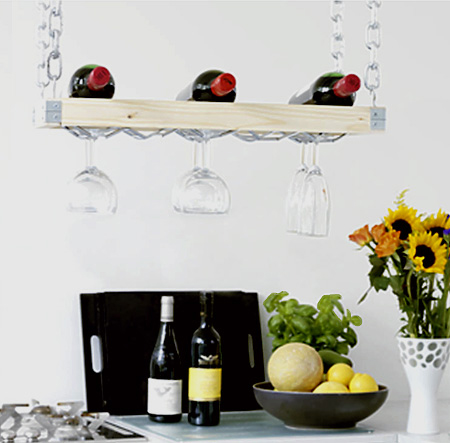
Make a hanging wine rack
Create our hanging wine rack and you’ll be the envy of your friends. All you have to do is to simply check out the items listed below and then follow our instructions. It’s sure to bring out the great cook and effortless host in you!
.
YOU WILL NEED:
Router or Dremel TRIO that comes with its own :
Multipurpose cutting bit (TR563)
Straight routing bit (TR654)
As well as other sanding, routing, cutting attachments
Other :
Workbench clamping system
Wood for wine rack
Wooden dowels x 8
Mitre glue
Sandpaper
Metal rack to hold wine glasses
Corner brackets
Screwdriver
25 ml Screws
Metal chain to hang wine rack and fixings into ceiling
Cup hooks x 8 (4 for the rack, 4 to screw into plugs in the ceiling)
Wall/ceiling plugs
HERE'S HOW:
Step 1
Cut the wood into lengths with the Dremel TRIO and the multipurpose cutting bit (TR563) to create a frame from the four lengths of wood.
Ours measured:
2 x 50 cm - front and back
2 x 25 cm - sides

Step 2
On the length of wood that will become the front of the wine rack, mark where the cuts for the bottle necks will go, then using the Dremel Project Table or your workbench, clamp this length of wood. Sand a shallow half circle on which to rest each bottle neck using coarse grit sandpaper – or if you’re lucky enough to own one, the NEW Dremel 4000 with sanding mandrel and sanding band 407.
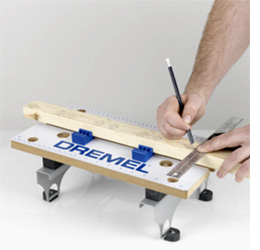
Step 3
Cut wooden dowels into twelve equal lengths (two per bottle) of 22 cm with the Dremel TRIO and the multipurpose cutting bit (TR563). Take the two lengths of timber that you cut for the front and back and measure on them the twelve points where the dowels need to be located. Mark up the timber every 10 cm to place each bottle. Then, within the 10 cm marks, place a mark at 1.5 cm and 8.5 cm. This will give you the centres for where the dowels will be placed. Make sure that the bottom edge of the timber to the centre of the dowels measures a depth of 1.5 cm.
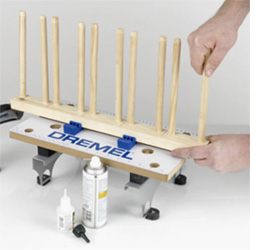
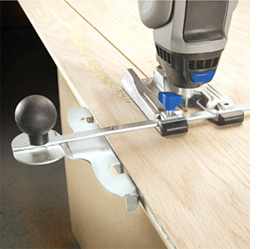
Step 4
Using the Dremel TRIO with straight router bit (TR654), rout half the way through the wood to create the slots for the dowels. Set the depth with the TRIO’s variable foot.
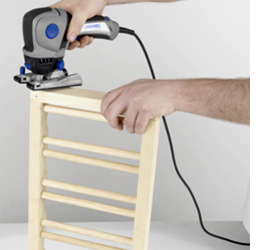
Bear in mind that you want your dowels to be close enough together for the bottles to be held but not so close that they topple easily off the dowels: approximately 4 cms. Sand away any rough edges using the Dremel TRIO with sanding bands TR407 or if necessary a fine grit sandpaper.
Affix the dowels using Joiner's Mate 2-part instant bonding glue rather than using wood glue, which can take up to 24 hours to dry. You have then created the back, front and rack for the wine bottles.
Step 5
Position the remaining lengths of wood on each side of the frame. Plunge cut pilot holes to attach the metal corner brackets then screw in 25mm screws and complete the wooden frame using the Dremel TRIO and the multipurpose cutting bit (TR563).
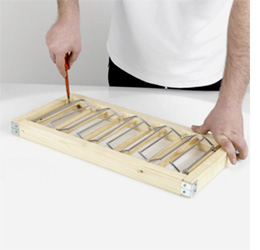
Step 6
Using your screwdriver or cordless screwdriver, screw the metal rack onto the underside of the wooden frame to hang the glasses.
Step 7
GOOD TO KNOW
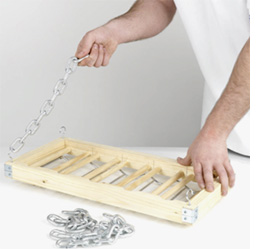
Draw round the corners of your empty wine rack on the ceiling to measure the location for your hooks from which to hang your wine rack. This will ensure that everything lines up. The hooks must be screwed into ceiling battens or beams.
Screw cup hooks into the corners of the top-side of the wooden frame. Then attach the metal chain to the four corners of the wine rack for hanging. To affix the wine rack to the ceiling, simply measure the location of the hooks, drill four holes in the ceiling, push in plugs and screw in four cup hooks. Then attach the metal chains to the self-tapping hooks in the ceiling.