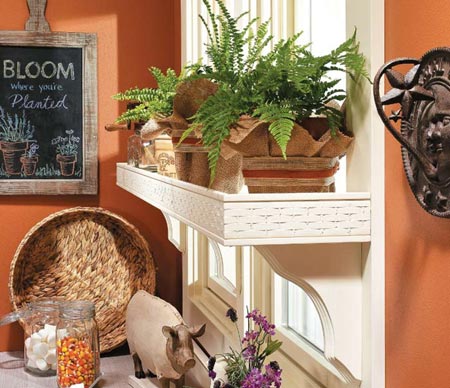
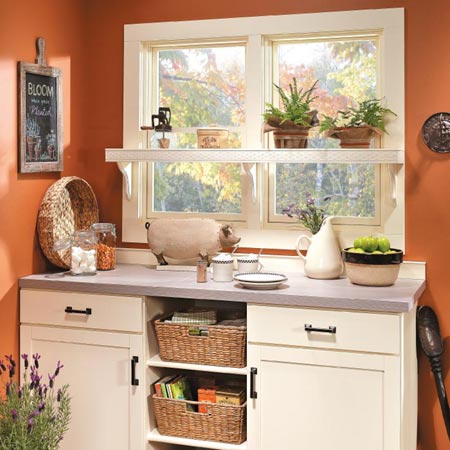
Easy DIY window shelf
Moulding and trim is an easy way to customise a shelf. And this handy shelf is the perfect solution for almost any room. It creates a storage surface and will upgrade your window’s style, too!
1. Measure up the width of your window. If you have a wooden frame you can easily attach the shelf to that. On a solid wall you will need to use wall plugs to anchor your shelf securely.
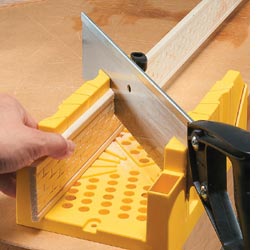
2. Start by cutting your shelf board to length - or have everything cut to size at your local Builders Warehouse.
3. Cut decorative moulding to create edging for the shelf. This is easy to do with a mitre box and handsaw.

4. Use No More Nails adhesive to affix the moulding to the shelf. Attach the front and the ends of the moulding pieces. Press the moulding in place against the board.
DIY TIP:
No More Nails has a fair amount of tack and should stay in place, but if you have any problems, press a support against the moulding until the glue has dried.
5. Use Rust-Oleum 2X Painter's Touch spray paint to paint the shelf and brackets before attaching to the wall.
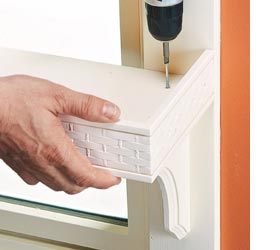
6. Secure decorative brackets to your window trim. Then place the shelf on the brackets, and drive in screws to connect the components. You will find a selection of pine brackets at your local Builders Warehouse.