
Replace a broken window pane
It is very easy to replace a broken window pane with the right safety gear, tools and materials. Here's how to do-it-yourself ...
YOU WILL NEED:
Heavy gloves and goggles
Hammer and putty knife, or small chisel
Needle-nosed pliers
Primer, paint or Woodoc 50 and paintbrush
Tape measure
Window’s putty
Replacement glass
Glazier’s points or pins
Screwdriver (optional)
1. Use a hammer and putty knife or chisel to remove old putty or wooden beading that holds the old glass in place (or nails) with pliers. Remove glass. (Remove the sash first, if necessary.) Clean out any remaining putty and dirt and brush with an old paintbrush.
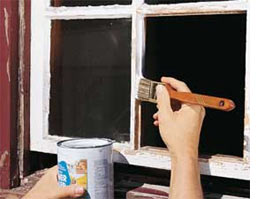
2. Whilst you have the opportunity, paint any unfinished timber with primer and paint, or with a sealer such as Woodoc 50. Have new replacement glass cut to order by using the old glass as a pattern, or carefully measure the opening and deduct 3mm from both the length and width to allow for easy fitting.
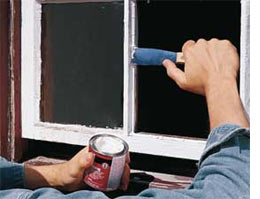
3. Using a putty knife, apply putty to the channel all around the opening. Position the new glass and press it firmly against the putty so it forms an even layer under the edges of the glass. For a longer-lasting and better weatherproofing option, use a silicone sealer such as Sista F130 as an alternative to putty. Apply with a caulking gun according to the manufacturer's instructions.
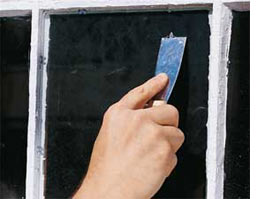
4. On wooden window frames with beading, put a thin bead of F130 silicone sealer around the edge of the glass. Now replace any window beading strips or glazier’s points (or nails) into the frame and against the glass with a screwdriver or stiff putty knife. Use at least two a side, spaced every 100-150mm. Scrape off excess with a putty knife.
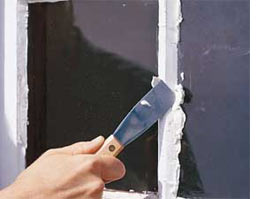
5. Apply putty over the edges of the glass with a putty knife held at an angle and drawn firmly across the putty. Work out from the corners. The putty should not be visible from indoors. Let cure for the recommended period of time before painting, taking into consideration humid or wet weather, which will extend the drying time.
family handyman magazine