
Make a vintage Asian-style cabinet
Home-Dzine reader, Emily, has begged me to put my new SketchUp skills to use and show her how to make this vintage cabinet. Since I adore vintage style furniture, how could I resist.
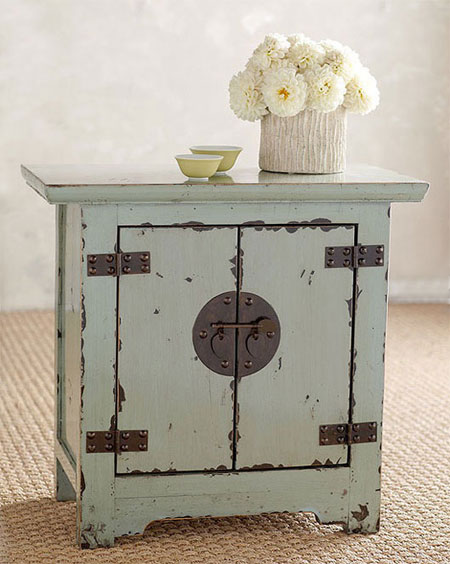
We made a very similar cabinet at one of our DIY Divas workshops, but it was a much larger version. This vintage cabinet would be quite at home in any oriental home and is not as difficult to make as you might think.
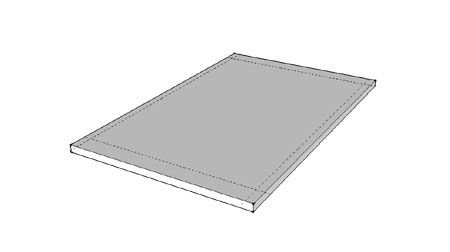
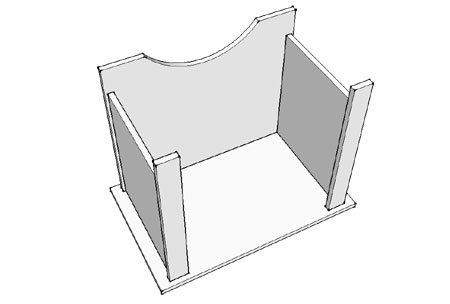
1. The top measures 600 x 600. Place this face down on a flat, level surface and then measure 20mm plus 40mm in from the front/back and 40mm plus 50mm in on both sides. Draw a pencil line at these measurements.
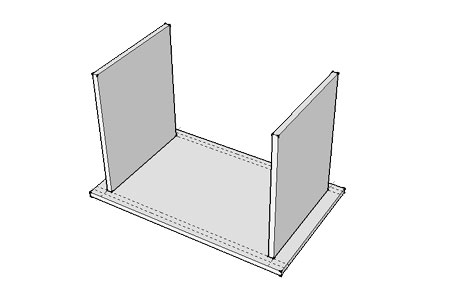
2. Using the 50mm side guide line, mount the sides to the top. To mount you can use dowel or biscuit joints, pocketholes, plastic or steel braces.
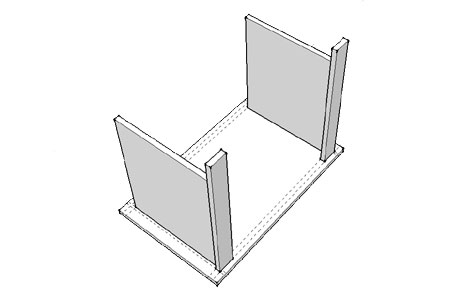
3. Using the 40mm side guide line and the front 20mm guide line, attach the front legs to the sides. Once again, to mount you can use dowel or biscuit joints, pocketholes, plastic or steel braces.
4. Before attaching the back panel, use a jigsaw to cut out the shape. I suggest drawing up a template that you can use for the front panel and the back, so that they look exactly the same. Now you will notice that the cut-out design doesn't look quite the same, and that's because I still don't know how to do that...!
5. Now you can pop in the base. To attach, drill pilot holes and countersink through the sides. You can easily cover up the holes with wood filler once you're finished.
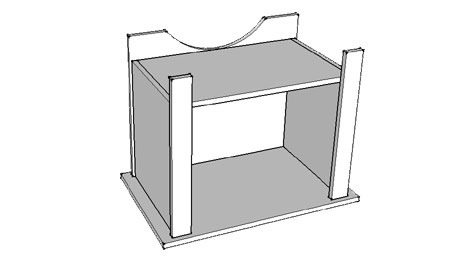
6. Attach 6mm side frames to both sides using No More Nails adhesive and leave to dry. Notice that I am using No More Nails and not wood glue. The reason is that I don't need to use clamps if I use No More Nails, as it has a suction effect that holds the pieces in place.
7. Attach the bottom panel to the front.
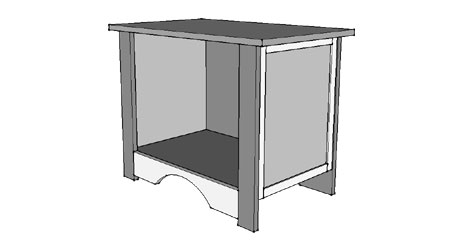
At this point, your cabinet should look like the one above. Still pretty basic. If you have a Dremel Trio this is where it comes in very handy. Use your Dremel Trio and a decorative bit to finish off the top edge. Now is also a good time to fill up any holes or gaps with a bit of wood filler and let this dry. When everything is dry, give a light sanding with 180-grit sandpaper and wipe clean.
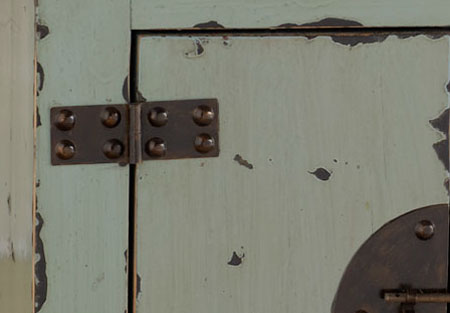
The painted finish on the cabinet is achieved by painting on a dark grey as the base coat. Use a paintbrush, foam roller or Bosch PFS spray system to apply the paint. The best paint to use is a low matt, or mat acrylic PVA. You will need to paint the doors separately, as these will only be fitted right at the very end. Plus, you still have to make the unique door hardware. Let the base coat dry and then use a wax candle to rub along the edges where you want the distressing. The wax stops the next coat from bonding and makes it easy to remove.
Apply your choice of top colour. Wait for this to dry before using 80-grit sandpaper to rub over the waxed areas. As you rub the paint will start to peel off. Continue rubbing until all the waxed areas are gone and then wipe down with fine steelwool.
Apply a thin layer of Woodoc Antique Wax over the cabinet and doors.
If you have a copy of my DIY for Divas | DIY vir Divas, turn to page 78 to find out how to make the door hardware. It's nothing more than 3mm supawood or masonite cut to the various shapes and sprayed with Rust-Oleum Universal Metallics in rubbed oil bronze. Attach to the doors with No More Nails and leave to dry.
Finally, attach the doors using large hinges. You probably won't find ones that look the same, but you can come fairly close. If you need to, spray them with oil rubbed bronze to match the door closure.