
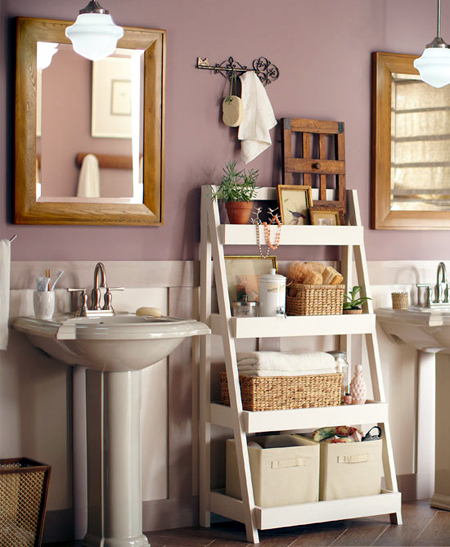
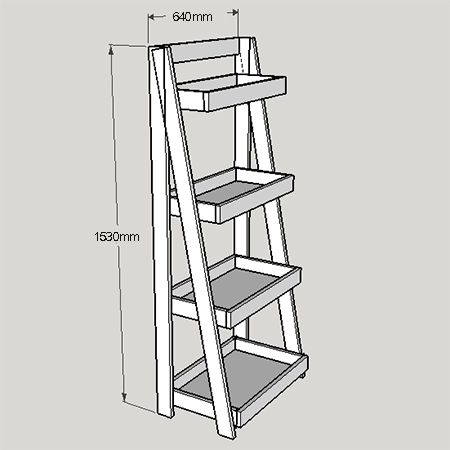
Tiered bathroom shelf unit
I have seen quite a few tiered bathroom shelf units on the Internet, but this design offers a bit more storage space and allows you to add baskets for extra storage and has plenty of room for towels and bathroom accessories. Here's how to make this tiered bathroom shelf unit...
YOU WILL NEED:
All sections PAR pine unless otherwise specified
2 of 69 x 1530mm - back leg
1 of 69 x 1800mm - front length
8 of 69 x 600mm - shelf fronts
2 of 69 x 210mm - drawer sides - top shelf
2 of 69 x 260mm - drawer sides - third shelf
2 of 69 x 310mm - drawer sides - second shelf
2 of 69 x 360mm - drawer sides - bottom shelf
1 of 69 x 600mm - top cross-piece
1 x 210 x 560mm - 12mm plywood - base - top shelf
1 x 260 x 560mm - 12mm plywood - base - third shelf
1 x 310 x 560mm - 12mm plywood - base - second shelf
1 of 360 x 560mm 12mm plywood - base - bottom shelf
Wood Primer
Plascon Velvaglo water-based enamel
4 x 35mm cut screws
TOOLS:
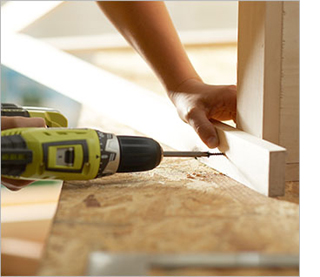
Drill / Driver + assorted bits
Countersink bit
Jigsaw or mitre saw
Orbital or random orbit sander plus 120- and 240-grit sanding pads
Paintbrush, foam roller and paint tray
Tape measure and pencil
Find everything you need for this project at your local Builders Warehouse.
HERE'S HOW:
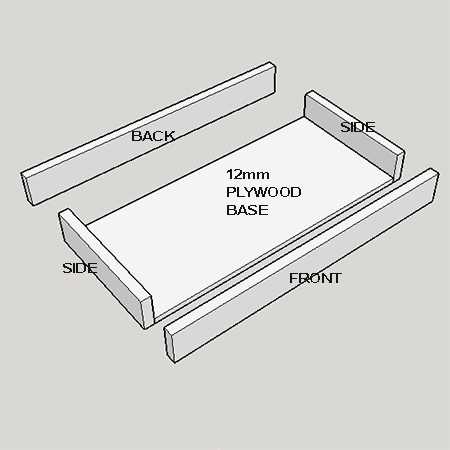
Assemble shelves
All the shelves are assembled in exactly the same way. Pre-drill a 3mm pilot hole through the fronts and backs and countersink. Use 4 x 35mm screws to join the sections together. Insert the base and drill 3mm pilot holes through the bottom of the sides. Countersink and secure with 4 x 3.5mm screws. After assembly fill the holes with wood filler and let dry.
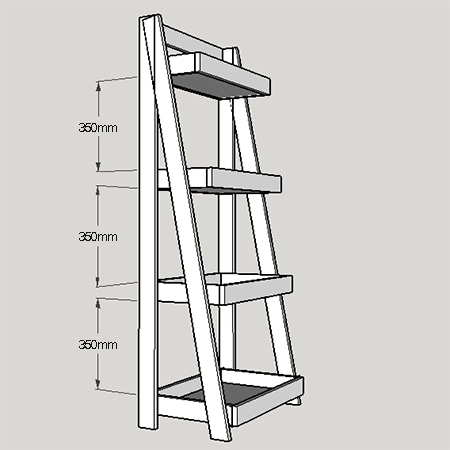
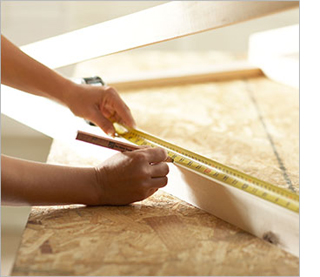
Measure and mark back leg
On both the front and back legs - front and back - measure up
from the bottom and mark at 50,
119, 469, 538, 888, 957, 1307, 1376. The 50mm mark is the height from the floor. The shelves are spaced 350mm apart. You can adjust this spacing if
you need to allow for a specific basket height.
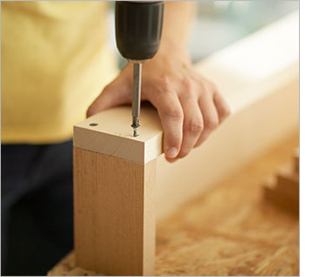
Attach
back leg
Using the drawn marks as a guide, place the back leg on a flat, level
surface and individually position each of the shelves in line with the
marks. Drill 3mm countersunk pilot holes and drive in 3.5 x 40mm screws. Fill with wood filler and leave to dry before sanding smooth with
180-grit sanding pads.
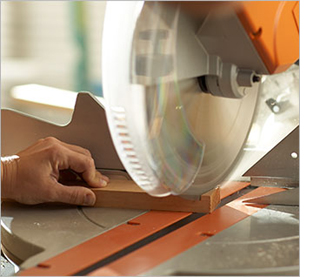
Cut front leg
Cut the bottom of both front legs at a 15-degree angle. You will only cut the top once all the assembled shelves are attached to the back leg.
Attach front leg
- To attach the front leg place the leg against the side of the bottom drawer in line with the drawn guides and partially drive in one screw.
- Have someone on hand to hold the unit in the upright position. This will allow you to angle the leg so that you know the cutting angle.
- Remove the screw and cut the angle before securing the front leg in place.
- Drill a countersunk pilot hole and drive a screw through the front of the leg at top - into the back leg.
Finally, drill countersunk pilot holes to attach the top cross-piece.
Finishing
Sand down with 120-grit sanding pads on uneven edges and over wood
filler and then sand smooth with 240-grit sanding pads. Apply
Plascon Wood Primer with a combination of paintbrush and foam roller
over the entire project. This effectively seals the wood and stops the
paint from being absorbed and causing the wood to swell.
Paint with Plascon Velvalgo water-based enamel paint using a combination of paintbrush and foam roller. You will need to apply three coats for adequate protection, especially since the unit is designed for use in a bathroom.