
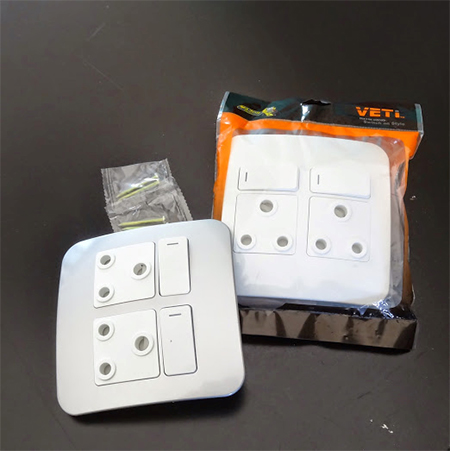
Convert single plug power outlet to double plug
There are some modern plug outlet and light switch covers available at your local Builders Warehouse. As part of my kitchen revamp I switched all the single power outlets to double, and replaced the old metal double plug outlets with new modern covers.
SAFETY FIRST
When working on any electrical fitting in a house, turn off the main
switch on your distribution board. Never, ever work on electrical
fittings without turning off the main switch. If, when removing cover plates from light or power sockets, you
notice that the wiring is different to that shown here, or any
irregularities, rather call in a qualified electrician to investigate.
After tiling the walls in my kitchen I decided the time had come to replace the old metal power outlet covers with modern, plastic covers.
1. Make sure electrical power is switched off on the distribution board. I can't stress the importance of this. If there are others in the house, let them know that you are switching off the power to ensure that it isn't accidentally switched back on again.
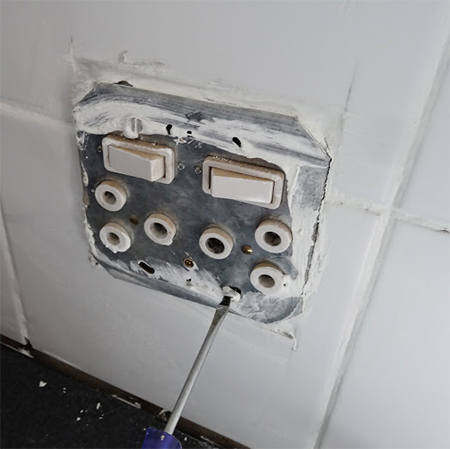
2. Remove the cover plate and then unscrew the back plate.

This is the mess you can expect to see once you remove the back plate. On older model plug outlets each individual socket is wired. If you look closely you will see that a SINGLE RED WIRE [LIVE] is secured to the back of the plate and into the power fittings. This red wire is then looped from the switch to the plug and also to the second switch and plug. You will also notice that 2 BLACK WIRES [NEUTRAL] come out of the wall box and into the back of the plate and are screwed into one of the plug fittings. From there a single black wire loops to the other plug fitting. The single COPPER [EARTH] wire runs from the wall box and is secured on the back of the plate. On newer power outlet covers and light switches there is only a single connection point for RED, BLACK and COPPER [earth] wires, as you will see below.
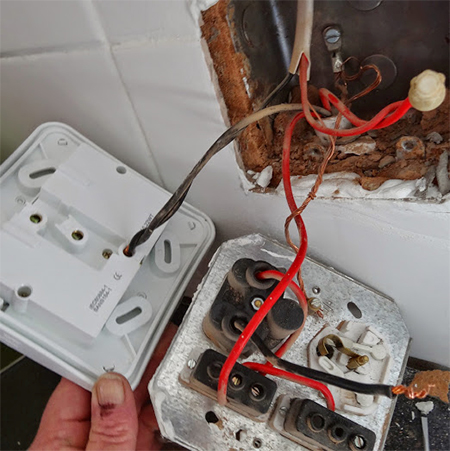
3. I removed the 2 BLACK WIRES [NEUTRAL] that come out of the wall box, coiled the wire ends together tightly using a pair of pliers and then inserted these into to back of the new cover in the slot marked 'N' for neutral.
GOOD TO KNOW
Only loosen one colour of wire at a time to ensure that you
don't get confused as you work. Loosen, remove and re-attach black, then
red, and finally the copper wire.
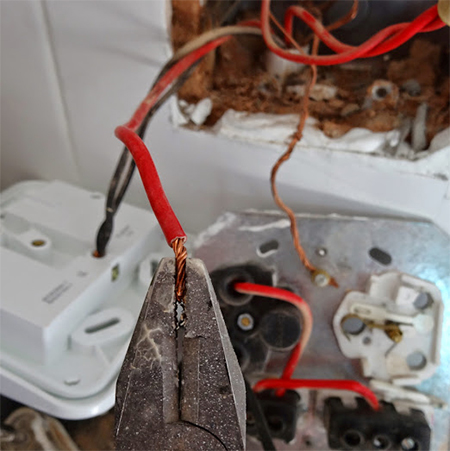
4. Next step was to loosen the SINGLE RED WIRE [LIVE] from the fitting. Use pliers to make sure the ends of the wire are tightly coiled.
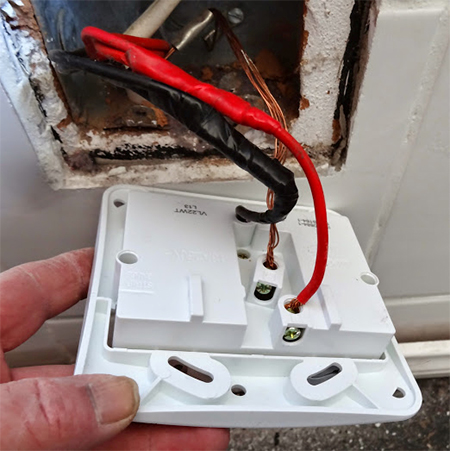
5.The SINGLE RED WIRE [LIVE] is screwed tightly into the connection marked 'L' for live.
6. Finally, the COPPER WIRE is attached to the back of the new cover plate and screwed into the connection marked 'E' for earth.
7. Check that the wires are firmly secured in the connections by wiggling from side to side.
GOOD TO KNOW
Modern plug or power outlet covers are designed so that all the
looping is built in to the plate, and you don't have to worry about what
wire goes where, since only the main wires from the outlet are wired to
the back of the plate.
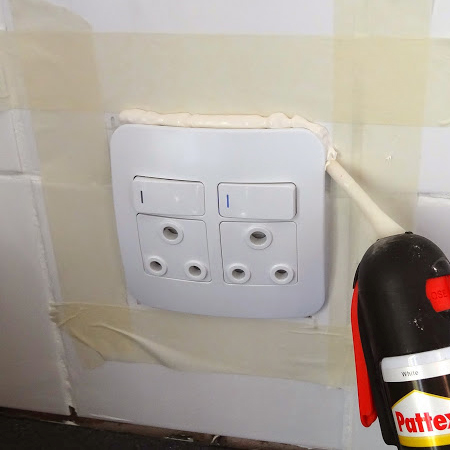
To finish off the fitting of my new power outlet covers I needed to apply a bead of universal silicone around the edge, as the cover plate didn't quite cover the gap where the new tiles were mounted. Add a strip of masking tape around the socket and then squeeze out a thin bead of silicone around the cover plate. You can use a silicone profile or the tip of your finger to smooth and remove any excess silicone.
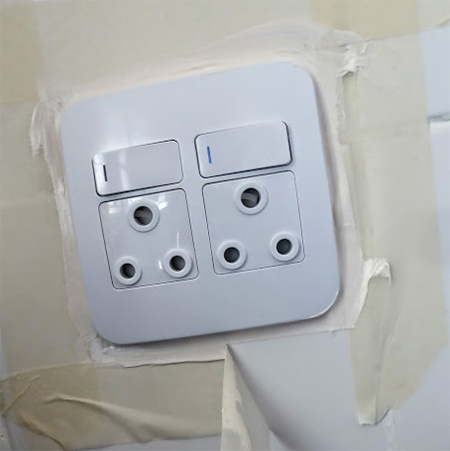
Immediately after application, and before the silicone starts to dry, carefully peel off the masking tape.
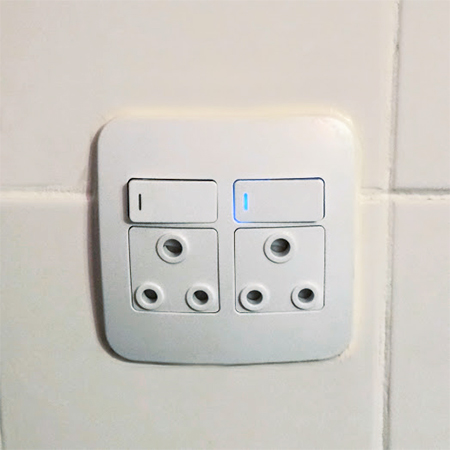
Ooooh. I love these new sockets and they look gorgeous with the white tiles. I also purchased a Veti double socket with a matt stainless steel finish for mounting onto another wall. This feature in no way endorses DIY electrical installation and readers are advised to consult a qualified electrician for all electrical installations in a property.