
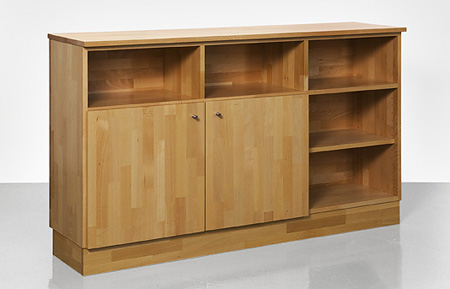
Sideboard room divider
You can build this project either as a shelving unit that is open on both sides, a shelving unit with a rear panel, or as a sideboard with rear panel and doors. Whatever you choose – this piece of furniture will look great in any room.
YOU WILL NEED:
QTY |
Item | Length mm
|
Width mm |
Material | ||
2 |
outer side panel | 720 |
300 |
20mm lam pine | ||
2 |
lower centre side panel | 460 |
300 |
20mm lam pine | ||
2 |
upper centre side panel | 200 |
300 |
20mm lam pine | ||
3 |
long shelf panel | 1390 |
300 |
20mm lam pine | ||
3 |
compartment base | 450 |
280 |
20mm lam pine | ||
1 |
sideboard top | 1440 |
350 |
20mm lam pine | ||
1 |
rear panel | 1430 |
720 |
20mm lam pine | ||
2 |
doors | 490 |
464 |
20mm lam pine | ||
2 |
plinth - long surround | 1420 |
100 |
20mm lam pine | ||
3 |
plinth - short surround | 250 |
100 |
20mm lam pine | ||
3 |
plinth - connector strip | 250 |
100 |
20mm lam pine | ||
3 |
plinth - connector strip | 150 |
27 |
20mm lam pine | ||
6 |
plinth - screw strip | 100 |
45 |
45mm pine |
8 x L-brackets
4 x Concealed hinge with centre stop
4 x Base plates
2 x Knobs
36 x Flat head screws 4 x 50 mm
100 x Flat head screws 3 x 17 mm
30 x Flat head screws 4 x 35 mm
16 x Flat head screws 5 x 16 mm
24 x Flat head screws 4 x 60 mm
12 x Shelf supports
Jigsaw
Sander and 120-, 180-, 240-grit sanding pads
Drill/Driver and asstd drill and screw bits
Cordless screwdriver
Router or rotary drill and drill press
Woodoc 5 or 10 interior sealer
Woodoc steel wool
Paintbrush
35-mm and 28-mm Forstner bits
Countersink bit
Masking tape
Folding rule, soft pencil, rubber, pencil sharpener
Clamps
Clean, lint-free cloth
HERE'S HOW:
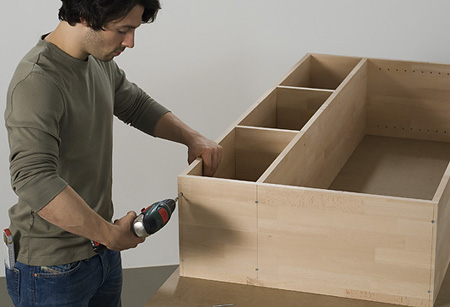
The design essentially consists of several shelf bases that are fastened between the side panels with screws. The entire unit rests on a butt-jointed plinth. The following assembly instructions are for 20-mm-thick pine laminated board. You must adapt the list of materials accordingly if you opt for other materials or thicknesses.
Ask your local Builders Warehouse to cut the required boards to size.
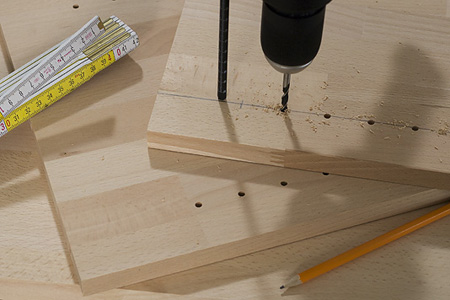
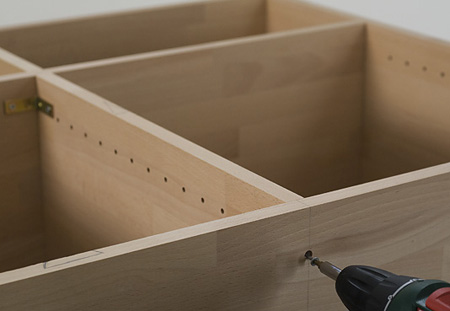
1. Drill a row of holes in the side panels
Drill two rows with holes measuring 5mm diameter on inside surface of left-hand outer side panel, on all surfaces of lower centre side panels and on inside surface of right-hand outer side panel. To do this, use a pencil to draw a line at a distance of 37mm from upper and lower edge respectively.
The hole centres are located on this line. Mark a point every 32mm along the line (distance from hole centre to hole centre). The first hole is located about 70 mm from the bottom edge. Place the centering tip of the wood drill bit precisely on the intersection point of each marked cross.
Do not drill all the way through. Each hole should be 10mm deep. You should therefore use a depth stop or wrap the bit with masking tape.
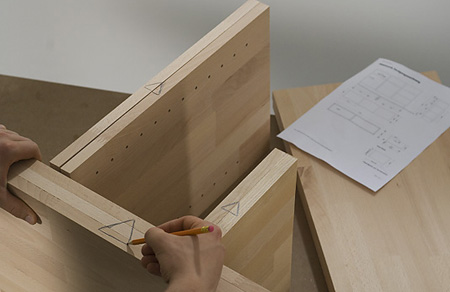
2. Join the sections for the upper compartments together
Place the outer side panels and the upper and lower centre side panels together with the visible edge facing downwards in the way you want to assemble them. Use a pencil to mark the rear edges so that you always know what goes where at a later stage of assembly.
Mark the shelf panels in the same manner. The next step is to set up the two upper continuous shelf panels and the two upper centre side panels on their rear edges in the way you want to fasten them together. Secure the positions carefully with clamp clips to prevent anything from slipping. Note that you can use pieces of scrap wood as buffer blocks to avoid leaving unsightly pressure marks on the workpieces.
Mark the position of the centre side panels on the shelf panels using a pencil. In the middle of the centre side panel outlines on the shelf panels, make two 4mm holes, with the outer hole at least 30mm from the outer edges.
Countersink the holes in the shelf panels. (At the same time, you can drill the holes for fastening the sideboard top with screws; countersink these holes from below). Use 4 x 50mm screws to assemble centre side panels and shelf panels.
GOOD TO KNOW
In the piece where you want to insert the screws first, always predrill a hole that is 0.5 to 1mm larger than the screw diameter; the hole should be countersunk for the screw head. In the piece that you are going to drill second, predrill a hole that is always 1mm smaller than the screw diameter.
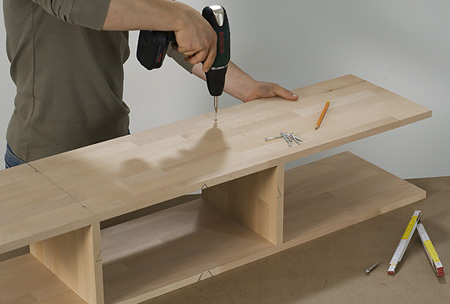
3. Join the upper carcass and outer panels together
Lay the assembled upper section on its back. Now align outer panels and lower long shelf panel on top of this section until the carcass appears as you want to assemble it. Once again, use a pencil to copy the outlines of the shelf panels to the insides of the outer panels. Drill two 4mm holes in the centre of the marked outlines.
Countersink these holes from outside: be particularly careful because these screw fittings will be visible externally. Use 4 x 50 mm flat head screws to assemble the carcass sections.
4. Fit the carcass inner sections
Use a pencil to mark the position of the lower centre side panels on the shelf panels. However, this time, only drill two 4mm holes into the lower shelf panel for each centre side panel in the centre of the outline. Countersink the holes from below. The carcass should still be lying on its back.
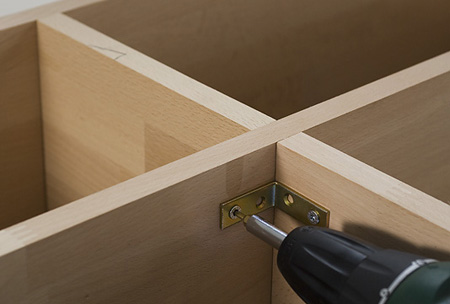
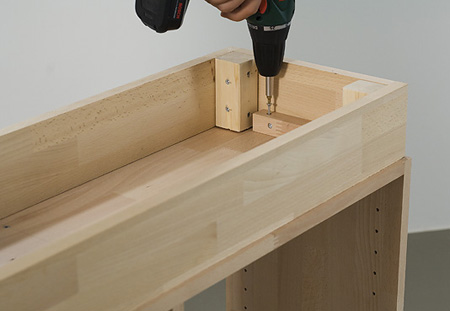
You can fasten the centre side panels as usual to the lower shelf panel with screws from below. However, for the upper shelf panel, you can make things easier by using L-shaped brackets. Fit the brackets so they lie flush on top, one in front on one side and the other behind on the other side.
Slide the centre side panels that you have prepared for fastening between the shelf panels. Use 4 x 50mm screws to fit the centre side panels to the lower shelf panel through the L-shaped brackets with 3 x 17mm screws.
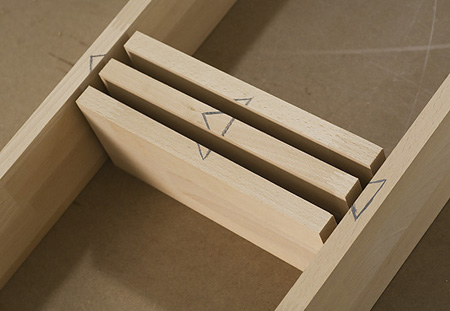
5. Join the plinth sections together and mount the plinth
Lay the long and short plinth surrounds together on a surface in the way
you want to assemble them. Use a pencil to mark the edges so that you
always know what goes where at a later stage of assembly.
Predrill the five plinth surrounds and screw strips. Since the surrounds are screwed evenly and diagonally together through the upright screw strips in the corners, align the drill holes through the screw strips so they are staggered. Use 4 x 60mm screws to mount the plinth sections.
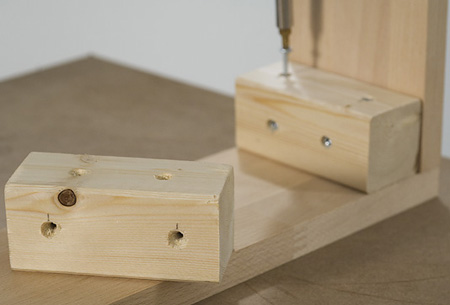
Predrill the connector strips used to fasten the carcass with the plinth. Mount the connector strips horizontally using the cordless screwdriver and 4 x 60mm screws to the short plinth surrounds so they are flush with the upper edges. Turn the carcass upside down and align the plinth along the bottom. Using 4 x 40mm screws you can mount the plinth below the carcass through the connector strips.
6. Join the sideboard top with the carcass
In step 2, you predrilled the upper shelf panel so you could fasten it to the sideboard top. You can now fit these pieces together. To manage this from below in the compartment measuring only 200 mm, you can use the Bosch IXO cordless screwdriver.
First align the sideboard top on the carcass: it will project by 5mm on the right and left-hand sides, and by 20mm to the front and rear. The larger overhang is to allow room for the rear panel and for the doors, which you can fit as required.
7. Prepare and mount the rear panel
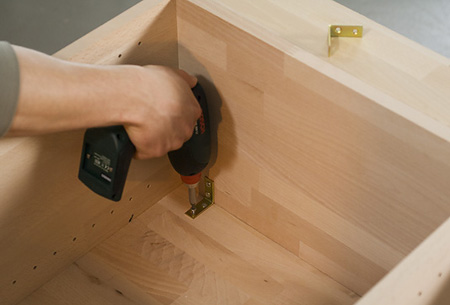
Using the cordless screwdriver and 3 x 17mm screws, screw two L-shaped brackets - flush with the rear edge - to the inside of the carcass outer panels, or flush to the rear inside the carcass base panels on the left and right-hand sides.
Lay the carcass on its side. Align the rear panel on the side edge of the carcass in the way you want to assemble it. Fix it in place with clamp clips and fasten it from the inside through the L-shaped brackets, using 3 x 17mm screws.
8. Fit concealed hinges to the doors and tighten doors
Lay the doors on your working surface in the way you want to assemble them on the piece of furniture. Mark the doors so that you always know which side is left or right or top or bottom later on during assembly.
Using a pencil, mark the axis lines for the positions for the concealed hinges on the back of the doors. The axis lines must be located precisely in the centre of two holes from the row of holes. For this purpose, lay the carcass on the outer panel and position the appropriate door as if it were open at a 90° angle. You can now easily copy the axis lines to the door.
Copy the axis lines for the second door from the first door using a ruler or a carpenter's angle square. You will need concealed hinges with a centre stop for our doors. The distance between the holes for the concealed hinges to the edge is 35 + 5mm, or 40mm. Mark the four drilling points on the pencil or axis lines.
Use a 35mm Forstner bit to drill the holes for the concealed hinges. Adjust the depth stop as required on the drill bit and aim the centering tip of the Forstner bit precisely on the marked drilling point.
Note on order of steps
You should fit the concealed hinges only after treating the surfaces to achieve perfect results. However, we will describe the procedure here in this step to cover all points. Insert the concealed hinges in the holes and screws provided to mount them.
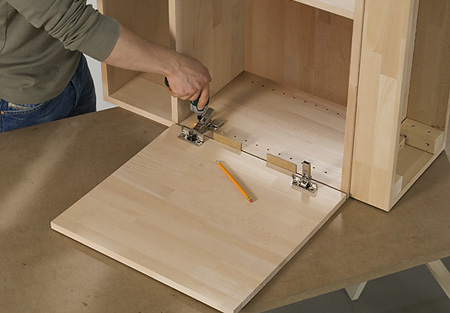
The backs of the concealed hinges on the doors are the base plates on the carcass. These should be fitted next. To do this, press the concealed hinges into the two holes in the row of holes you used earlier to trace the axis lines. Lay the carcass on one of the outer sides to help you clip on the doors.
Position each door as if it were open at a 90° angle. Now align the door using two 5-mm spacer blocks so it is parallel to the side panel. Guide the hinge arms through the base plates and clip them into place. Finally, predrill the holes for the knobs on the doors. Tighten these with the screws provided.
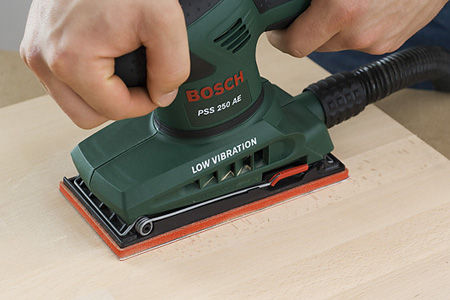
Sand wood surfaces
Take time to prepare the surfaces so they are in the best working condition possible before starting assembly.
First chamfer all edges with 180-grit sanding paper at a 45° angle to create a small bevel.
Use your sander to sand all visible surfaces in the direction of the wood grain, first with coarse sanding paper (120-) and then with fine sanding paper (240-). Damp sponge the surfaces afterwards to wipe off the dust. Some loose wood fibres may protrude while the wood is drying. You can remove these with 280-grit sanding paper.
Seal the surfaces
Generously apply the first coat of sealer and leave to dry. Once dry, rub lightly with steel wool to remove excess on the surface. Apply the second and final coat, allowing sufficient drying time between coats.