
Make a shoe storage cabinet
If your built-in cupboards are piled high with shoes, perhaps it's time to look at building a shoe storage organiser. The shoe storage cabinet shown here is a simply DIY project that even a beginner DIY enthusiast can take on if you have all your board cut to size at your local Builders Warehouse.

HERE'S HOW:
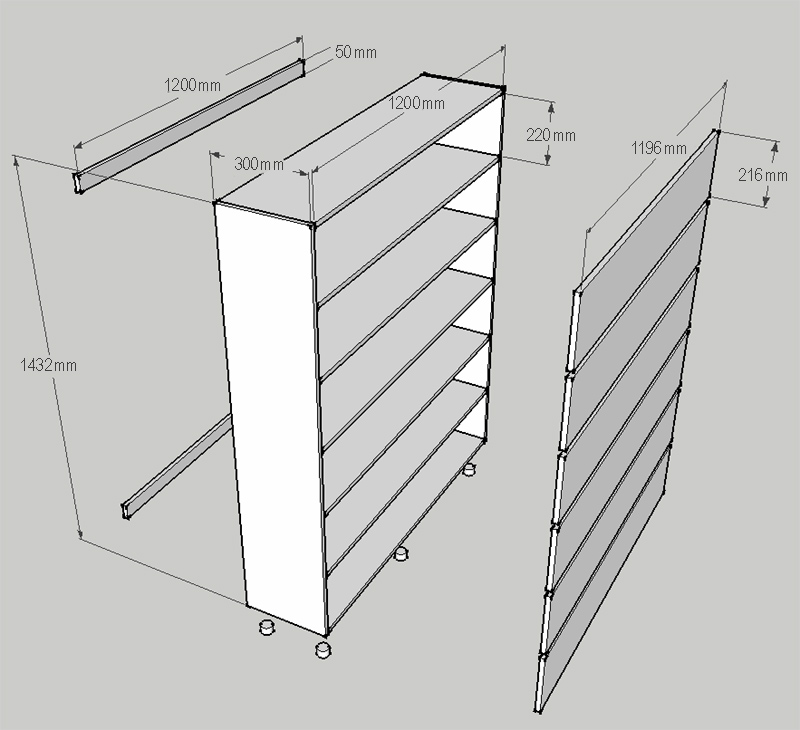
7 of 300 x 1200mm - 16mm supawood - top / bottom / shelves
2 of 300 x 1432mm - 16mm supawood - sides
2 of 50 x 1200mm - 16mm supawood - support battens
6 of 216 x 1196mm - 16mm supawood - doors
Pack of 4 x 40mm cut screws
12 medium butt hinges and 16mm screws
12 flap hinges and 16mm screws
6 feet and screws
12 handles or knobs
TOOLS:
Drill / Driver + assorted bits
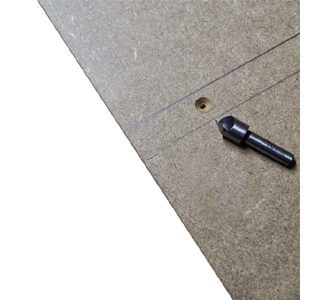
Countersink bit
Tape measure and pencil
Have all the board cut to size at your local Builders Warehouse.
HERE'S HOW:
GOOD TO KNOW
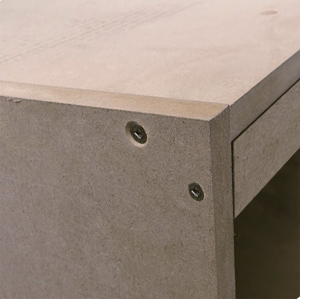
Use a 3mm wood bit to drill pilot holes and countersink for all screws on the outside of the cabinet.
1. On both side sections, use a tape measure and pencil to mark the locations for the shelves. Each screw is 50mm in from the front or back of the side.
Draw a line on the inside and outside of both sides and use this as a guide to drill and countersink for screws.
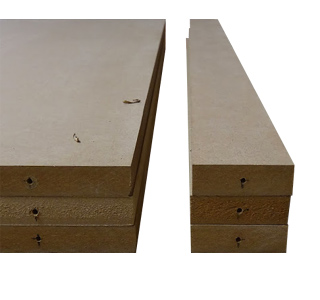
2. On the edge of the top, bottom and shelves, pre-drill a 3mm pilot hole. On the top, bottom and shelves the pilot hole will be 50mm in from both edges. On the support battens drill the pilot hole 25mm in from the edge.
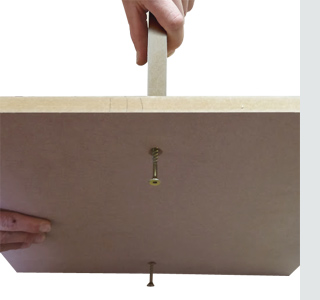
3. With the sides on the back edge on a flat level surface, drive screws through the side so that only the tip of the screw protrudes. Align the pre-drilled holes at the edge of each shelf, and the top of bottom sections, with the screw tips and secure in place.
4. Measure down 41mm from the top edge and drill / countersink a pilot hole for mounting the support battens at the top and bottom of the unit.
5. Paint the cabinet in your choice of colour using a paintbrush and foam roller, or with a Bosch PFS spray system. A washable acrylic paint, such as Plascon Double Velvet or Wall & All, will provide a durable and long-lasting finish that is easy to keep clean.
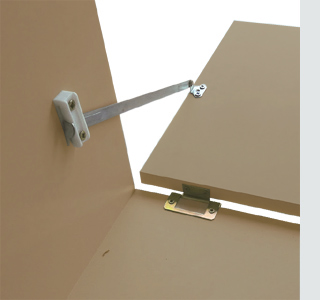
6. Finish off by attaching decorative butt hinges to the bottom of each shelf door and then attaching this to the shelf frame. With the door attached you can now add a flap hinge on both sides. I recommend using two flap hinges if you make this cabinet to 1200mm length as shown here.
Finishing
Attach your choice of handles or knobs and add feet to the base of your new shoe storage cabinet. You will find a varied selection of handles,
knobs and feet / legs at your local
Builders Warehouse.
Not responsible for errors or omissions